

How To Install Alidropship Woo Plugin
Follow along step-by-step with this blog tutorial on how to set up an Alidropship Woocommerce dropshipping store with WordPress.
Watch the video below:
Today, we're going to show you how to build an Alidropship Woocommerce store.
An Alidropship Woocommerce store is one of the easiest ways to have a dropshipping store up and running.
Not only is it easy, but both Alidropship and Woocommerce are specifically designed to work for eCommerce sellers.
Alidropship speeds up the process of adding products to your store, while Woocommerce is a powerful plugin that allows you to quickly create beautiful, professional looking stores.
The best part is that these stores are easy to set up. So whether this is your first shot at building a store, or you've had experience in the past, we've designed this tutorial to be as 'newbie friendly as possible,' by breaking it down into 17 simple steps.
These 17 steps are as follows:
- Set up hosting and domain name
- Install WordPress on your site
- Install Woocommerce on your site
- Install Alidropship plugin
- Install Alidropship chrome extension
- Install Alidropship theme – shopper
- Update Alidropship settings
- Add custom logo and colour scheme
- Add products from Aliexpress to your store
- Add product categories
- Create an about us page
- Create a contact us page
- Add shipping for your products
- Add PayPal payment gateway
- Customize homepage
- Update product pages
- Add store menu
Building a dropshipping store (the right way) plays a key role in you being able to make sales and drive traffic, while winning over customers trust.
And this store you're about to build is designed to meet all of these here, with only less than an hour of your time.
Let's get started.
Step 1: Setup Hosting and Domain Name
The first step is to setup hosting and a domain name.
To simplest way to do this is through a hosting service like Site Ground. And it'll only cost you $4.95 per month. A very low price when compared to other hosting services.
Here are the steps.
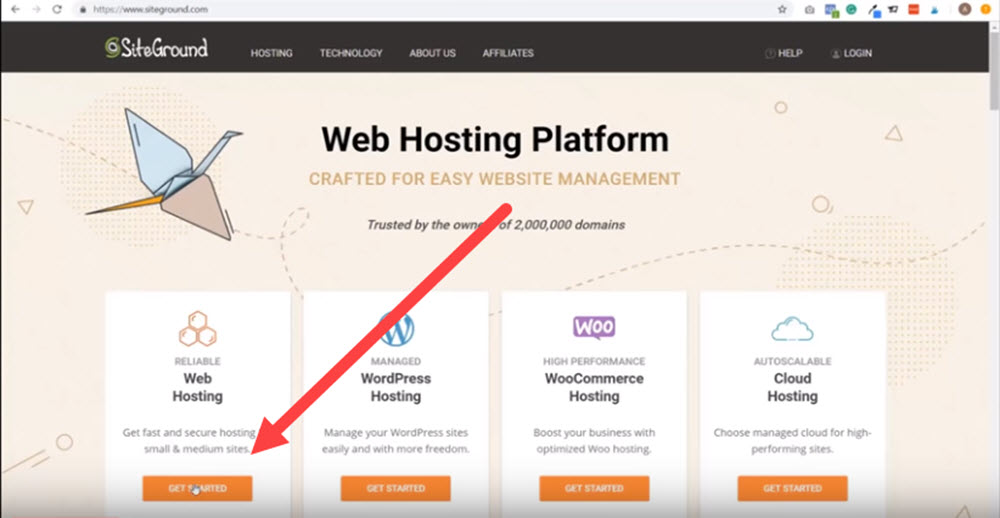
1. Go to Site Ground homepage and click Get Started.
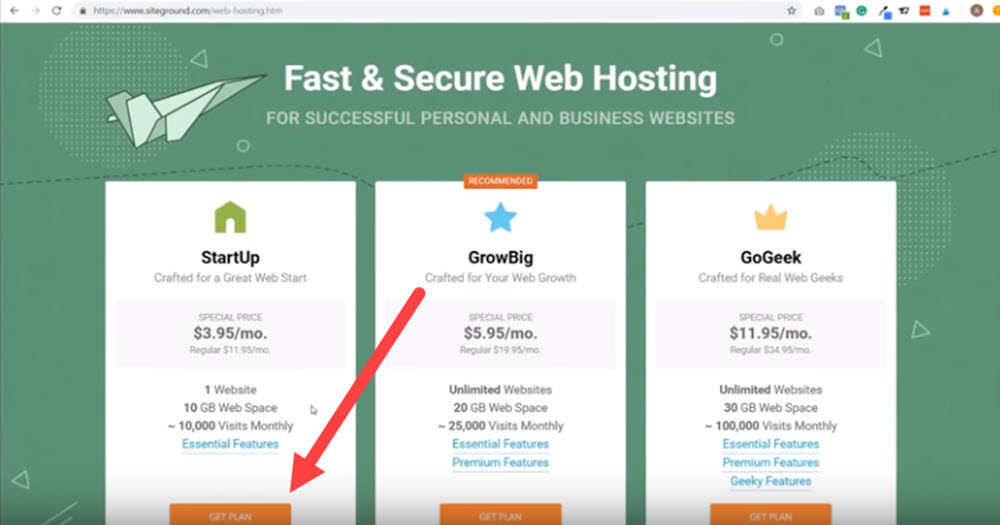
2. Select start up plan, then click Get Plan.
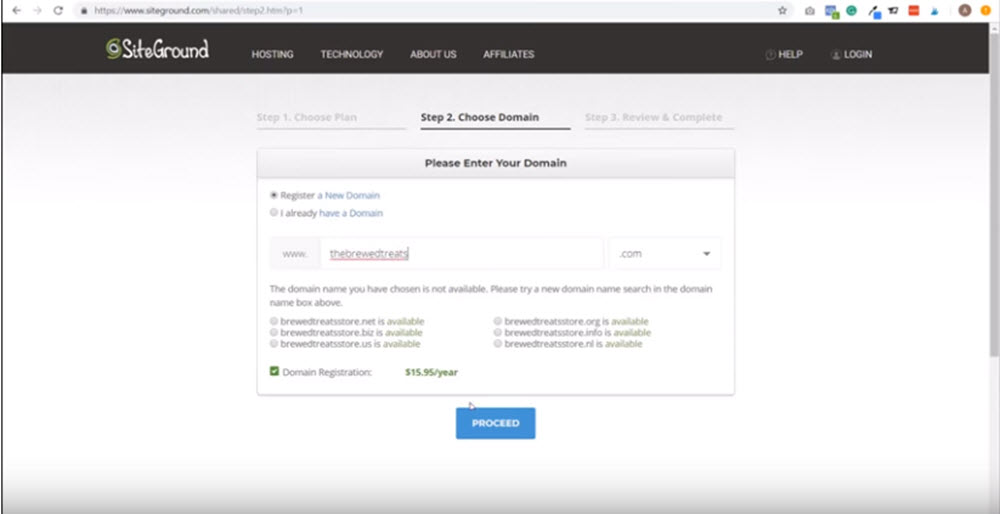
3. Enter preferred domain name, then click proceed.
4. Provide your account information by adding an email and password.

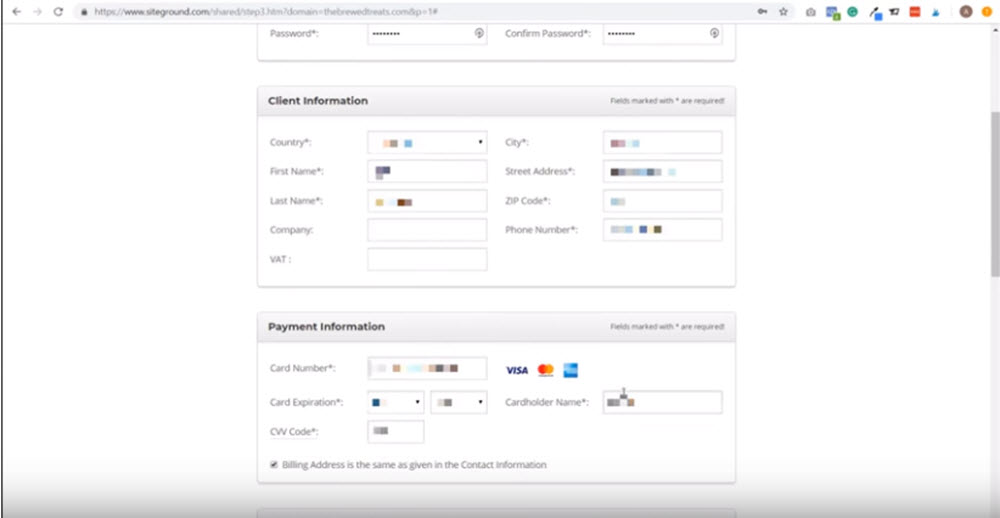
5. Next, fill in the client and payment information section.
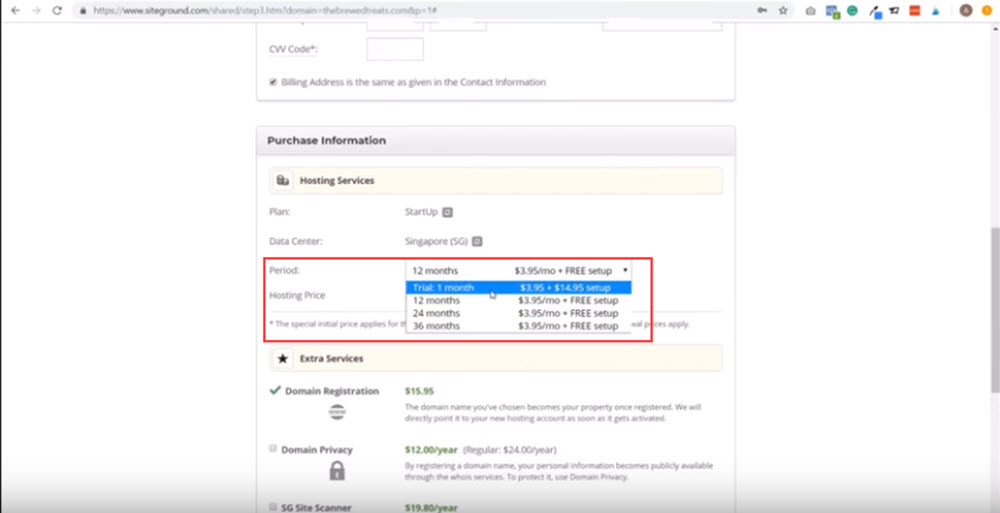
6. Click on period, and set 12 months. We recommend this as it is the most cost effective.
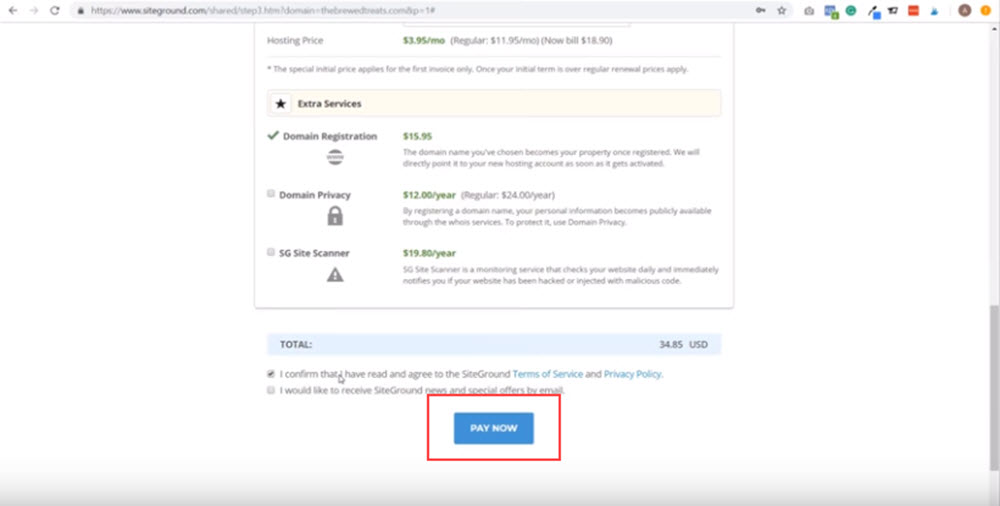
7. Tick the box, click Pay now.
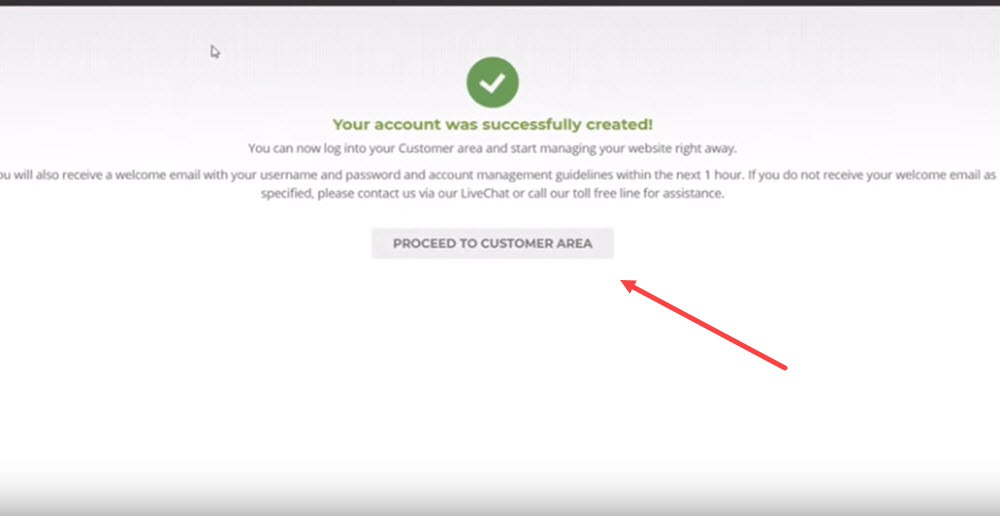
8. Click proceed to customer area.
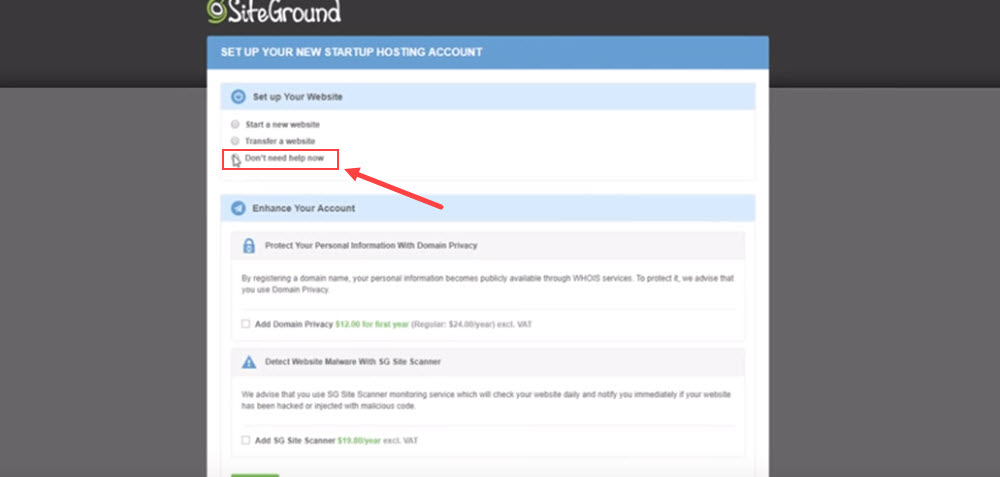
9. Tick the 'I don't need help' box, then just click confirm.
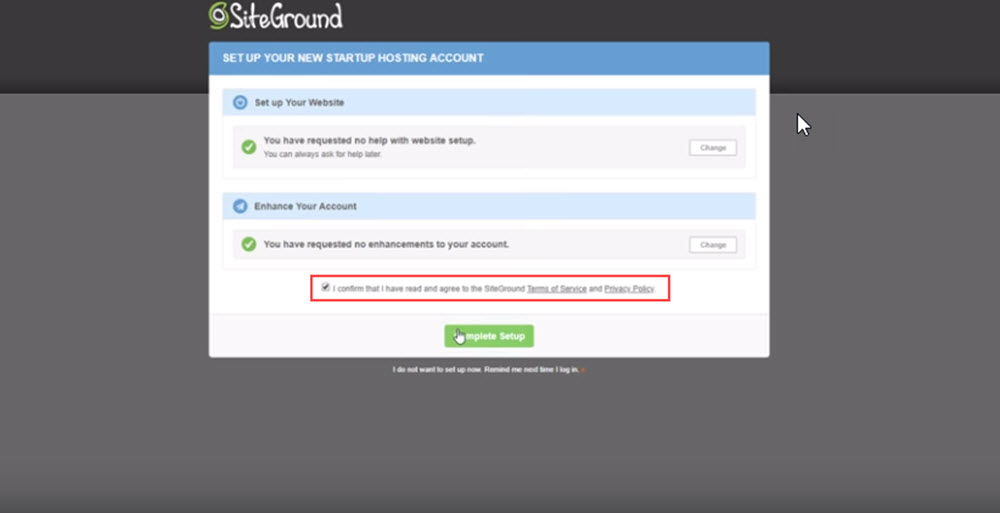
10. Then tick the terms of service box, and then finally click complete setup.
Bonus tip: Always use a '.com,' and not any other type of domain. This helps your site to be found easier in the search engines, and in general, customers trust .com domains more than any other domains out there.
Step 2: Install WordPress on Your Site
WordPress is an incredible web builder that turns our website into a blog. It's completely free, with several features to streamline the process of creating a website.
It's also what we'll be using in our later steps to install Woocommerce and Alidropship.
Here's how to install it onto your hosting service.
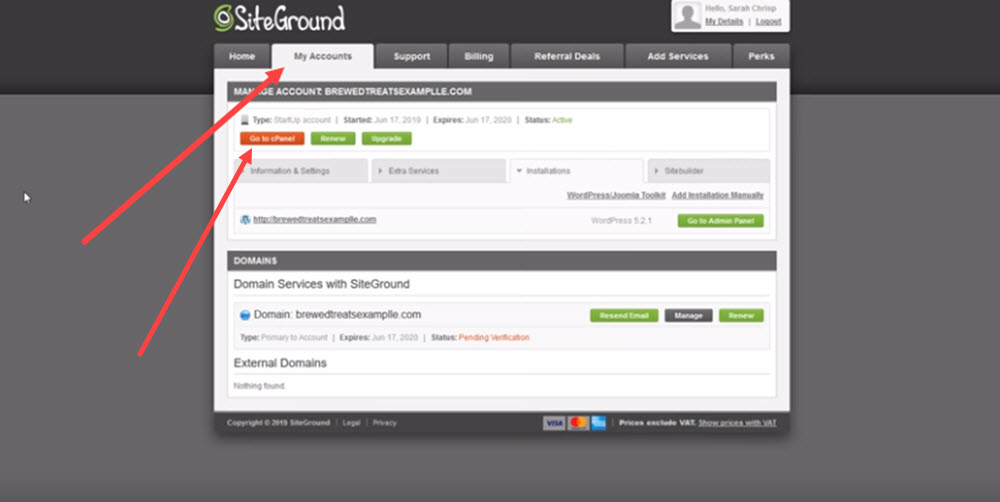
- In your Site Ground dashboard, click My account, and then click Go to cPanel.
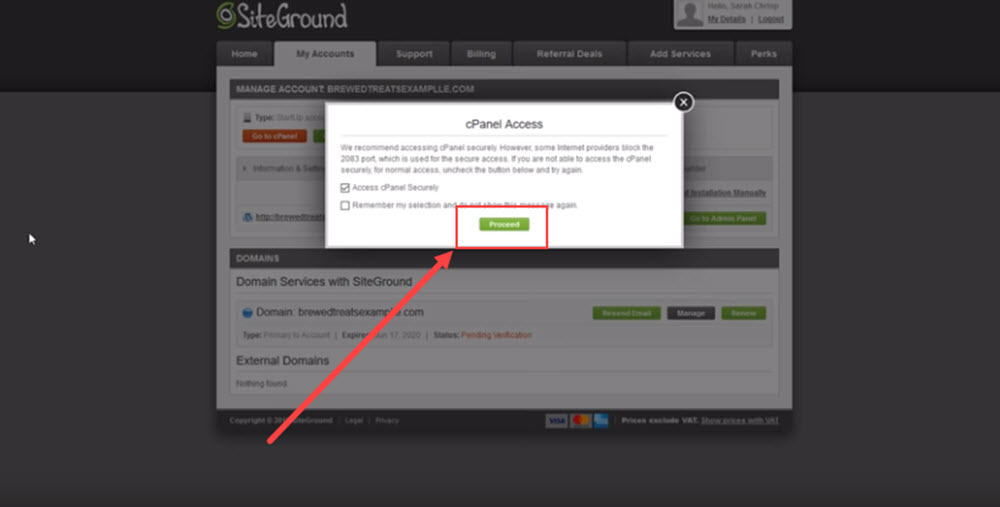
2. In the popup box, click Proceed.
3. Under WordPress tools, click the WordPress icon, then click Install.

4. Click the Install button.
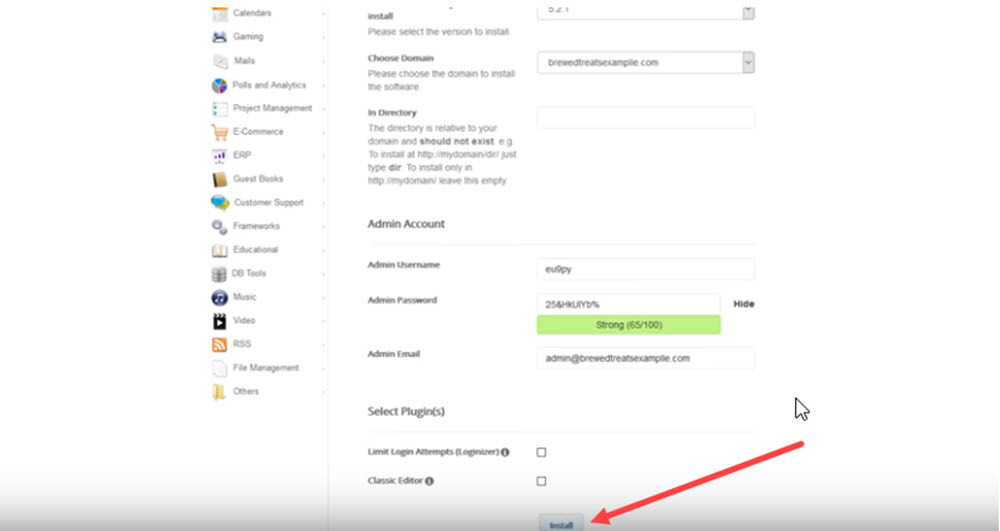
5. Change quick install to custom install.
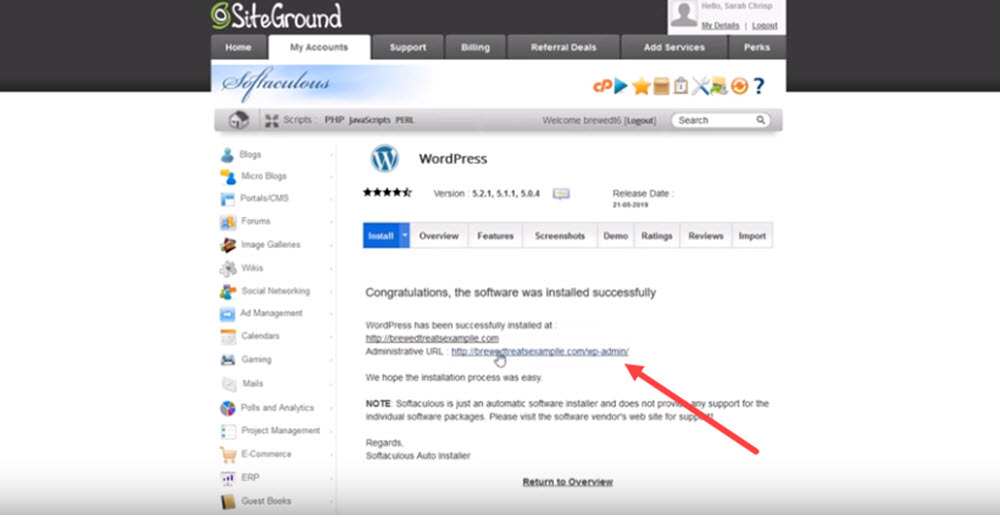
6. As you'll see, you have the option to change the password or admin username Site Ground have already generated for you. If you want to change it, then go ahead. But, if not, scroll down and click Install.

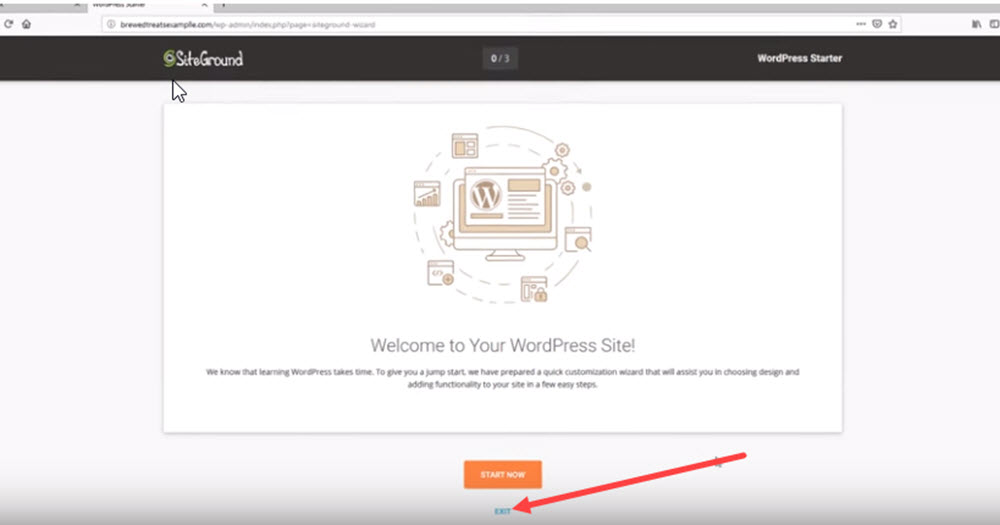
7. Once loaded, click the administrative URL.
8. Then click Exit.
Step 3: Install WooCommerce on Your Site
Woocommerce is a plugin that gives our website an eCommerce functionality, so the theme appears as a store (rather than a normal website or blog). Luckily, Site Ground makes this step super easy.
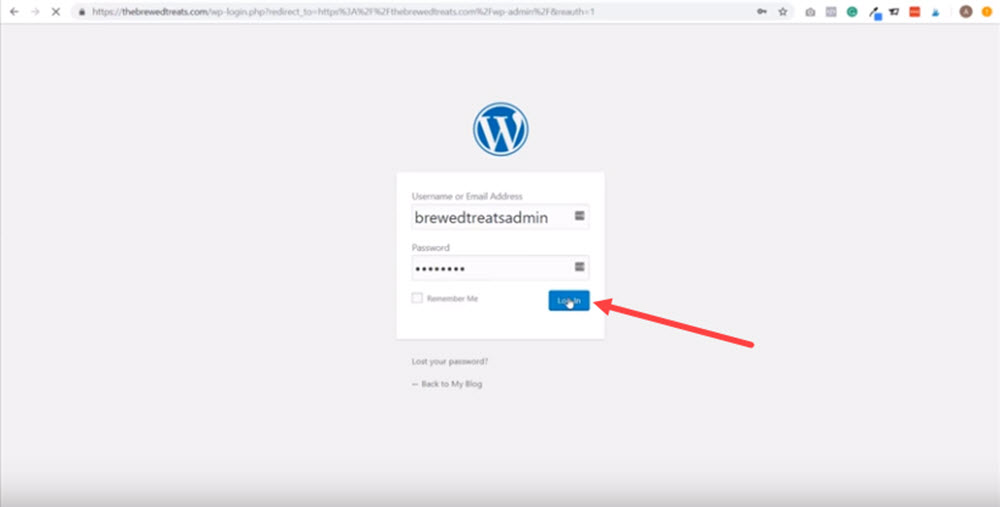
- In your Site ground dashboard, click My Accounts, and then click the Go to Admin Panel button.

2. Type in your username and password, then click login.
3.On the next page, click Exit.
4. From here you'll be redirected to the dashboard. In the dashboard menu, click Plugins, then click the add new button.
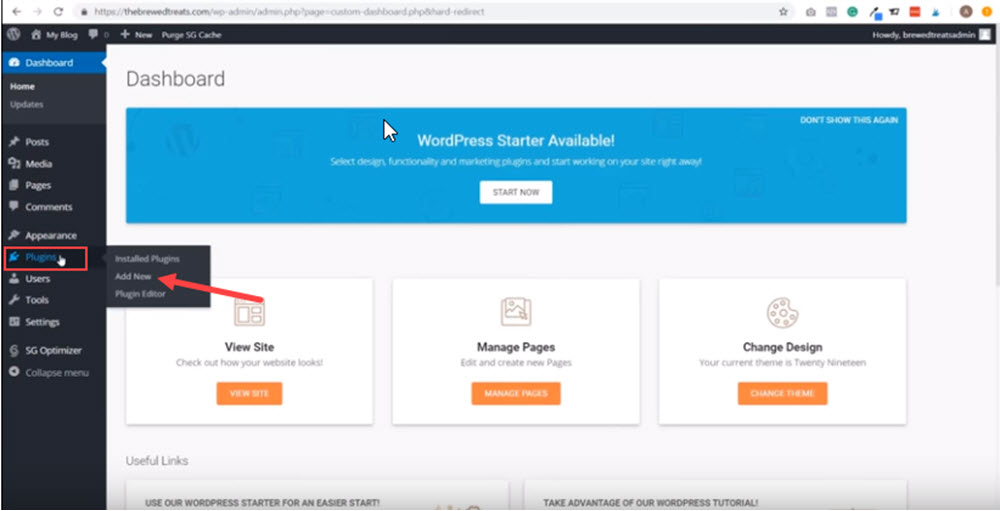
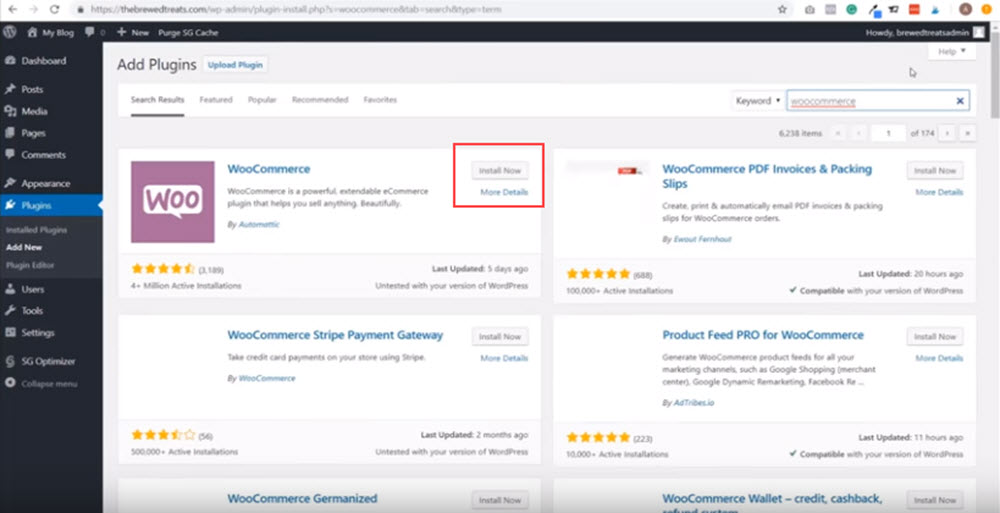
5. In search box, type in Woocommerce. When you find it, click install now.
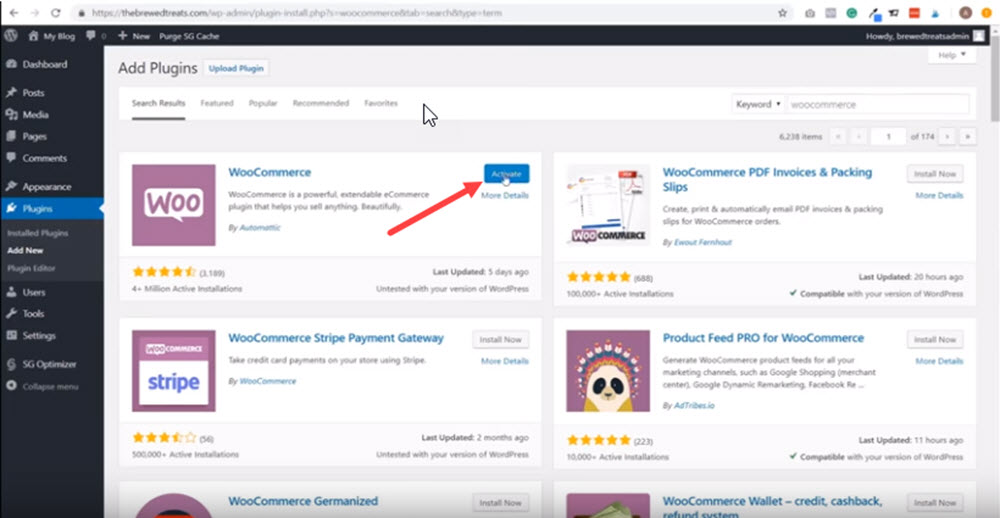
6. Once installed, click activate.
7. On the following page, select your country from the drop down menu. And then fill in your address, city, state and postcode.
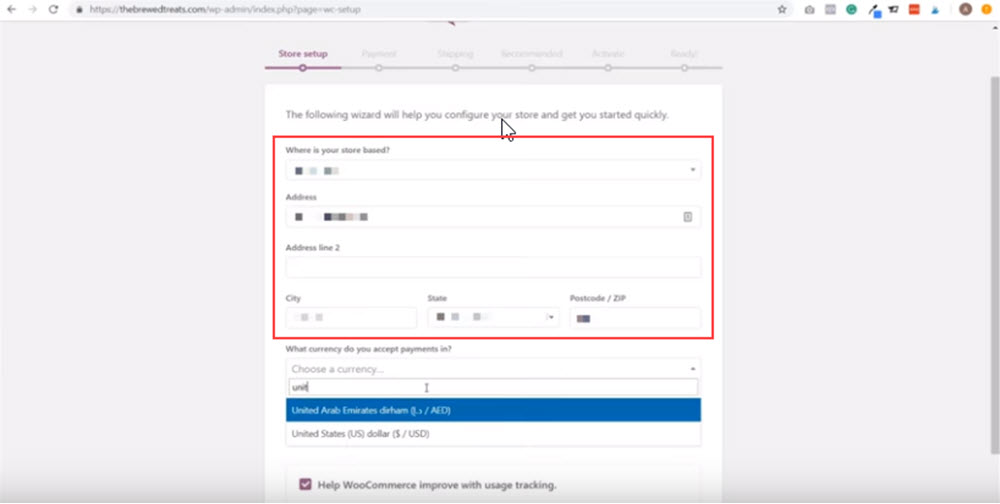
8. For the question "What currency do you accept payments in?" select United States (US) dollar from the drop-down menu.
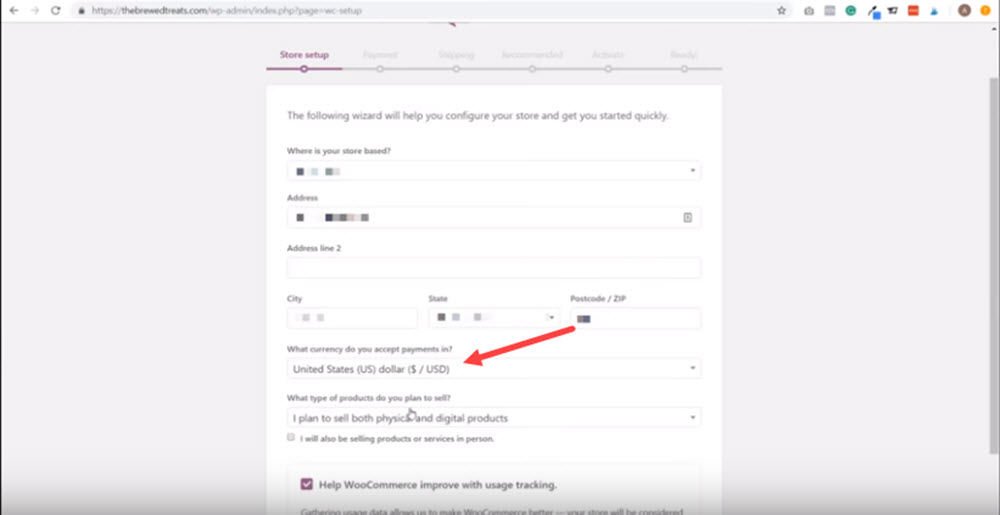
9. And for the type of products select the option 'I plan to sell physical products.' Once all filled in, click Let's go!
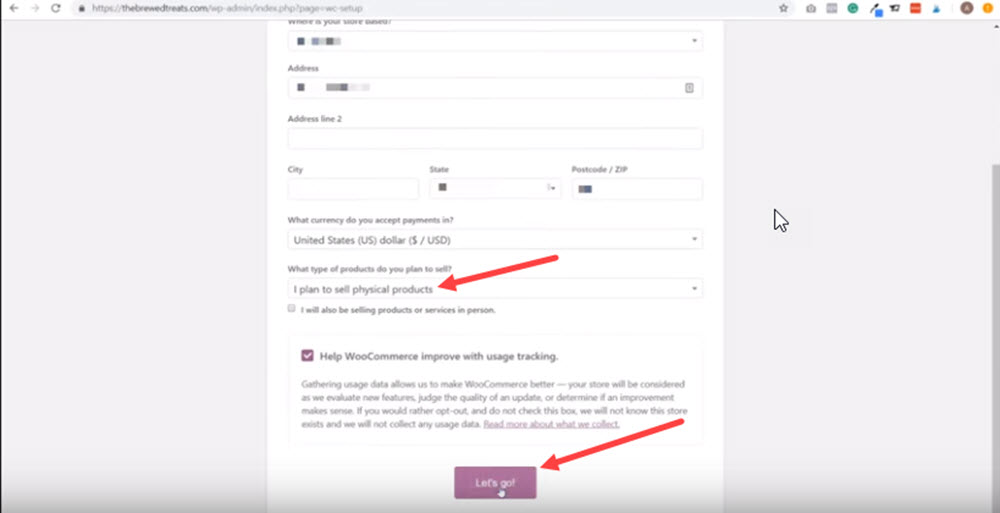
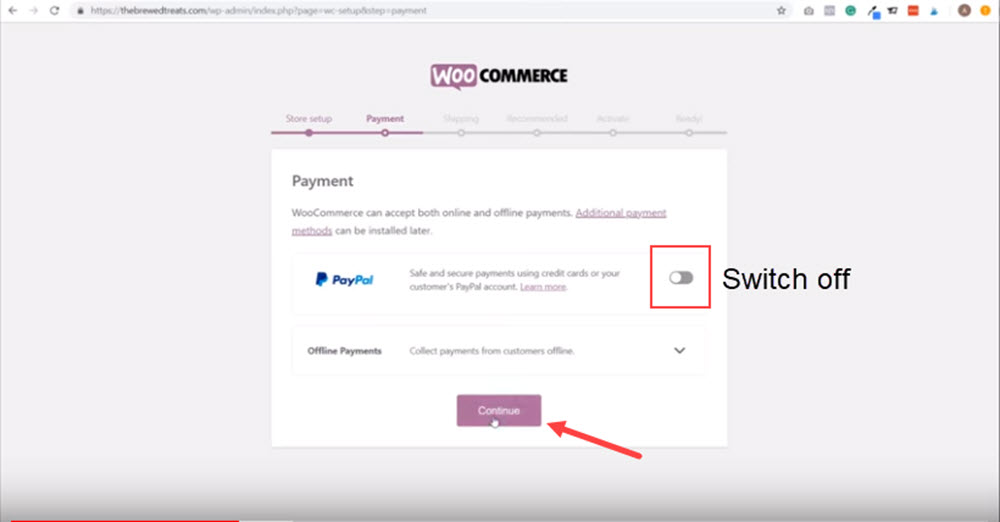
10. In the Payment section, turn off the toggle that is currently on for PayPal, then click continue.
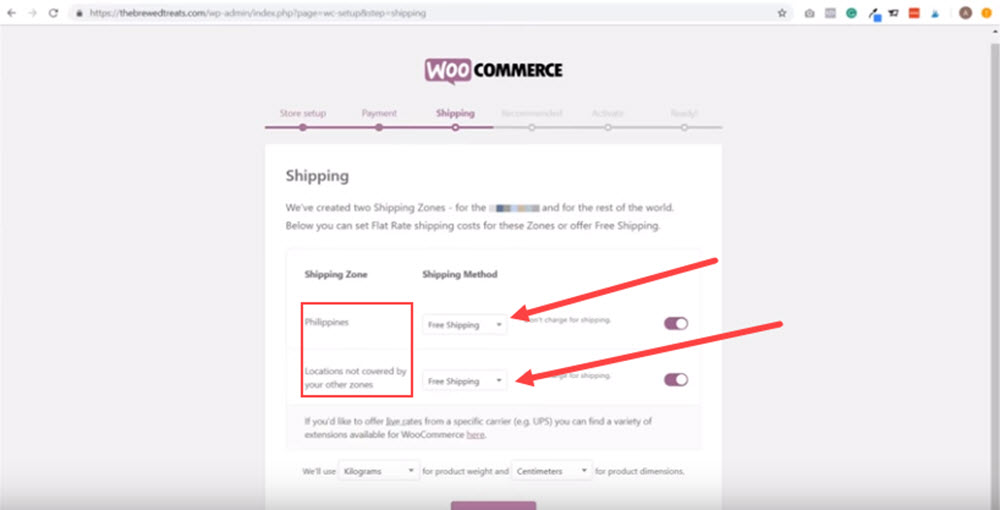
11. In the shipping tab, select free shipping from the drop down menu, for both your country and location not covered by other zones. Then click continue.
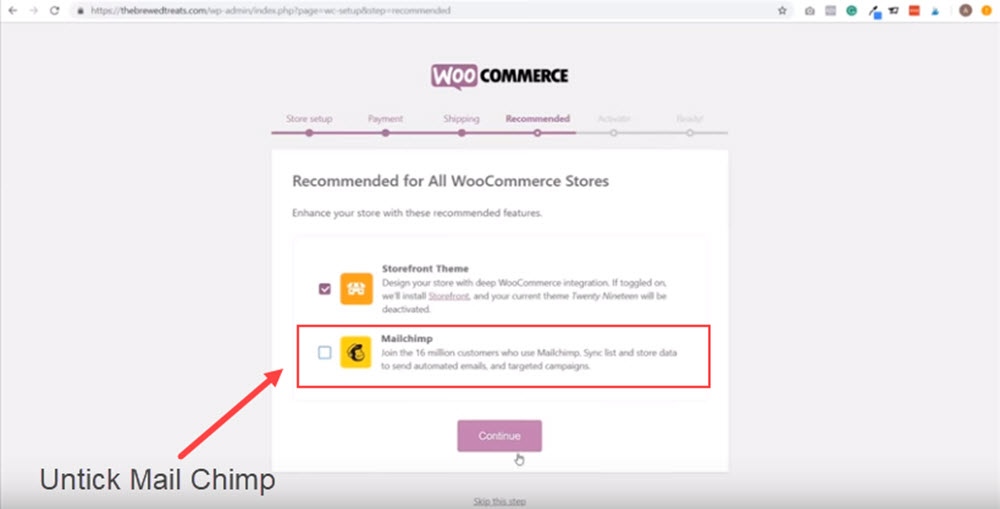
12. In the next tab, untick Mailchimp, then click continue.
13. On the next page, ignore the Jet Pack promotion, and Click 'Skip this step' at the bottom of the screen.
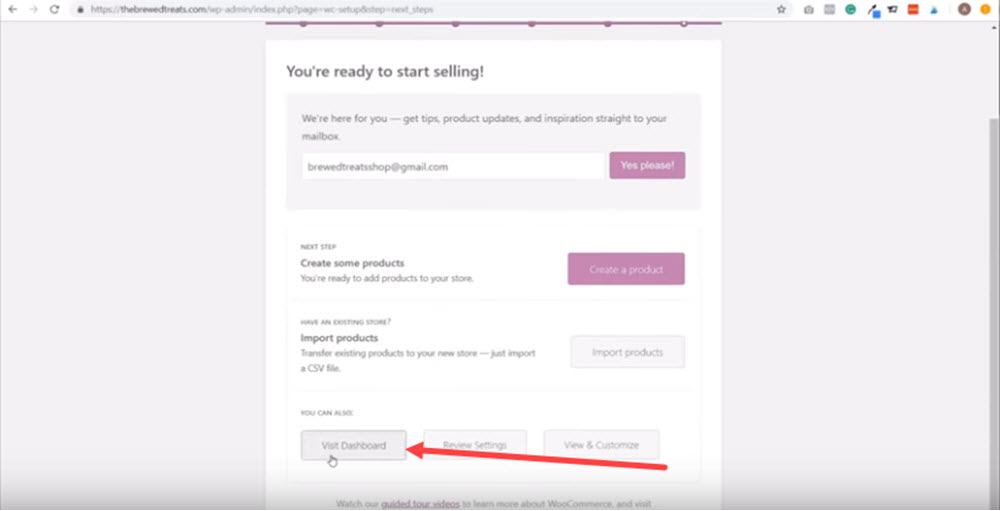
14. Then click visit dashboard to go back to your WordPress dashboard.
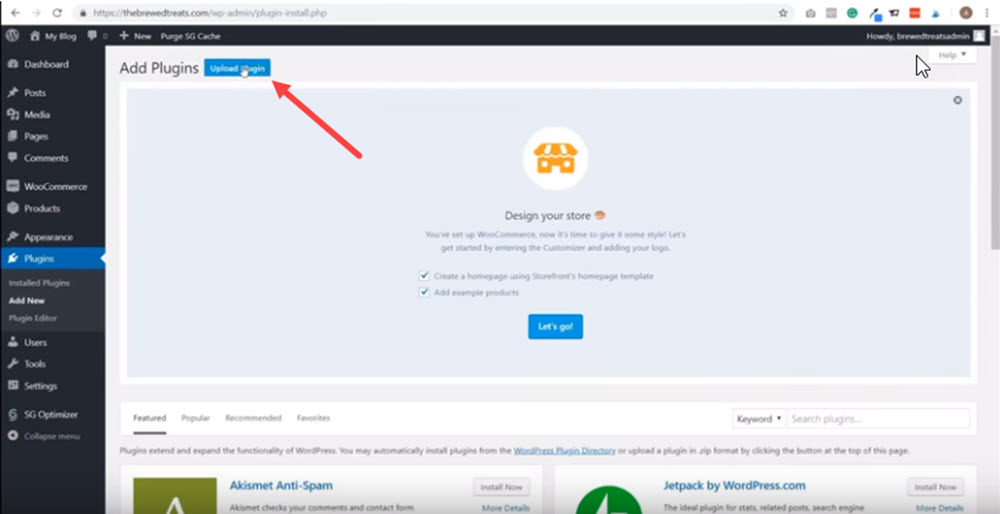
Step 4: Install the Alidropship Plugin
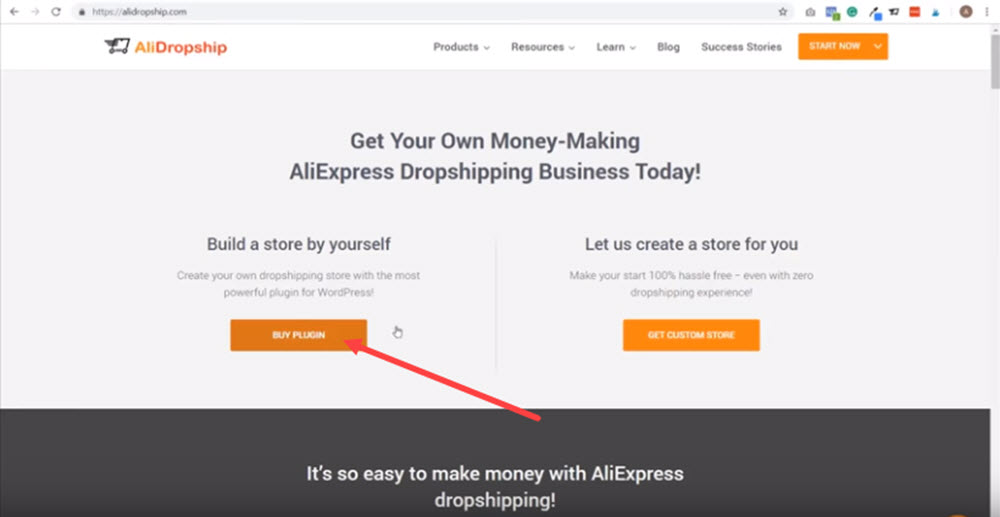
Now that you've installed WooCommerce, it's time to install Alidropship. This is the plugin we're going to use to help speed up the process of adding products to our store. It is a one-time purchase of $89, so once you've bought, it's yours to keep for as many stores you wish to create in the future.
Click here to sign up for Alidropship (NOTE: Affiliate link)
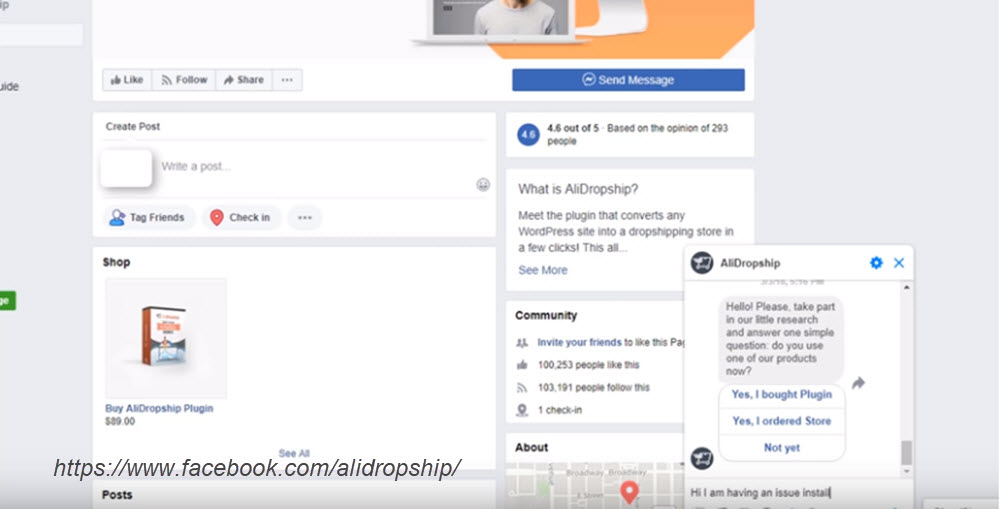
But before we start this step, here's a quick tip: If you find yourself stuck using Alidropship, simply message them on their Facebook page (https://www.facebook.com/alidropship/) to assist you with whatever you need help with.
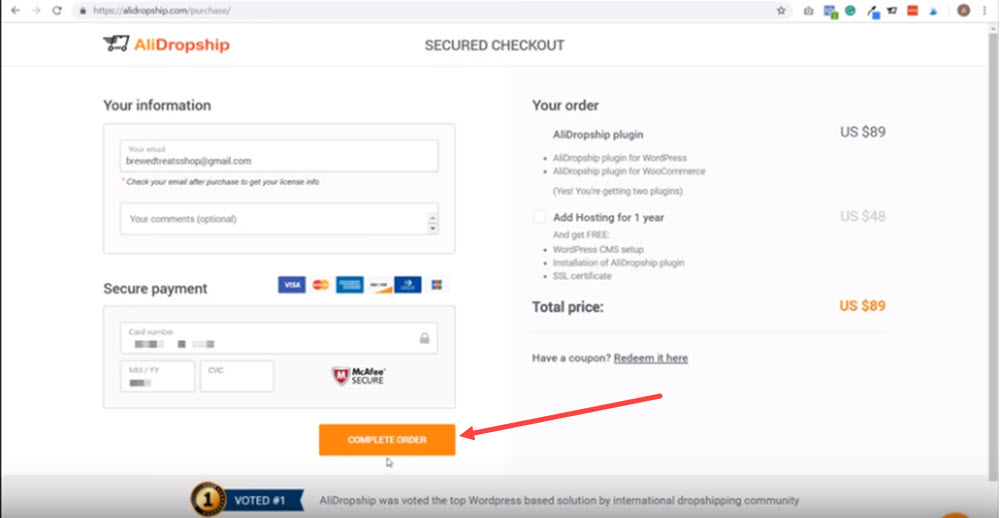
- On the Alidropship homepage, click Buy Plugin. Then on the following page click 'Buy Now For Only $89.'
2. Enter your email address and credit card details, then click Complete Order.
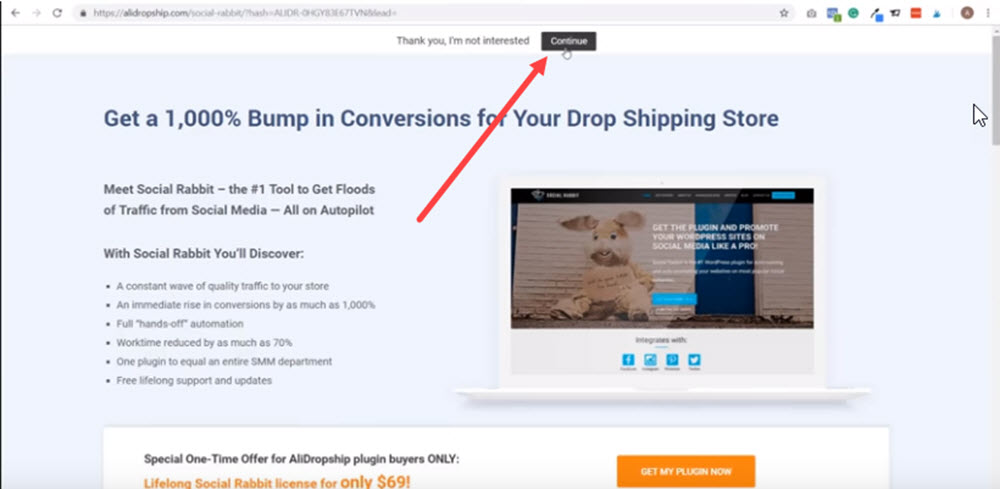
3. Click continue to skip over the next page.
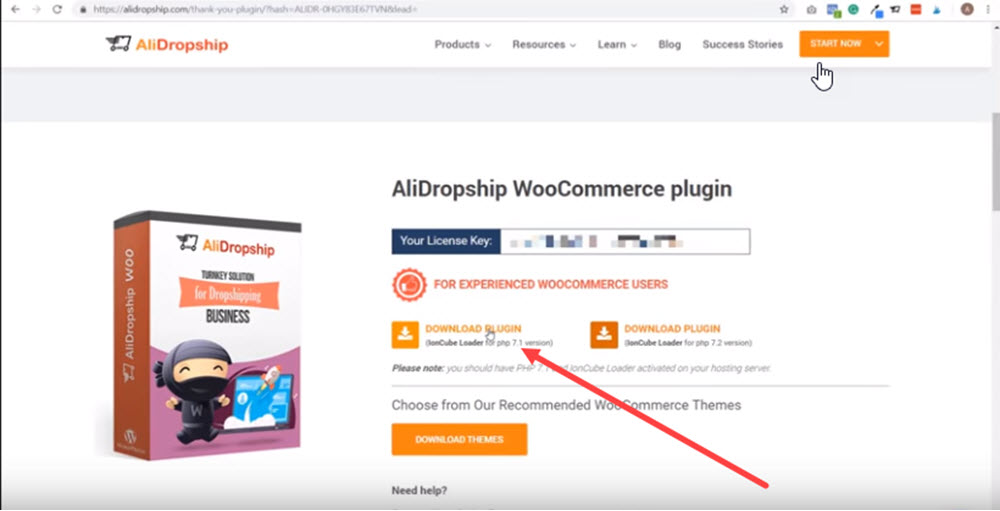
4. On the next page, scroll down to the Alidropship WooCommerce Plugin and click 'Download Plugin.' (This might take a while, so be patient and wait until it's done)
5. Go back to the WP dashboard and click Plugins.
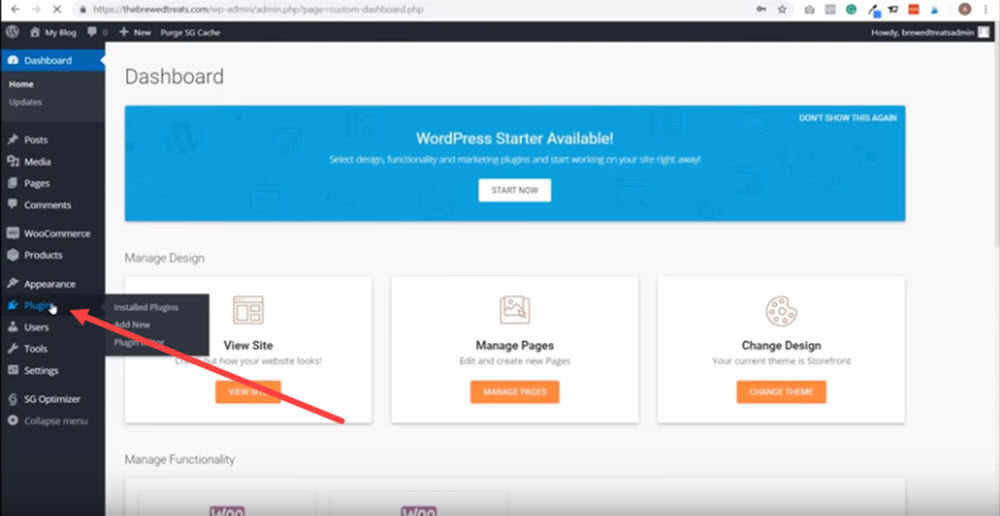
6. Next, click Add New, then click Upload plugin.
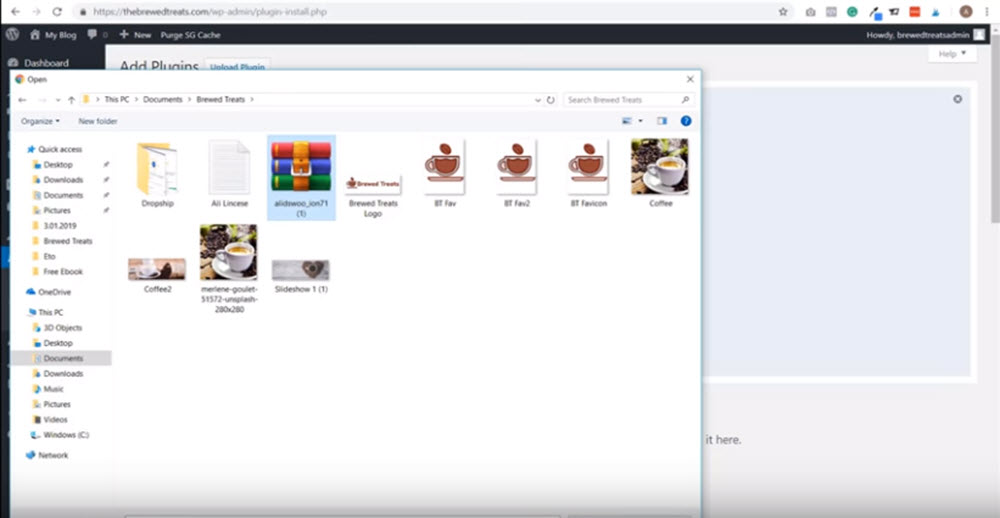
7. Click Choose File, then double click the Alidropship plugin you just installed onto your computer.
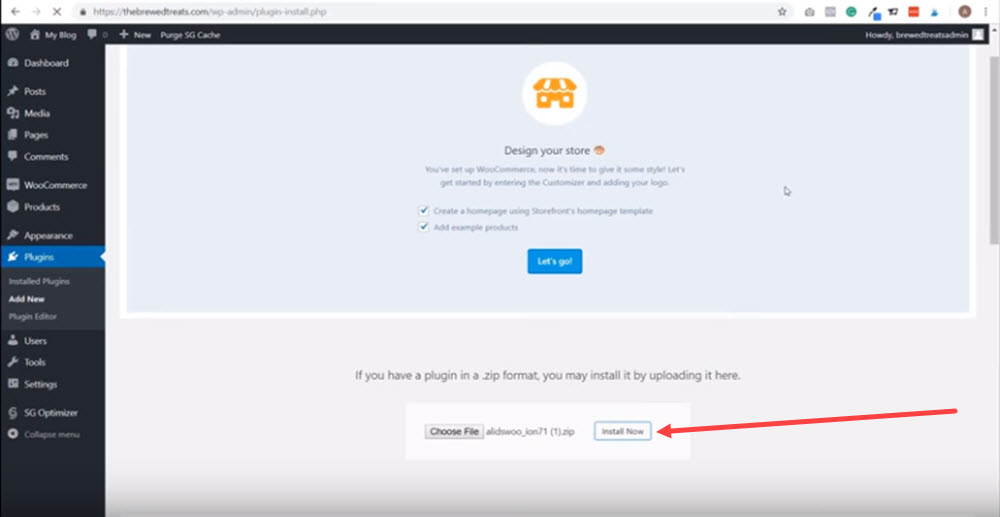
8. Click Install Now, and wait for the installation process to finish.
9. Once done, click Activate Plugin.
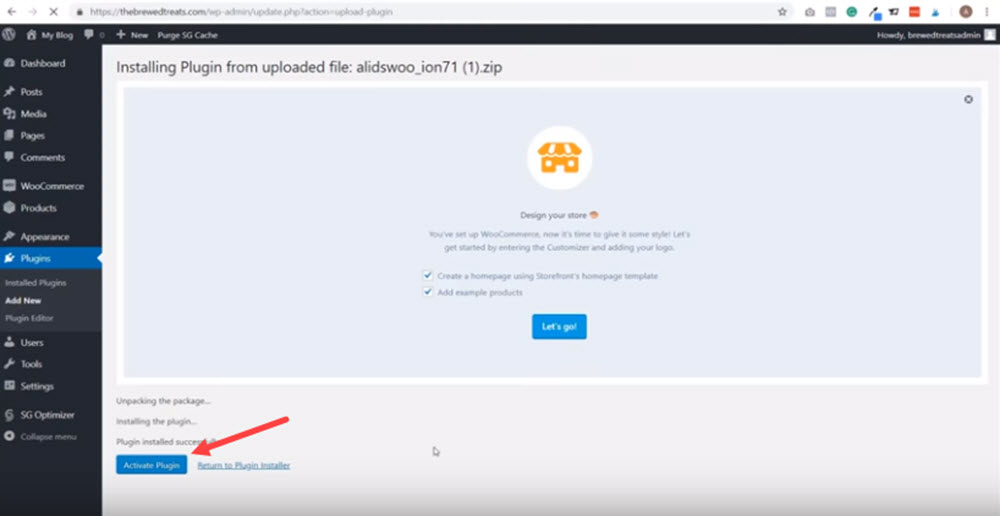
You've successfully activated the Alidropship plugin. Now it's time to move onto the next step: adding products.
Step 5: Install the Alidropship Chrome Extension
This Alidropship extension goes hand in hand with its plugin we just activated inside WordPress.
To use the extension, you will need to be using the Google Chrome browser. This means that, if you don't already have it already installed onto your computer, this is something you are going to need to do before starting this step.
(Click here to install Google Chrome)
Once you've downloaded Google Chrome, follow along with these next steps.
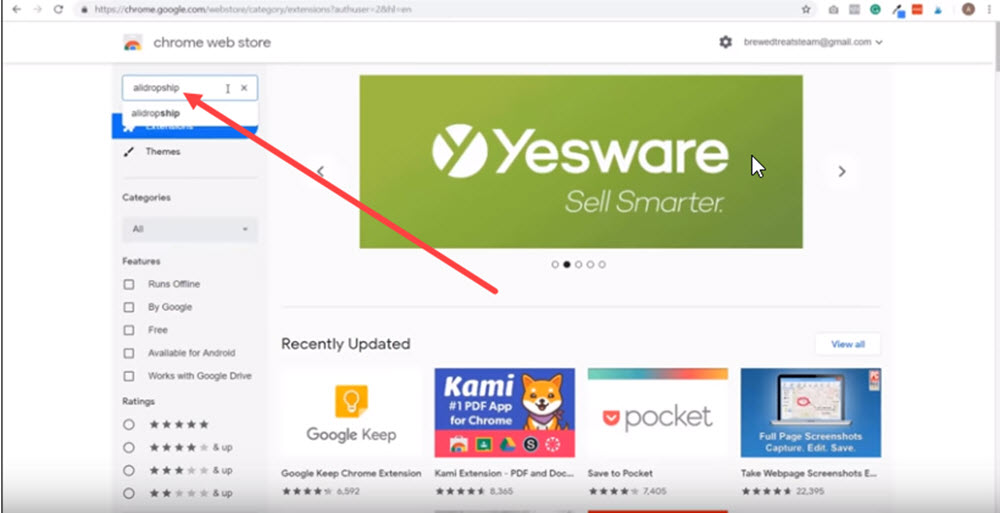
- In the Chrome web store homepage (https://chrome.google.com/webstore), type in Alidropship into the search bar.
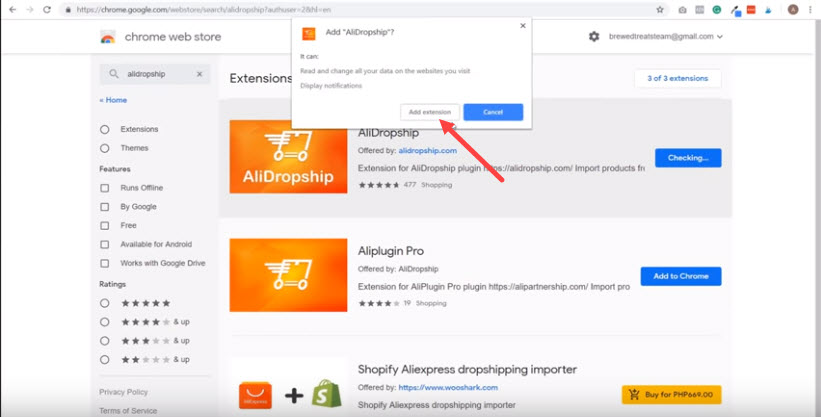
2. Once you've found the plugin, click Add to Chrome, then click Add extension.
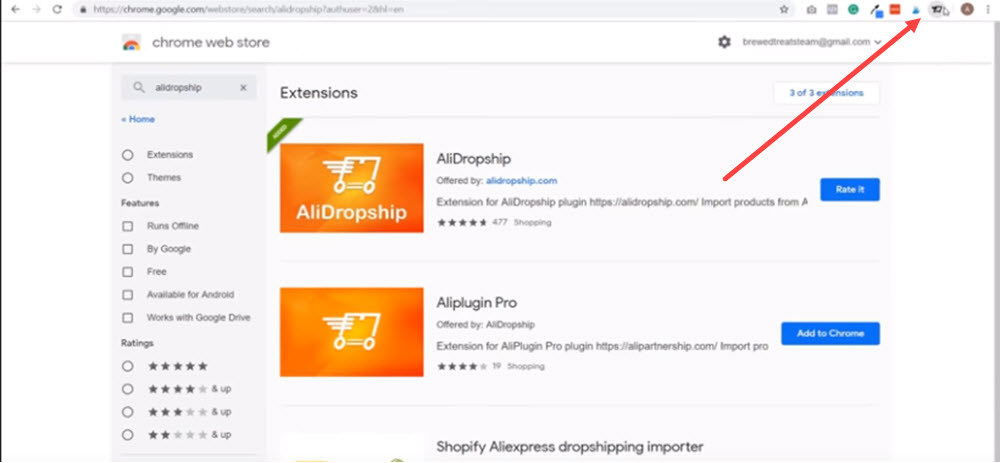
3. Next, click the Alidropship icon, that should now be at the top right corner of your page.
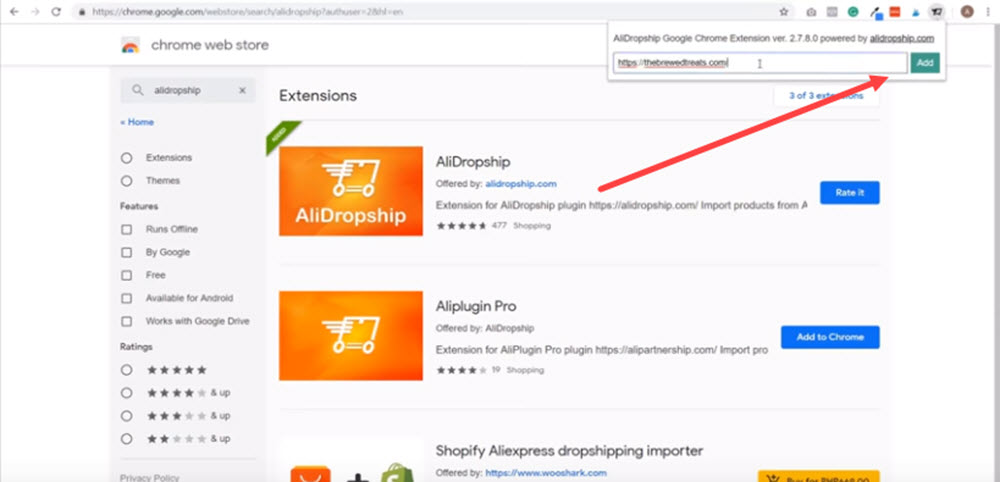
4. Then enter the URL of your store's website, and click Add.
Step 6: Install the Alidropship Theme: Shopper
This is the theme that we'll use for our store. Shopper is one of Alidropship's most high-converting themes, and is specifically designed to work well with Woocommerce.
- Go to the Themes page on Alidropship.com.
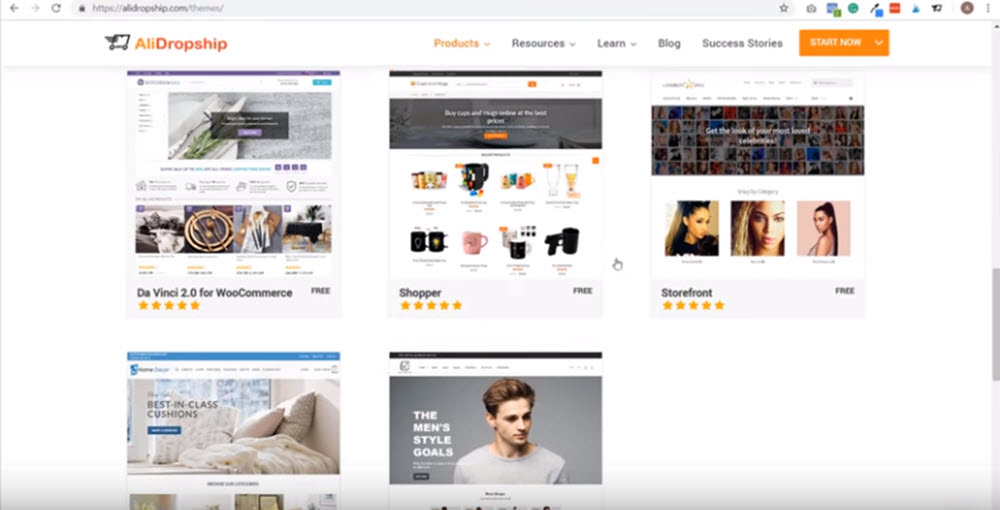
2. Scroll down to the Recommended WooCommerce themes for Alidropship Woo plugin, then select the Shopper theme.
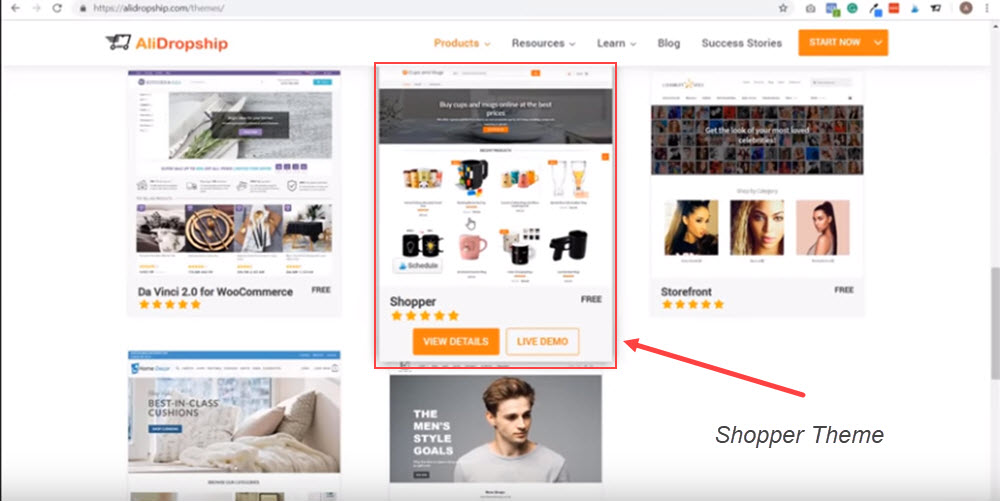
3. Next, click Download.
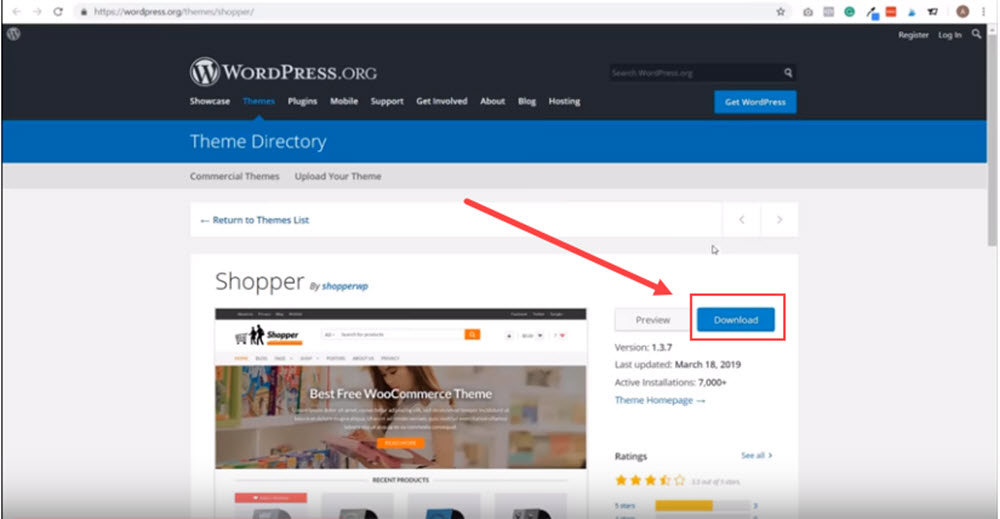
4. Go back to your WordPress dashboard. Click appearance, then Themes.
5. Next, click Add New.
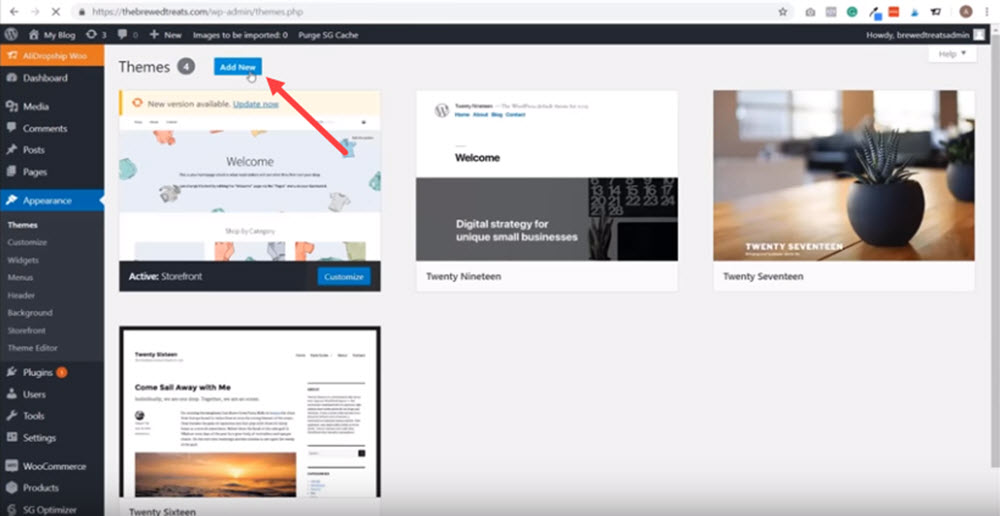
6. Click Upload Theme.
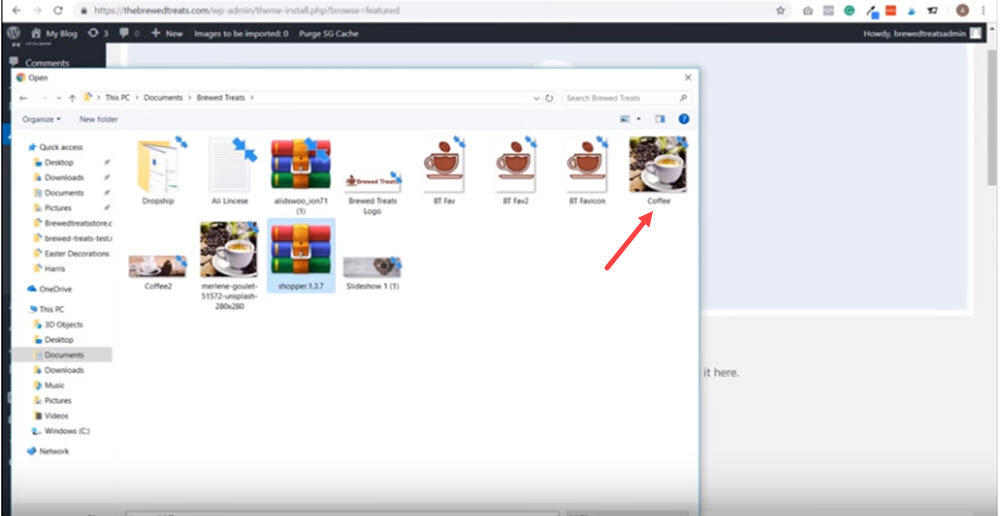
7. Scroll down and click file. Select the file in your downloads folder, then click open.
8. Click Install Now. (Wait for a few seconds until the installation is complete)

9. Once installed, click Activate.
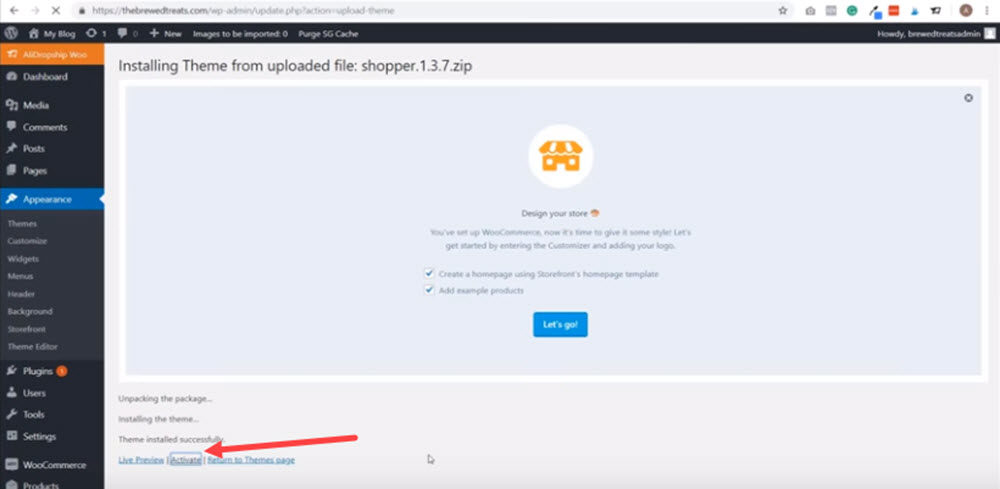
And, easy as that, you have now successfully installed the Shopper theme for your store.
Step 7: Update the Alidropship Settings
To finalise the download of Alidropship, you'll want to edit some of its settings (as not all of them are the most preferable to dropshippers).
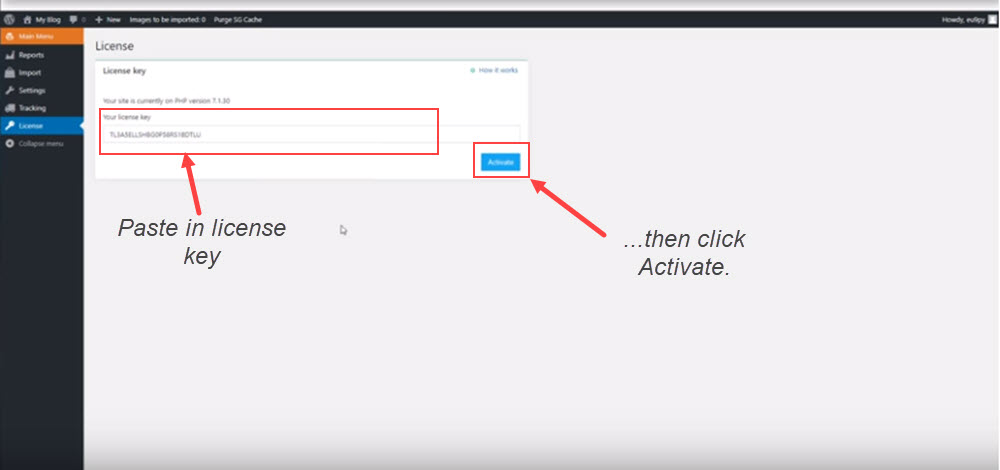
But, as a prerequisite to the following steps, you'll first want to make sure that you have entered your license key.
To do this, open up your dashboard and click the Alidropship Woo button, then click License. Then, from the page that you downloaded Alidropship, copy the License Key.
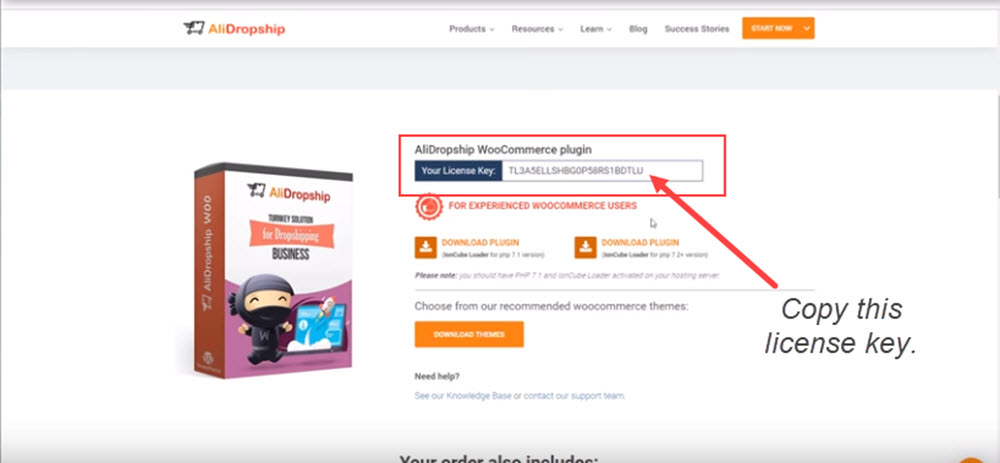
Once you have done that, switch back to WordPress and paste your key into the field. This will confirm your purchase, so you are able to use the plugin.
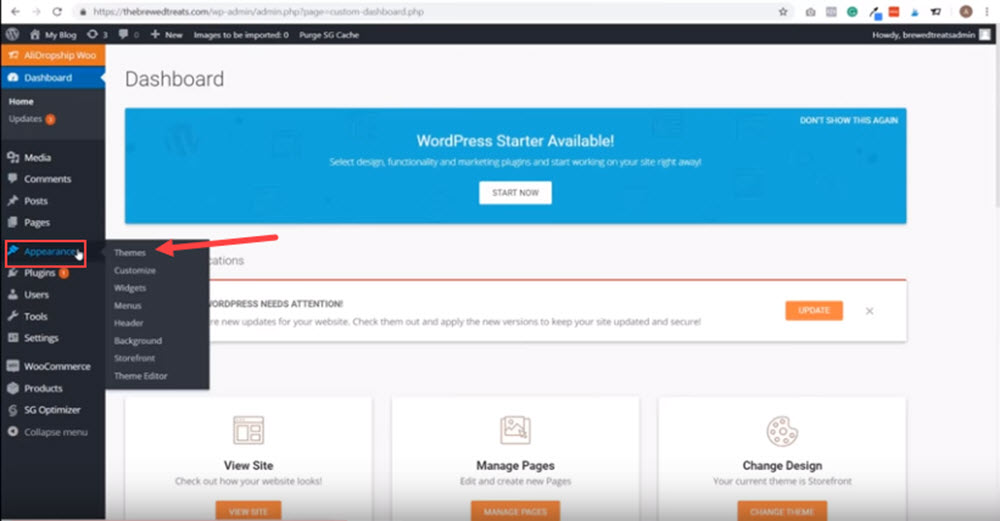
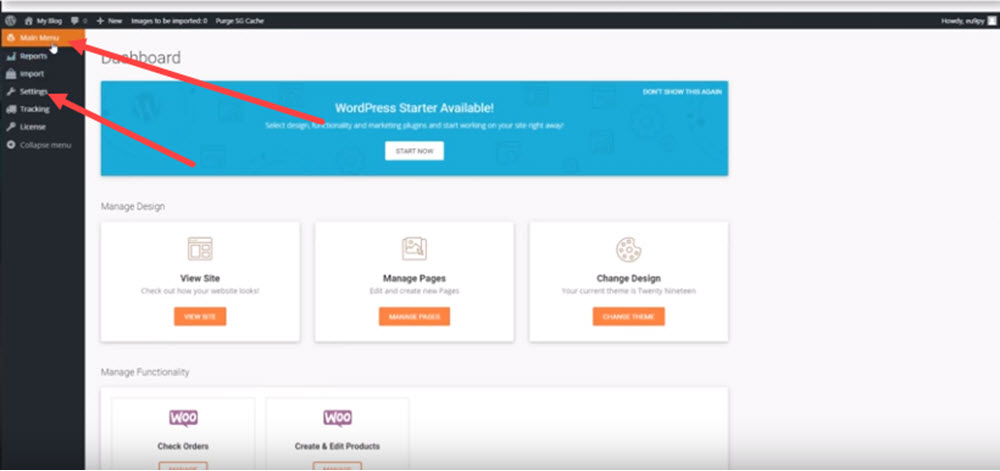
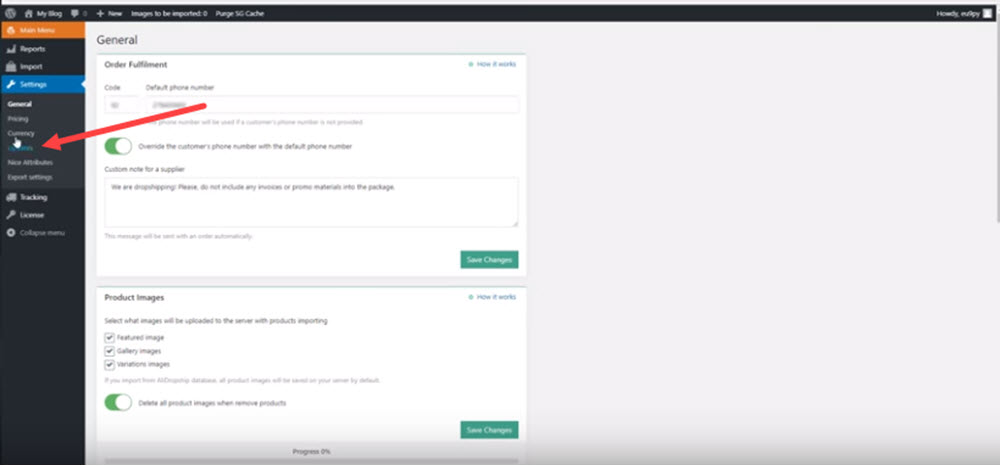
- On your dashboard, click the Alidropship Woo button, then click Settings.
2. On the settings page, add a phone number, and click the option 'Override the customer's number with the default phone number.' Then click Save Changes.
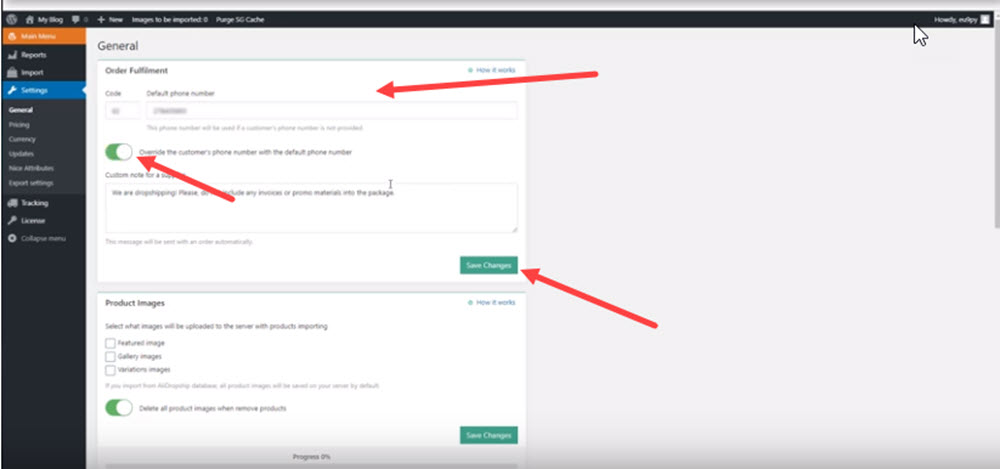
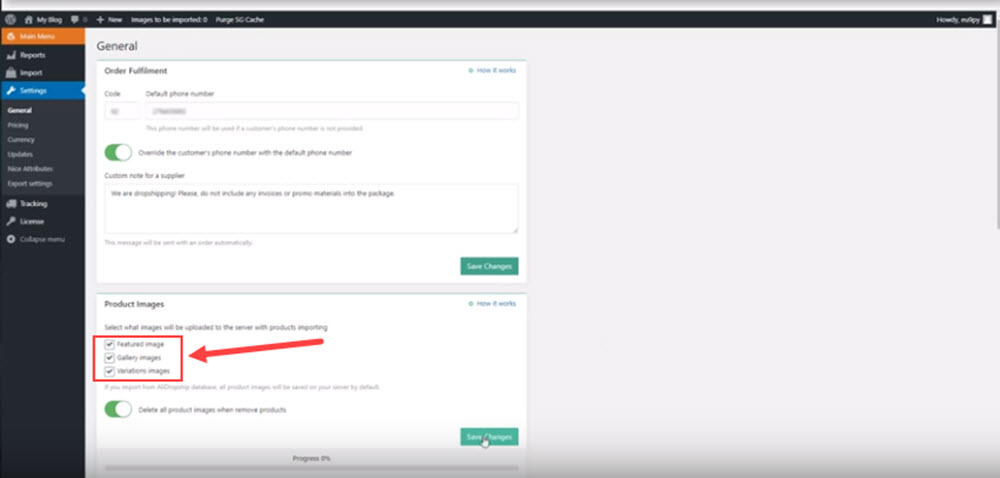
3. Under product images, tick every box, then click Save Changes.
4. Under Settings, click Updates.
5. Tick the Notify Me box under the option 'When a product disappears or is out of stock.' (We don't want any customers purchasing fantasy items!)

6. Tick the Notify Me box under the option Set Quantity to Zero.

7. Under the option 'When the price charges,' select Do nothing from the drop down menu, and then tick the Notify Me box.
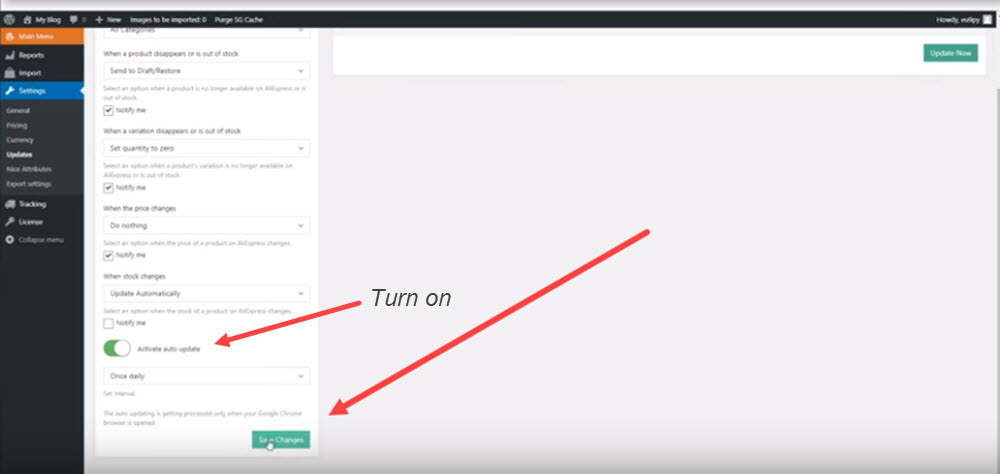
8. Once done, turn on the Activate auto update toggle, then click Save Changes.

Step 8: Add a Custom Logo and Colour Scheme
Before you complete this step, you're going to need to do these two things.
- Create a logo for your store. We personally recommend using Fiverr where you can have a logo created for you for as little as $5 (plus a few small additional fees).
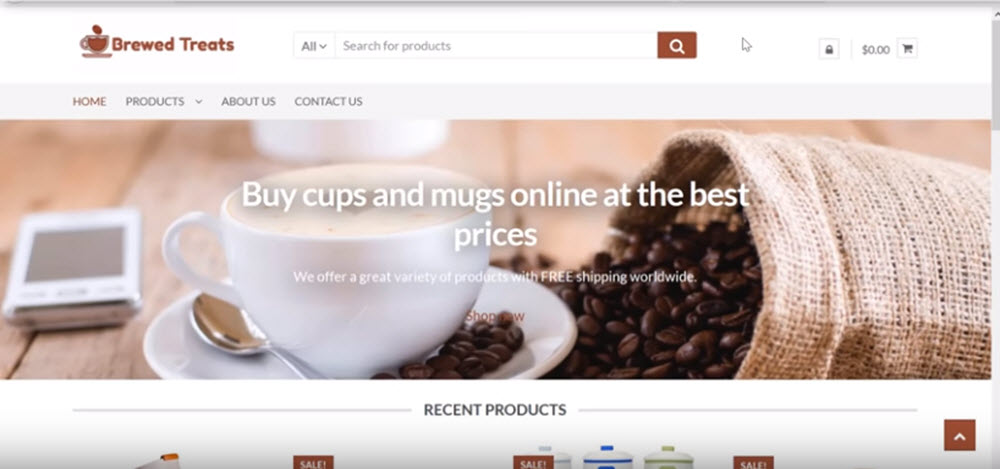
- Pick a main colour for your store. We'll be using this colour throughout this tutorial to add personality to our site. As a tip, pick a colour that relates to your niche. For example, our store's main colour is brown, and this site is being used to promote coffee related items.
Once you have both, here is how add them to your store.
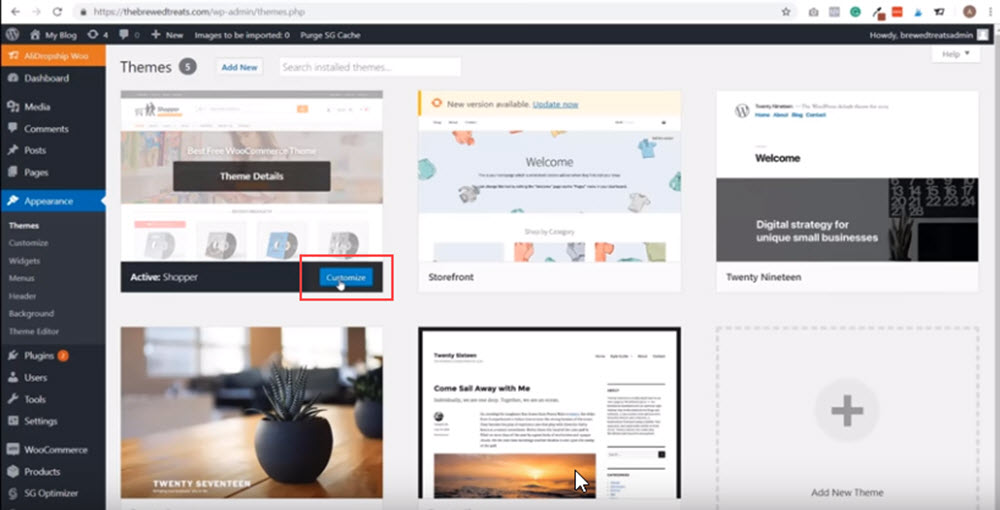
- In your WordPress dashboard, click Appearance. Then select Themes.
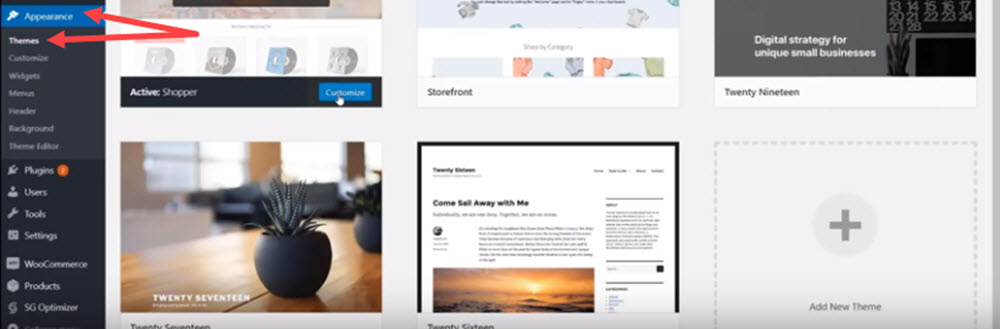
2. Click theme you want (Shopper), then click Customize.
3. On the next page, click Select Identity. Then Select Logo.
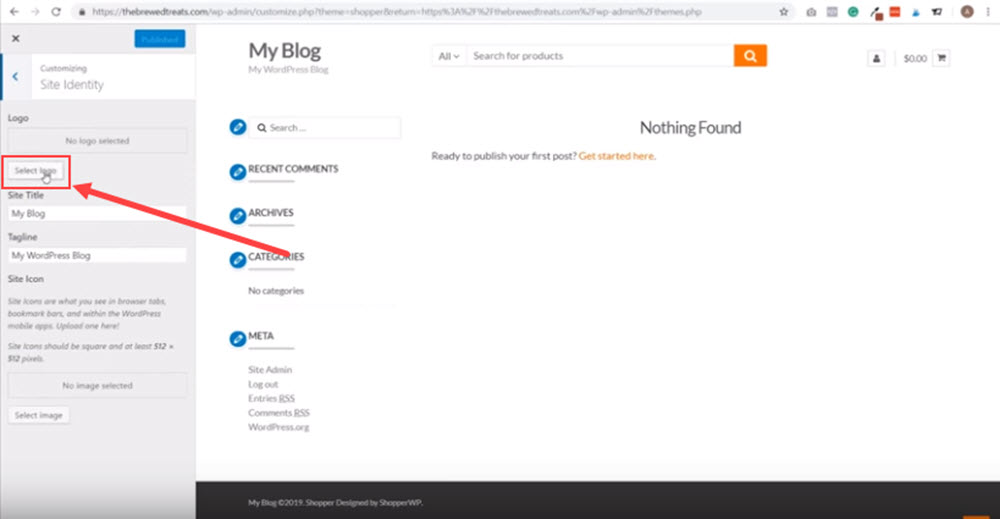
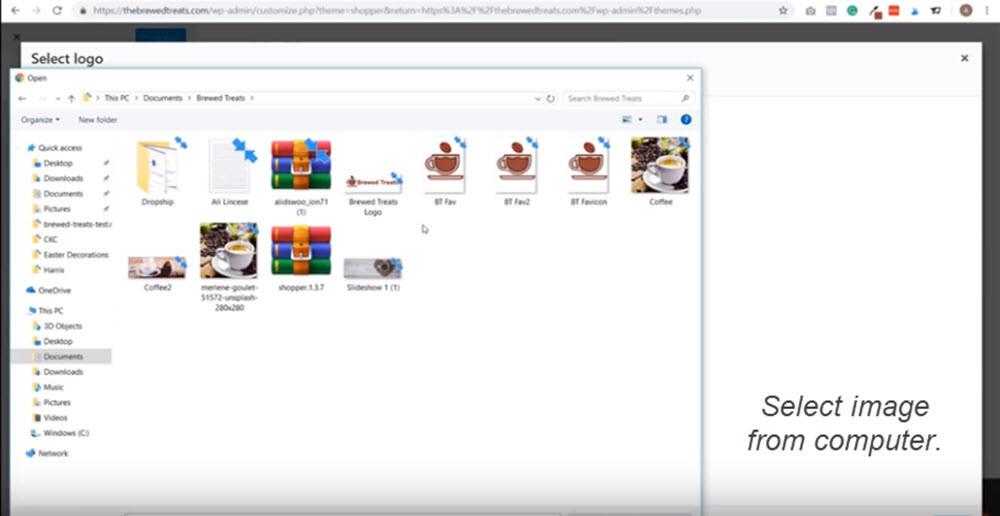
4. Click Select Files, then select the logo from your computer that you created and downloaded from Fivver.
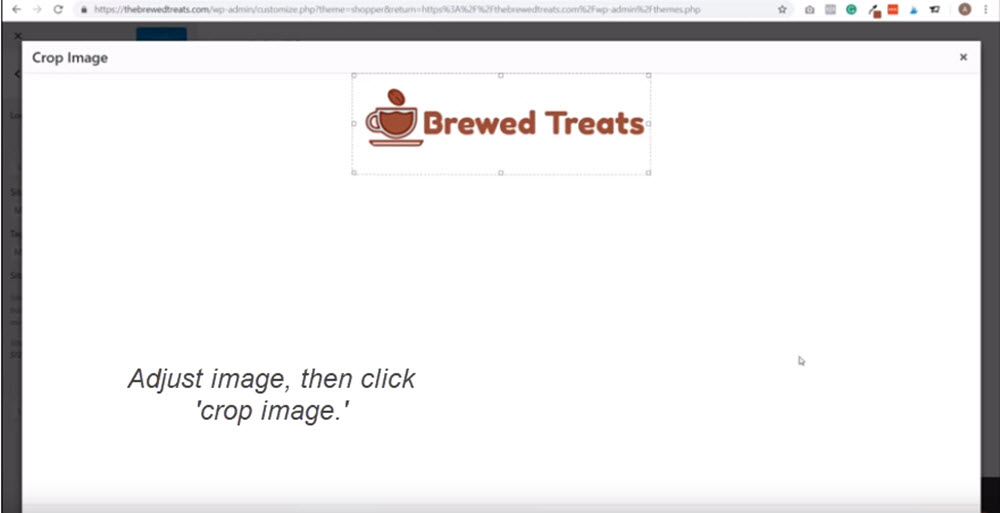
5. Once the image has loaded, click Select. Then adjust the sizing as you wish, and then click Crop image.
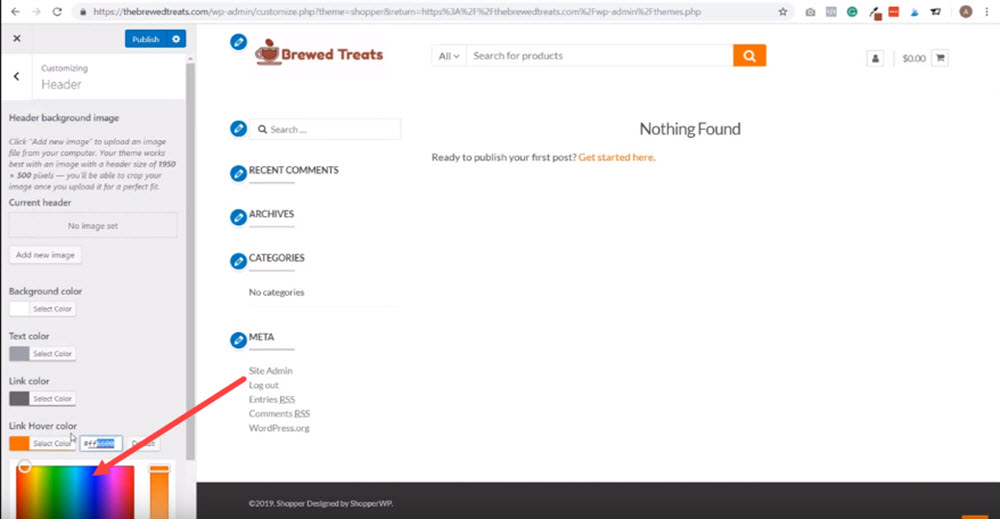
6. Now click the back button.
7. Then select Header and click Hover colour. And then change the colour to the one which you have picked.
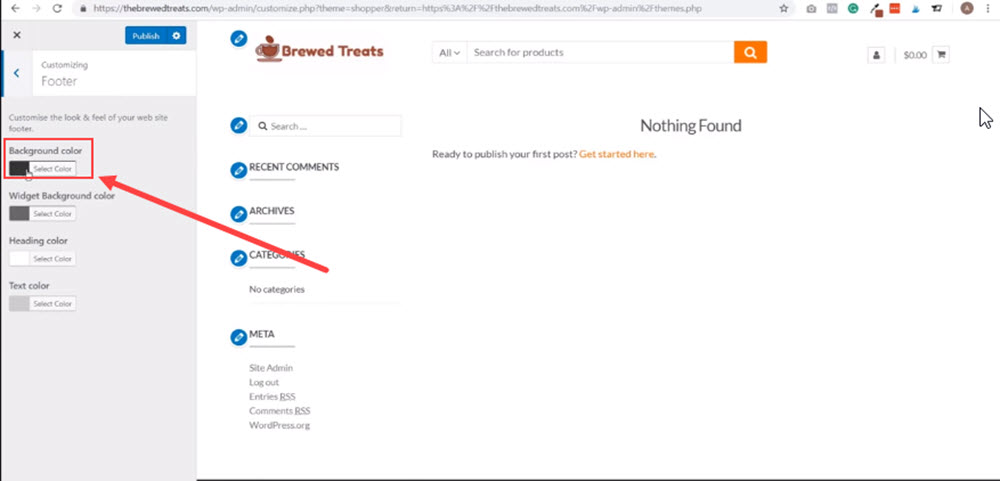
8. Go back and click Footer. Then click Background Colour, adjusting the palette to your desired colour.
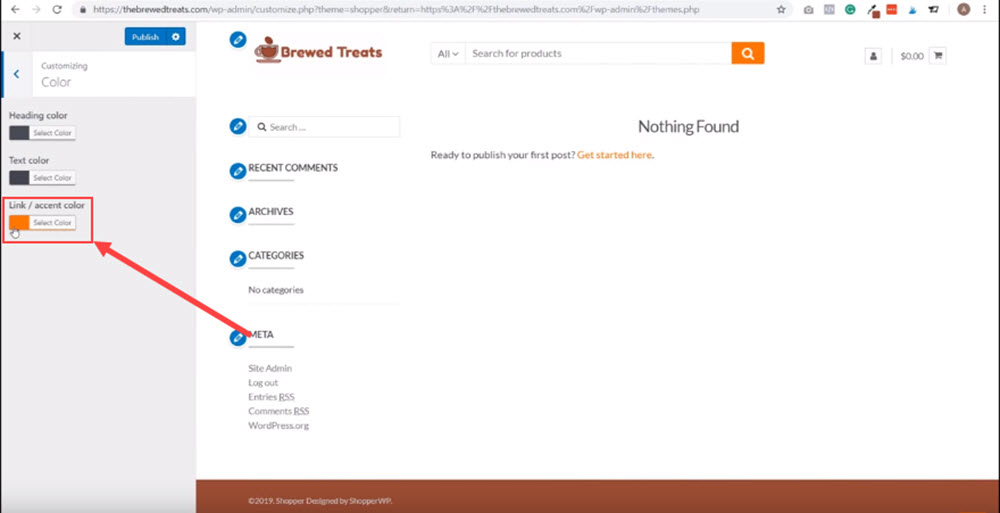
9. Go back and select colour, and click Link/accent colour. Select the colour you have chosen (or copy and paste the colour code you used for your background colour).
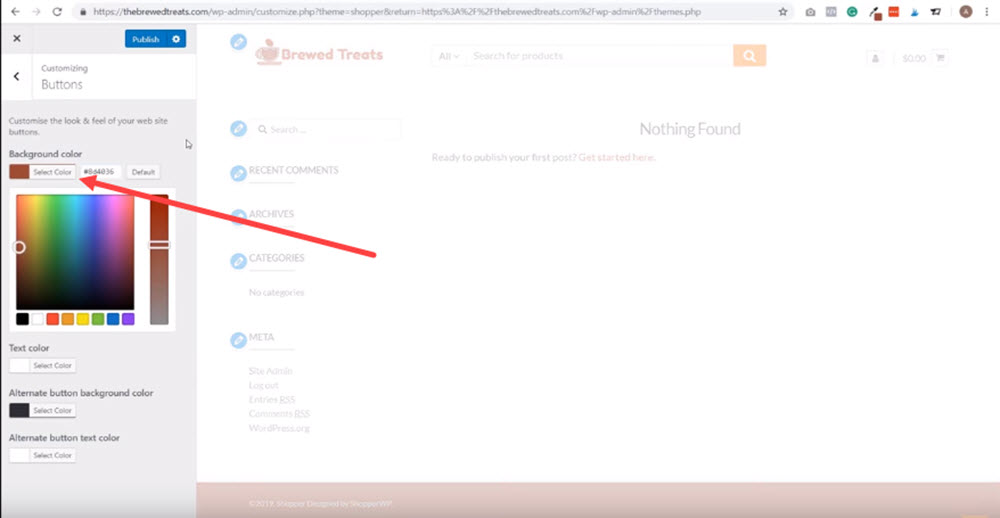
10. Go back and select Buttons. And again, under background colour, pick your selected colour or paste in the colour code.
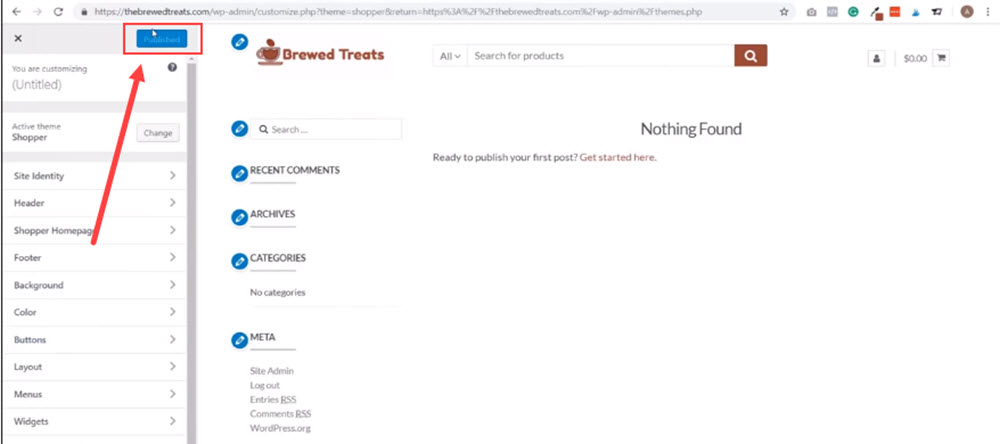
11. Finally, go back and hit Publish.
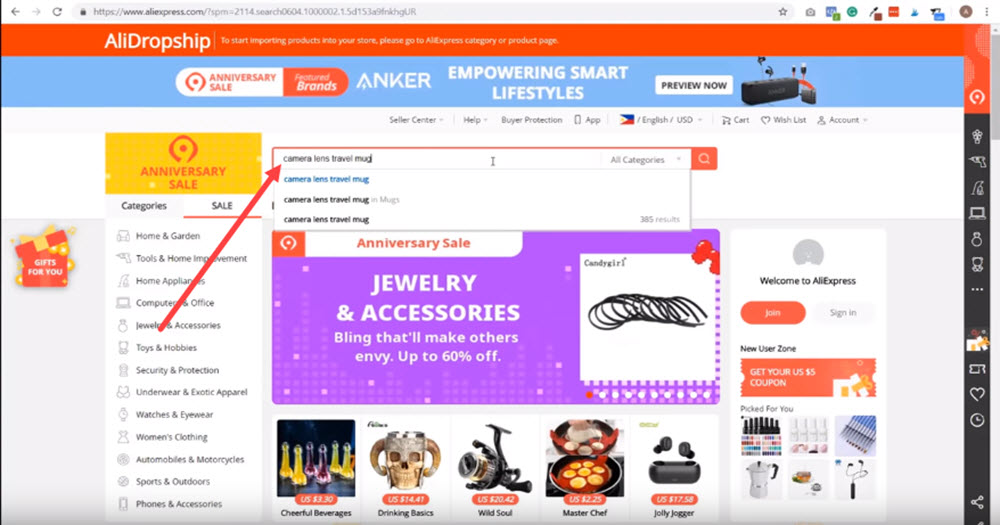
Step 9: Add Products from Aliexpress to Your Store
Here is where you'll be using the Alidropship Chrome extension to help to add products to your store.
For this particular step, have open Aliexpress.com in your Chrome browser. And then in another tab, have your store admin area open.
Then follow along with these next steps.
- Go to Aliexpress.com and search for the item you want to add.
2. Next, click Orders.
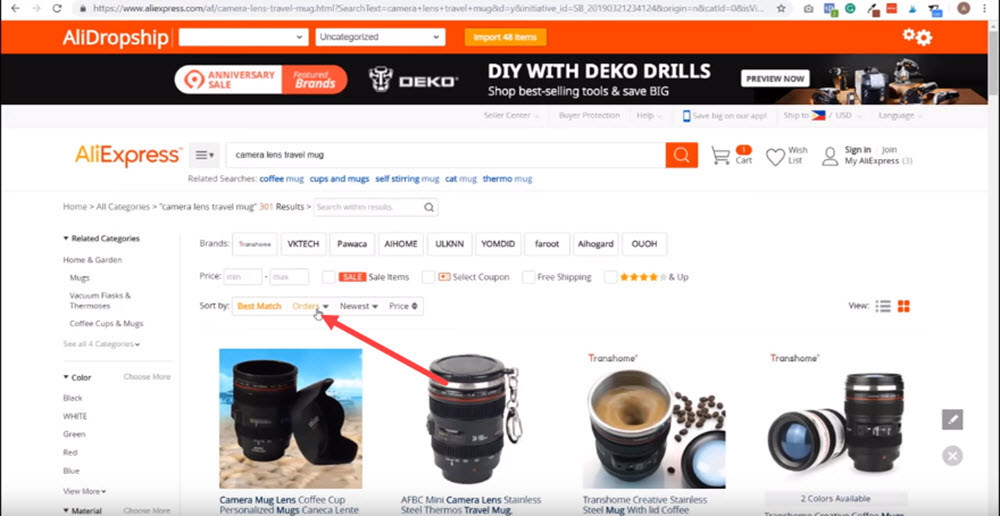
3. Select the item you want to add from the search results, then click the Alidropship icon to add the product to your listing.
4. To confirm your product has been added to your store, switch over to your Admin tab. And then under Woocommerce, select Products. If you followed the first three steps, the product should appear in Products.
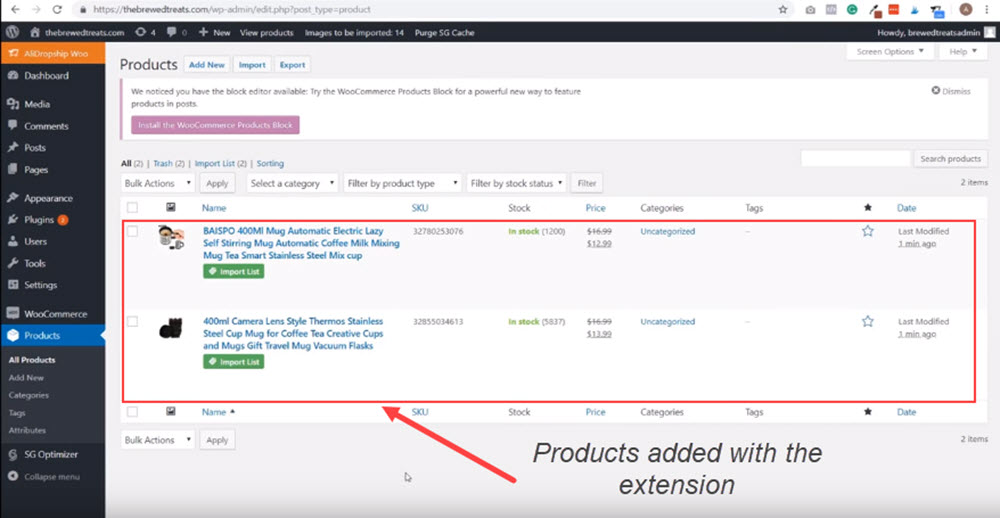
Now you know how to add products to your store, repeat steps one to three for the rest of the products that you want to add to your store.
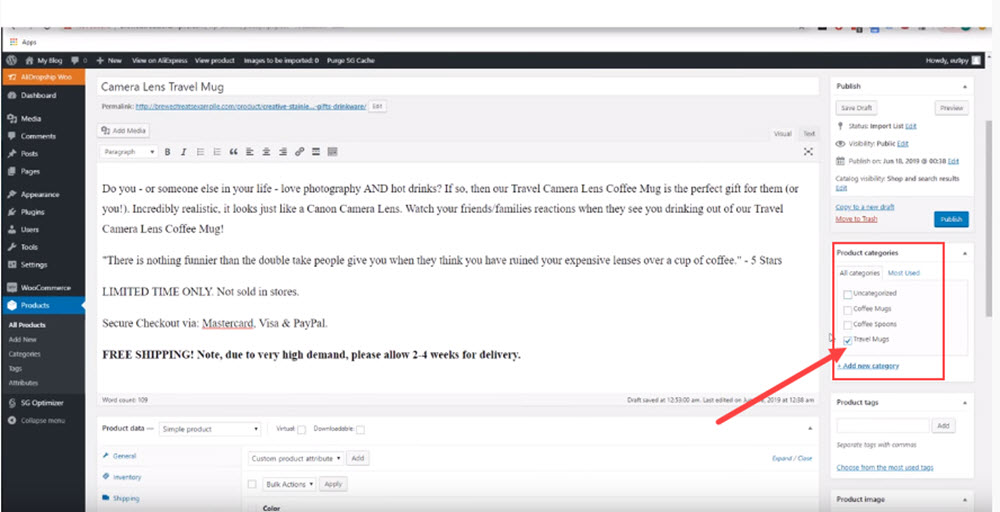
Step 10: Add Product Categories
Here is where you'll add categories for your store. So, it'd be worth jotting down what categories your store will have.
For example, our coffee store has three categories. Coffee mugs, travel mugs and coffee spoons.
Your store might have more than three. But the number of categories doesn't matter. As long as you know how to add categories to your store, you can create as many as you wish.
Once you've jotted down your categories, it's time to add them to your store.
- In your WordPress dashboard, under Products, click Categories.
2. Under Name, type in the name of your first category.
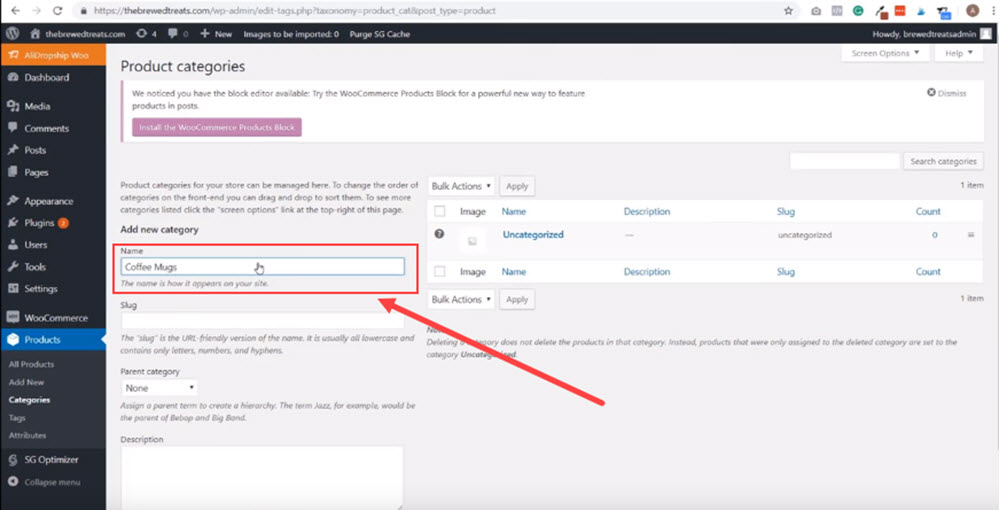
3. Under Slug, type in the name of your category again. But this time, add a dash between both words.
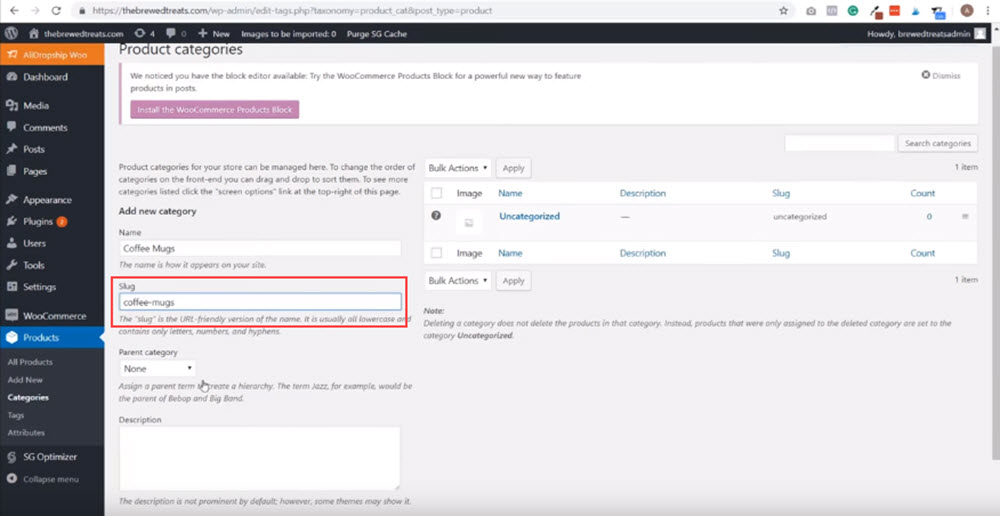
4. Scroll down and click 'Add new category.
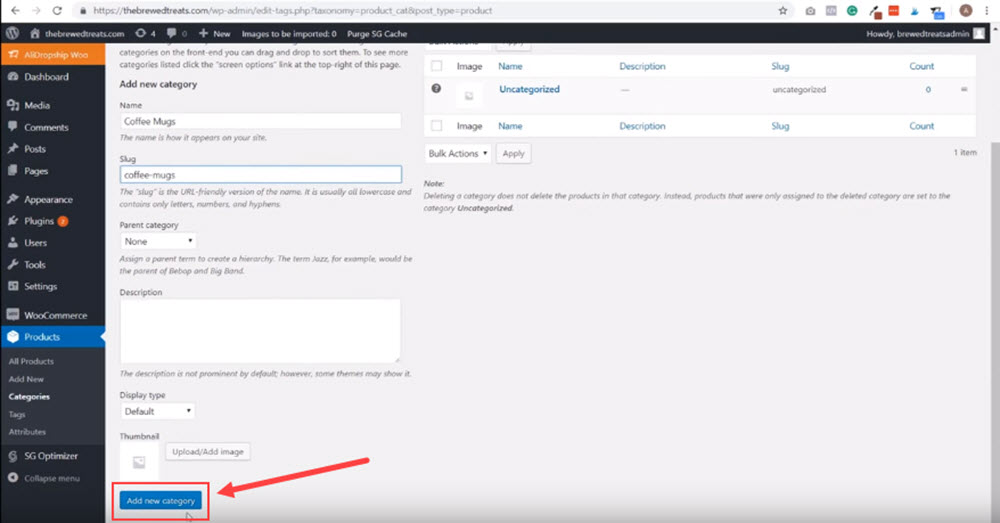
Repeat the four steps for the rest of your categories. Once you have, congrats! You're now ready for the next step…
Step 11: Create an About Us Page
Now we're going to create a simple About Us page with some text and an image.
Before doing these steps, be sure to have some text for your About Page ready with an image related to your niche.
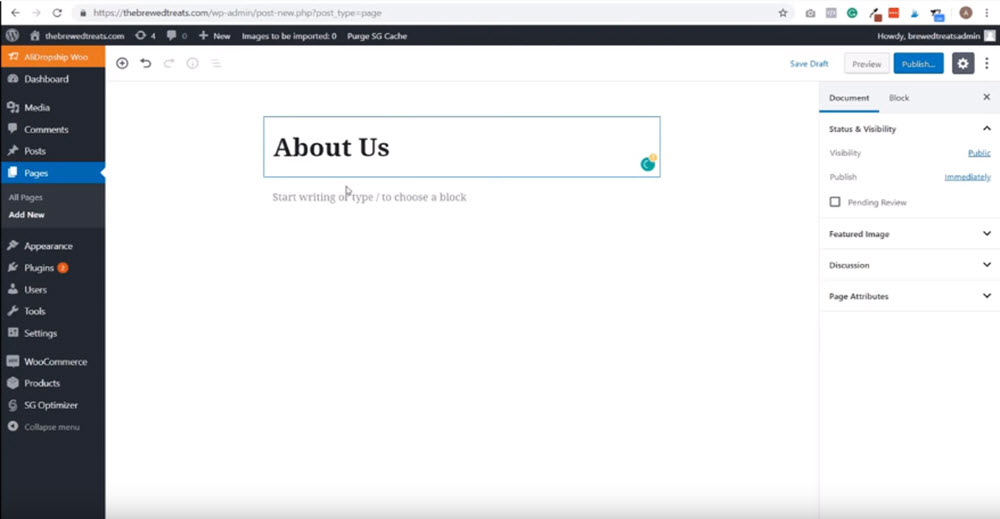
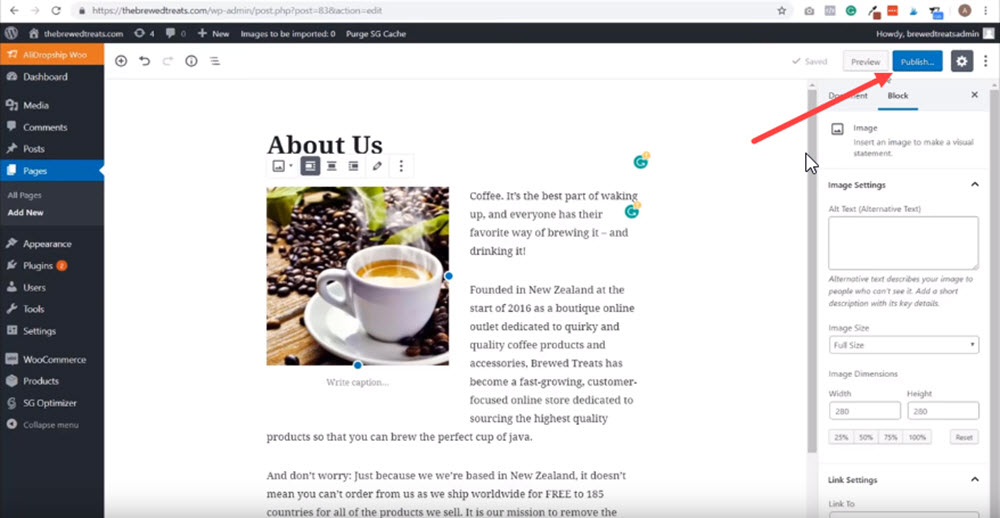
1. On your dashboard, click Pages. Then click Add New.
2. Close the box on the side, then write About Us inside the Title section.
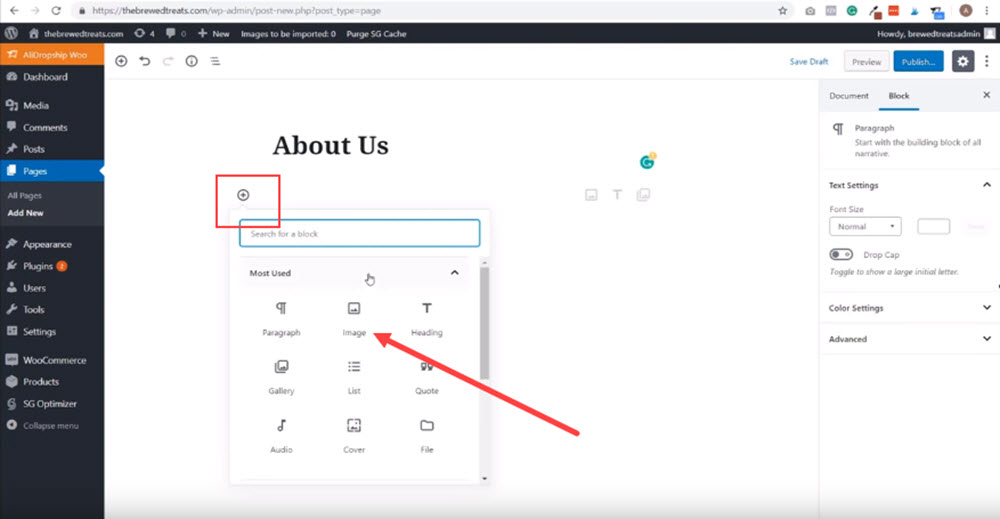
3. Next, click the + button and select Image.
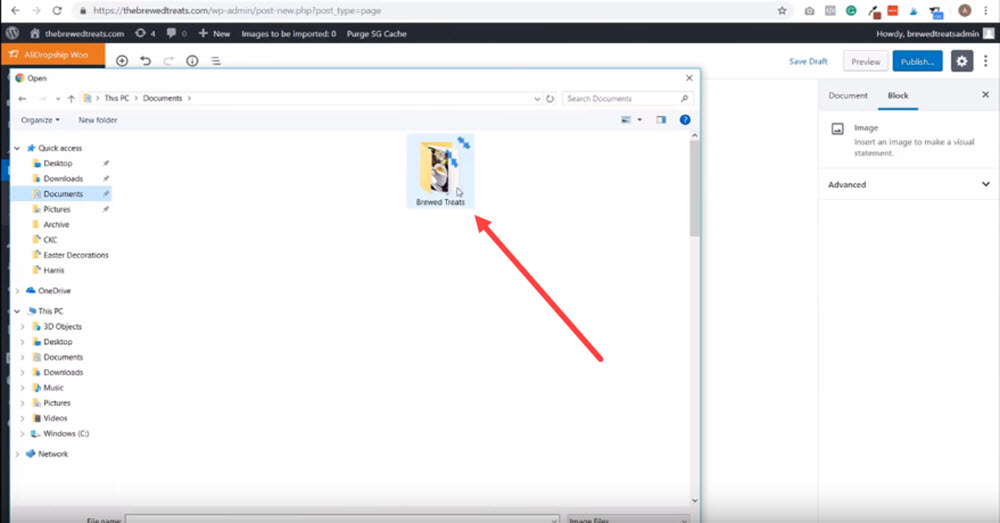
4. And then click upload. And then select the image you want to use from your computer.
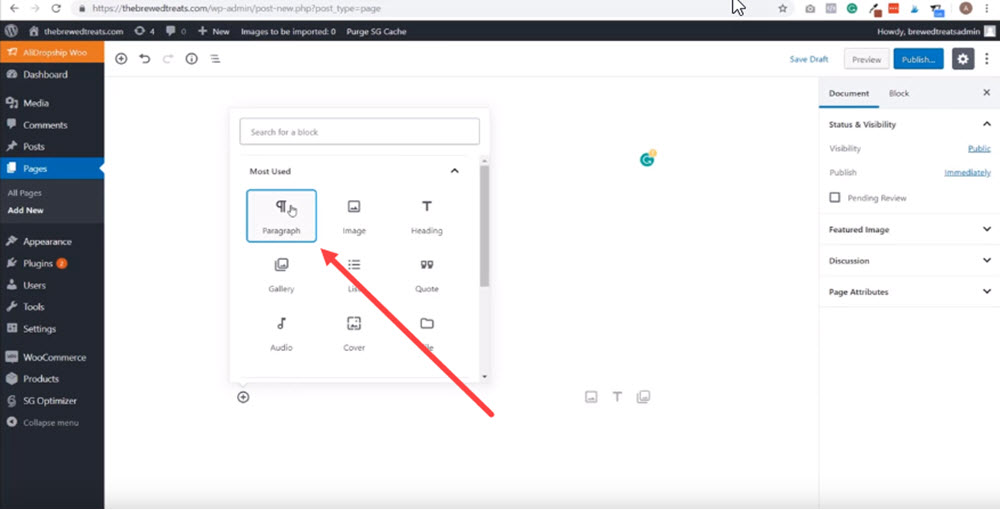
5. Hover under your image until you find that + button again. Click it, then click Paragraphs to paste in the text you created in-advance.
6. Now, click on the image. And then click the left alignment button.
7. Lastly, hit publish to add this page to your website. (Or instead, click draft if you aren't ready to publish yet)
Step 12: Create a Contact Us Page
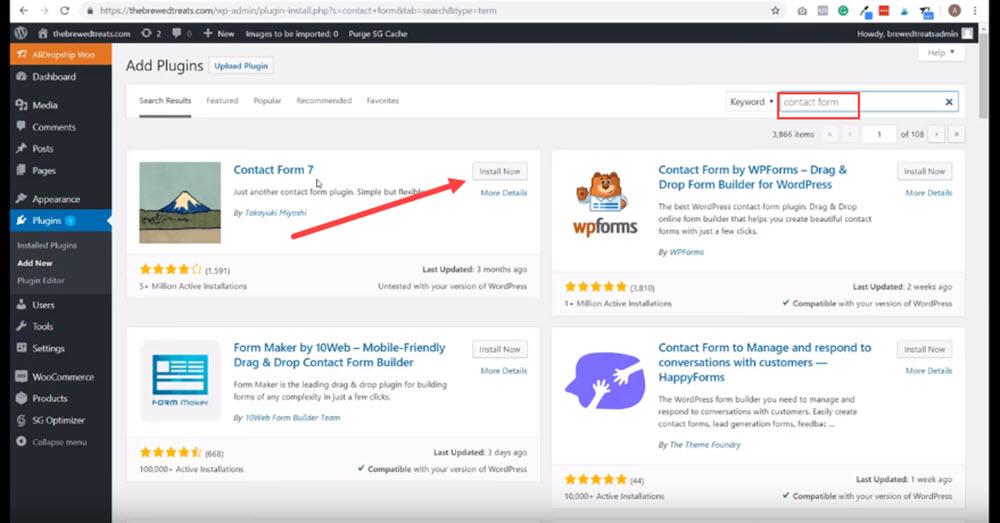
Now we've added an About Page, this next step is going to be just as easy. We're simply going to install a free plugin called Contact Form 7, that will allow us to create a nice little contact page, so that customers can easily reach out to you through email.
- In the WordPress dashboard, click Plugins. Then click Add New.
2. In the search bar, type in contact form. Select Contact Form 7 from the search results, and then click Install Now.
3. Wait for a few seconds, and then click Activate.
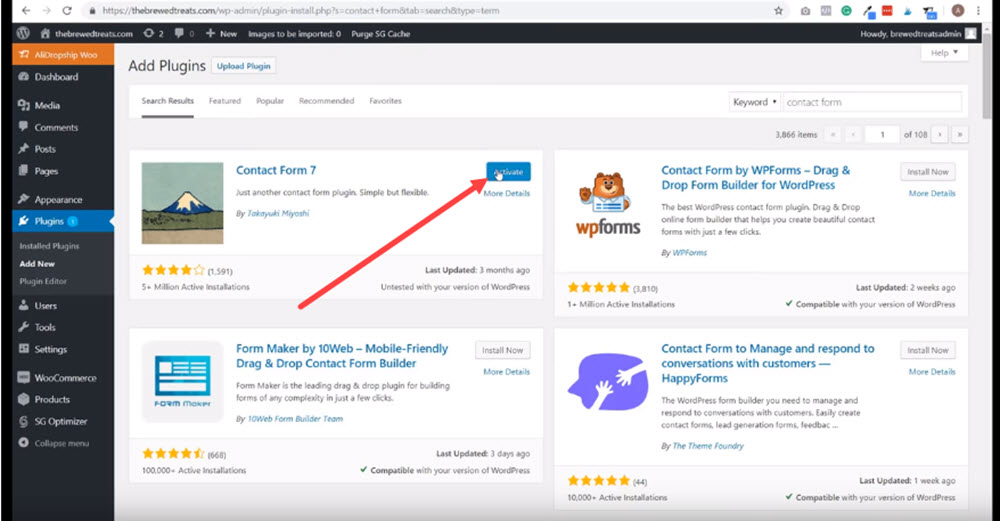
4. Under Plugins, click Installed Plugins, and check to see that Contact Form 7 has fully downloaded.
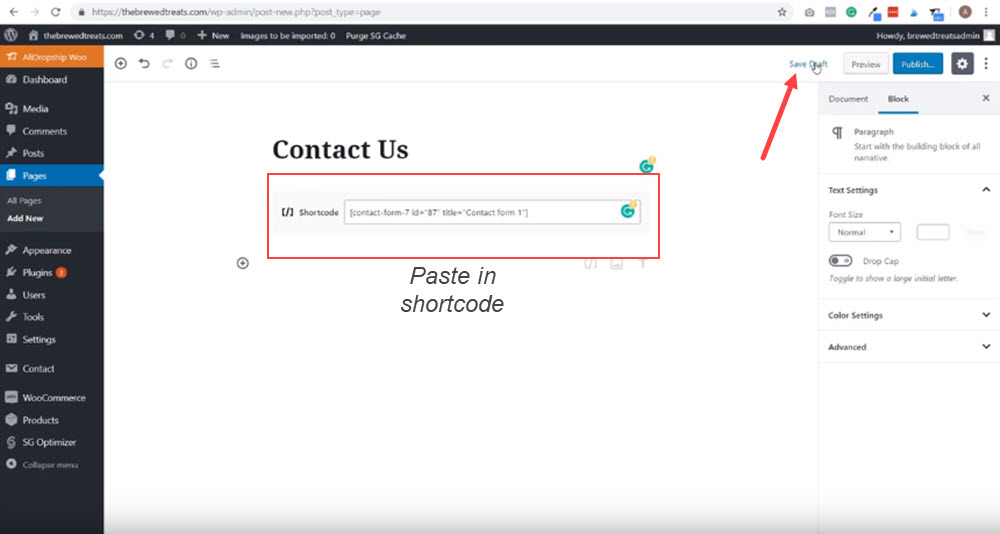
5. Click Settings. Then on the following page, copy the Short code.

6. Go to Pages. And click Add New.
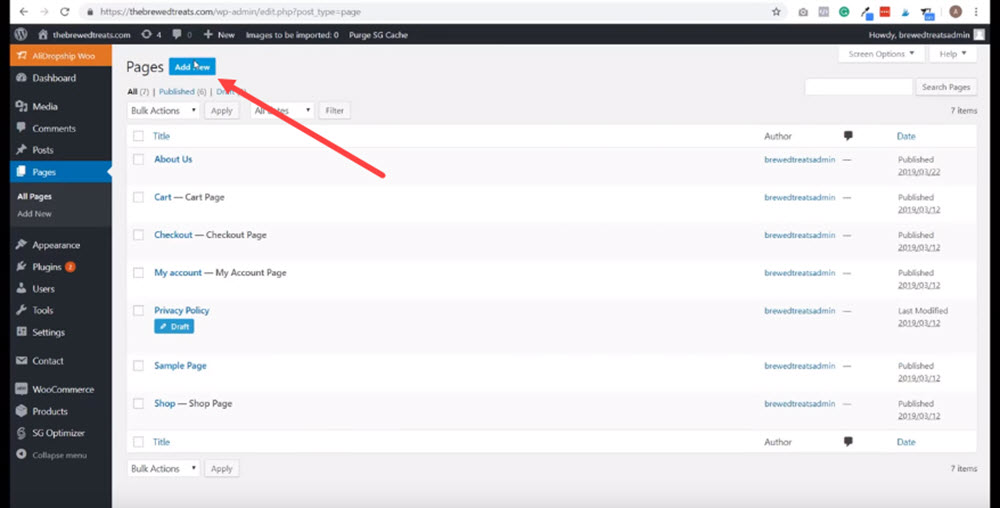
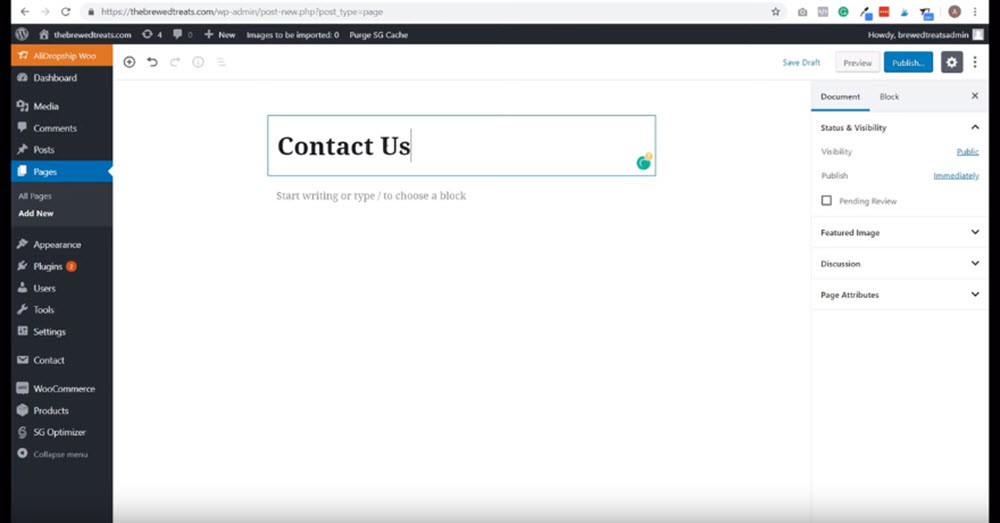
7. Type in Contact Us in the title box.
8. Next, paste in the short code under the title. Then click Save Draft.
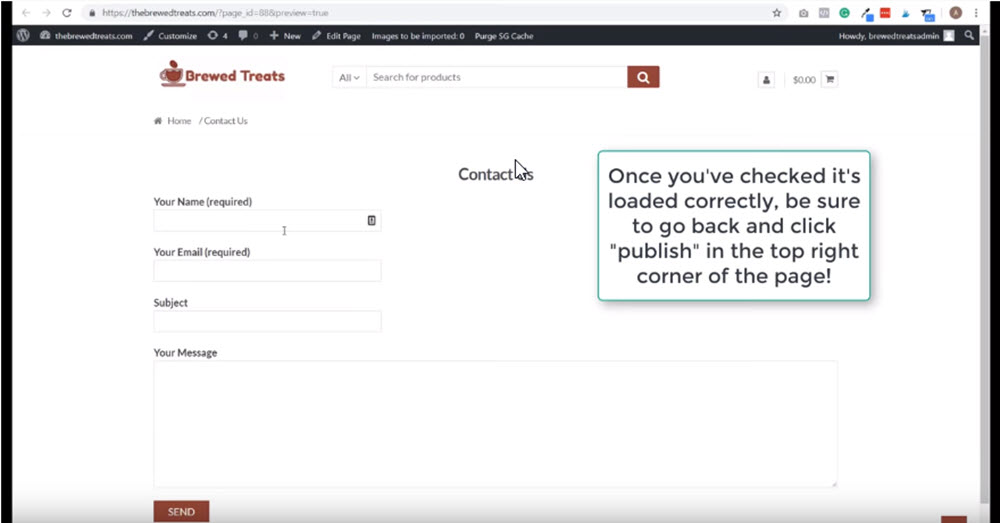
Click Preview to see make sure that it loads correctly. Then when it has, switch back to your previous tab and click Publish (in the top right corner of the page).
Step 13: Add Shipping for Your Products
Finding out your shipping options or how much to charge for each item is definitely frustrating.
That is why, as a newbie, we recommend only having one shipping option for every item in your store — free shipping.
The shipping isn't actually "free." Instead, you just slightly raise the product price so it has free shipping (but costs a little bit more).
Not only is this way easier for you to manage, but you can also take advantage of "free shipping" ads on Facebook — which is a great sales pitch, and converts super well.
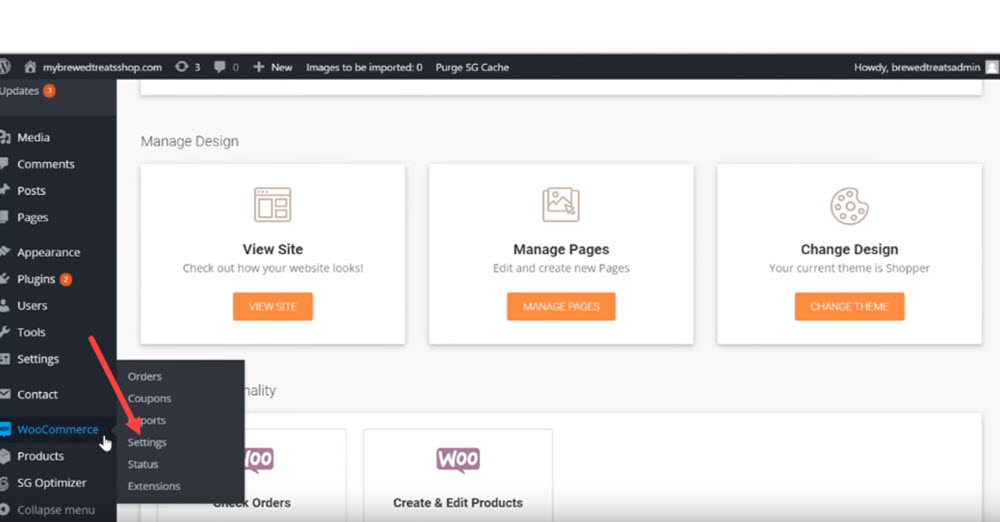
- On your dashboard, click WooCommerce, and then click Settings.

2. Next, click the Shipping tab. Then click Add Shipping Zone.
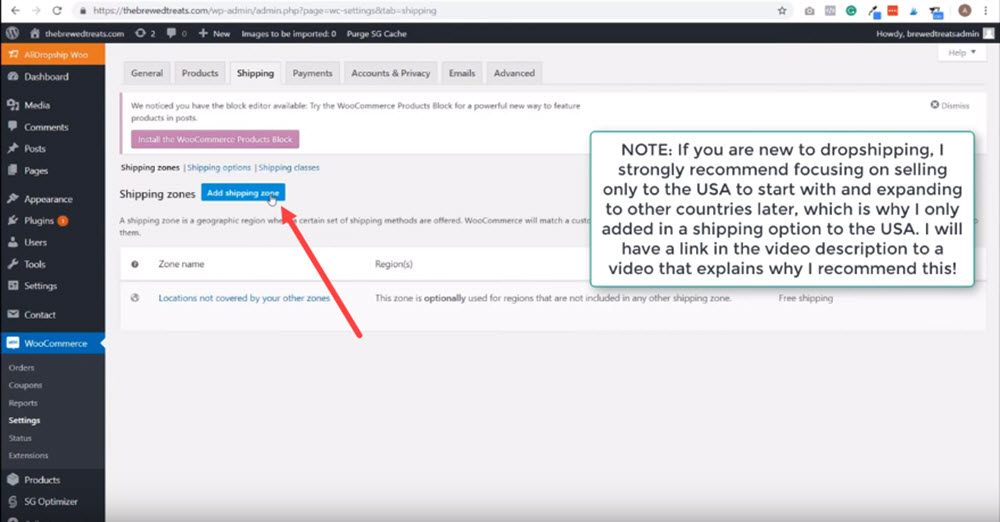
3. For the Zone Name, type in the United States.
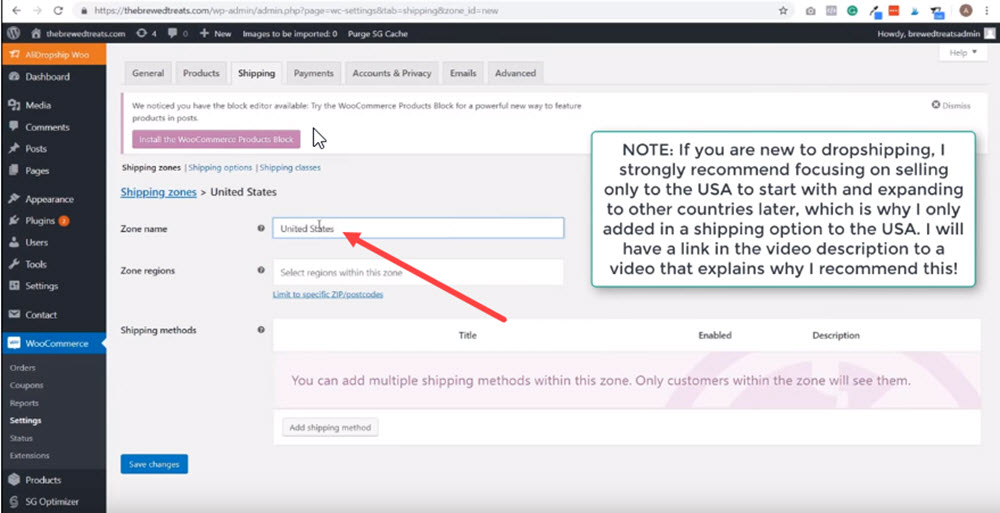
4. For Zone Regions, select the United States from the drop down menu.
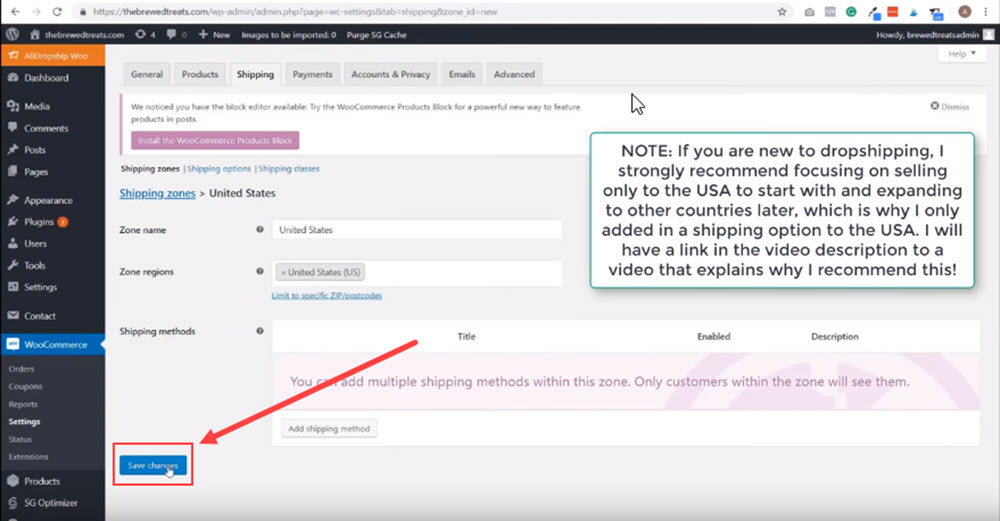
5. Click Save Changes.
6. Next, click Add Shipping Method. Then from the drop down menu, switch the option to Free shipping. And then click Add Shipping Method.
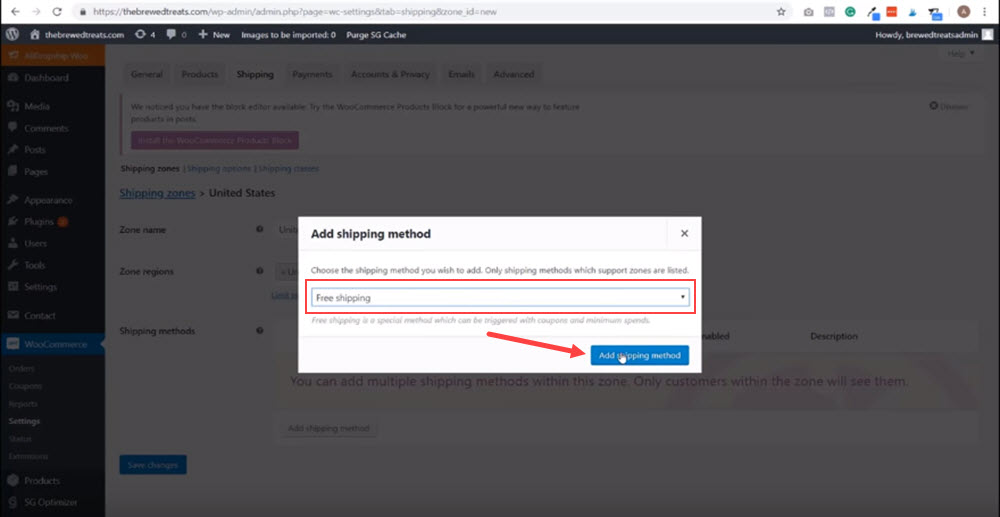
And there you have it! You've now added a free shipping option for your store.
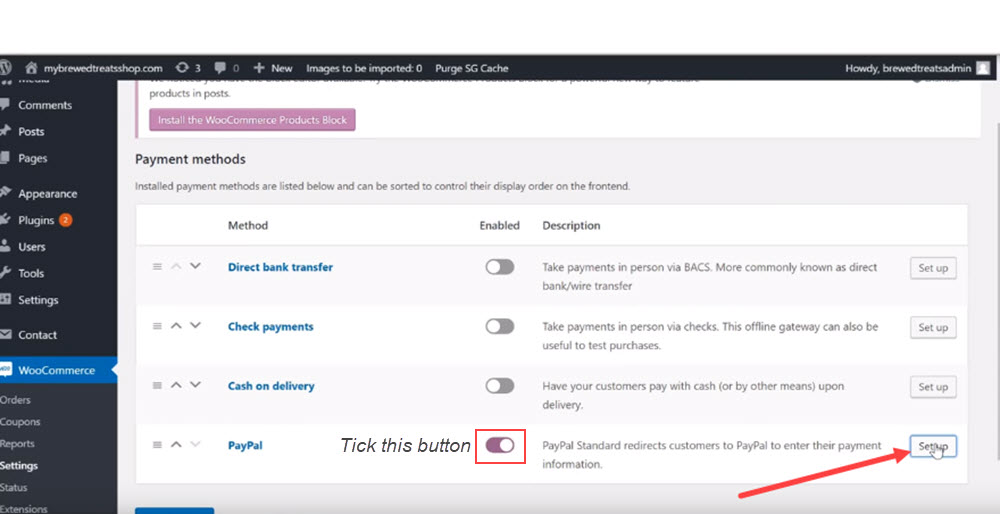
Step 14: Add PayPal as a Payment Gateway
PayPal is the easiest and most universal way to pay for items online. The best part is, your customer's don't need to be a member of PayPal to make a transaction. And that's why we'll be using this as our primary payment processor, to make your store accessible for every person.
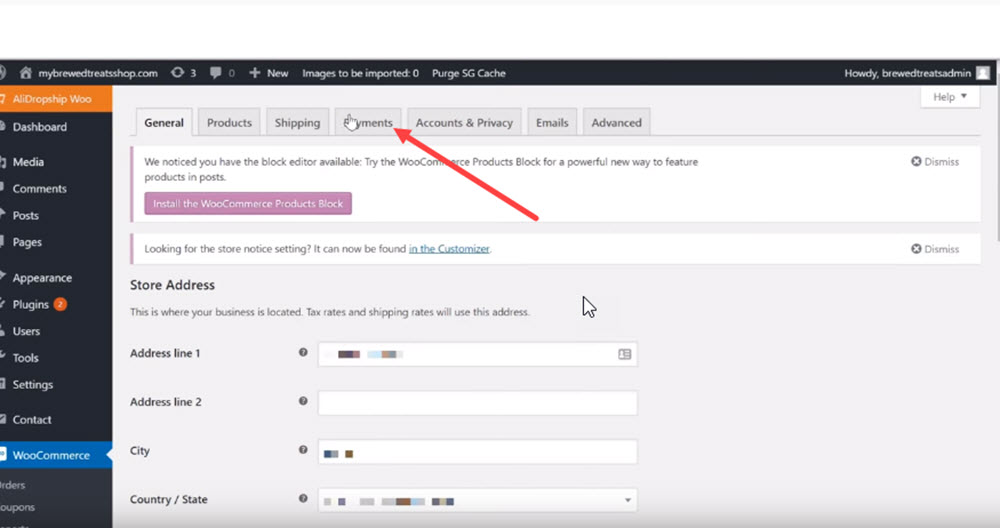
- In your dashboard, click WooCommerce. And then click Settings.
2. Next, click the Payments tab.
3. Click the button next to the PayPal payment method, then click setup.
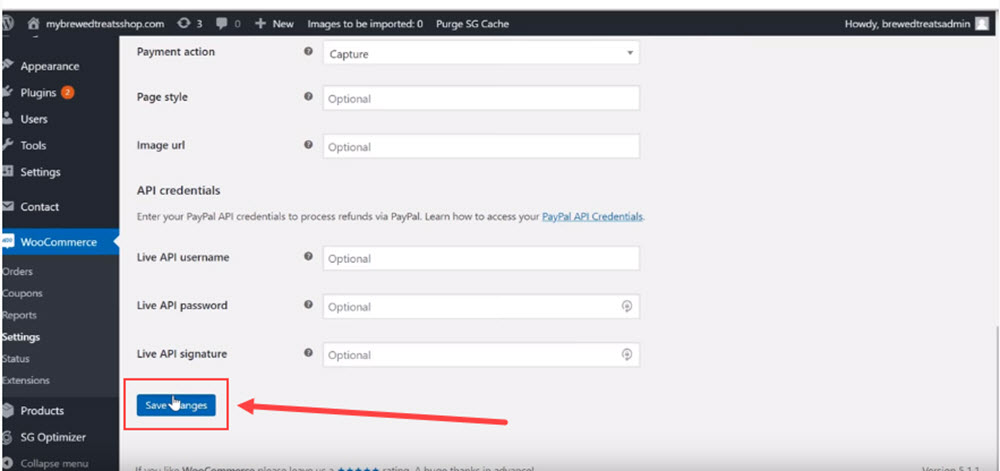
4. Now scroll down and enter the email address you wish to use for your store.
5. And finally, click Save Changes.
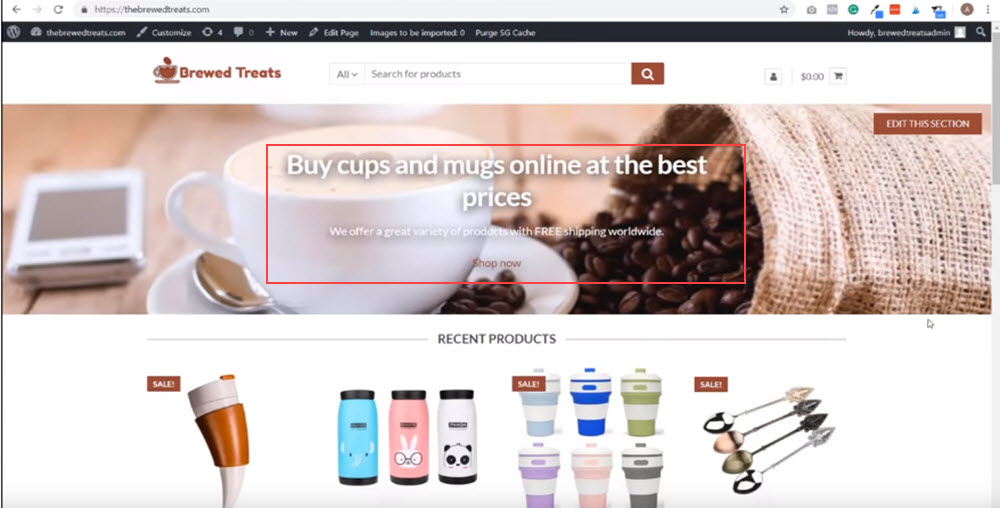
Step 15: How to Customize Your Homepage
The simplest and easiest way to create a store homepage, without any previous design experience, is to showcase your products on it. And, again, Shopper makes this super easy!
For the following steps, you're going to first add a 'splash' image that features something related to your product. We recommend using Pixabay for finding images. This is a huge library of royalty free images that you can use for your store.
Below your splash image, you're then going to showcase some of your products in your store. That way, customers see your best items first thing when they land on your store.
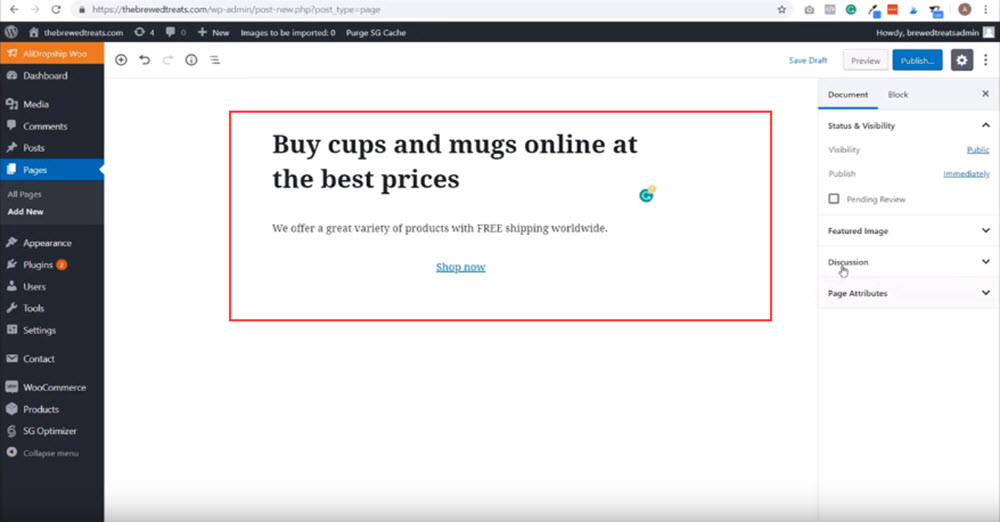
- In your WordPress dashboard, click Pages. Then click Add New. 23:43
The title is going to be the main text on your splash image. Under this will be your sub text. A good idea will be to use a call to action like "Shop Now" for the sub text.
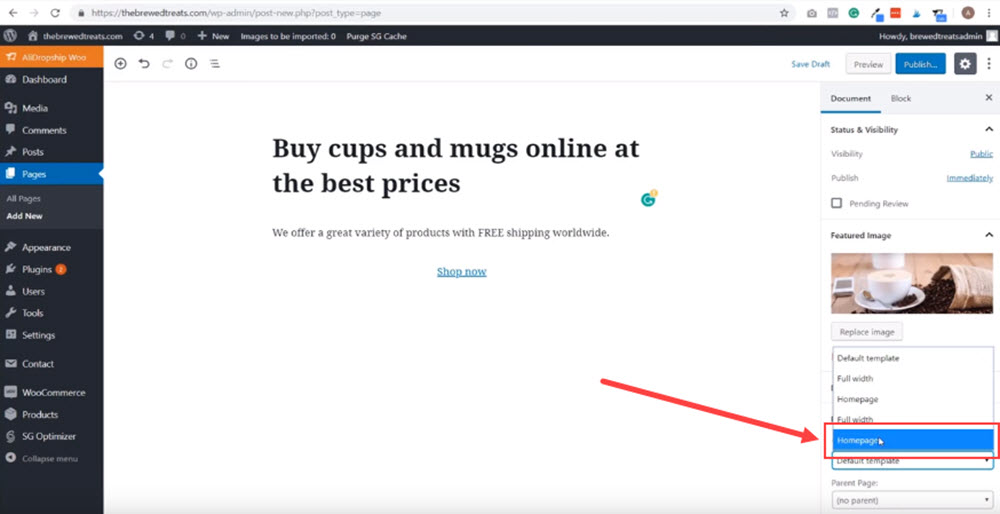
2. Afterwards, click Document on your right. And then Featured Image to add your splash image.
3. Next, under Page Attributes, select Homepage from the drop down menu.
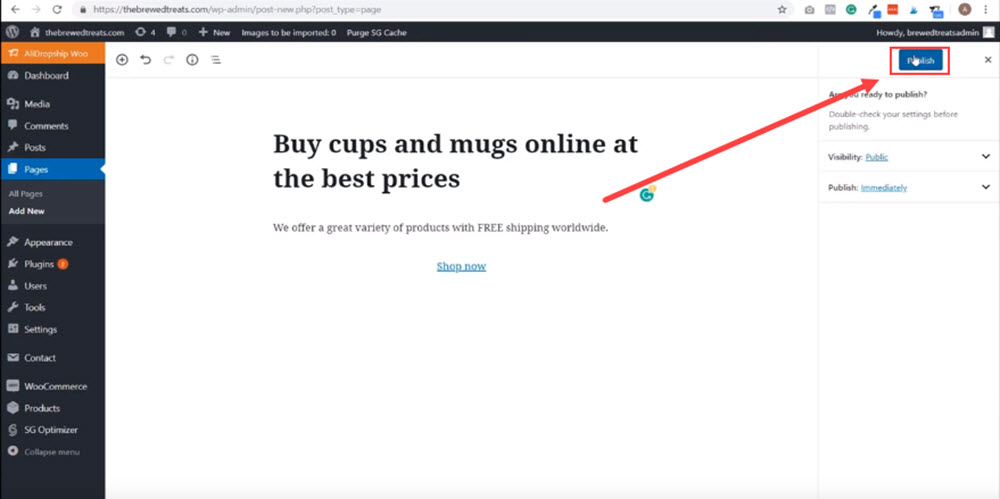
4. Publish the page to your store.
5. Next, click Settings. And then Reading.
6. Select a Static Page.
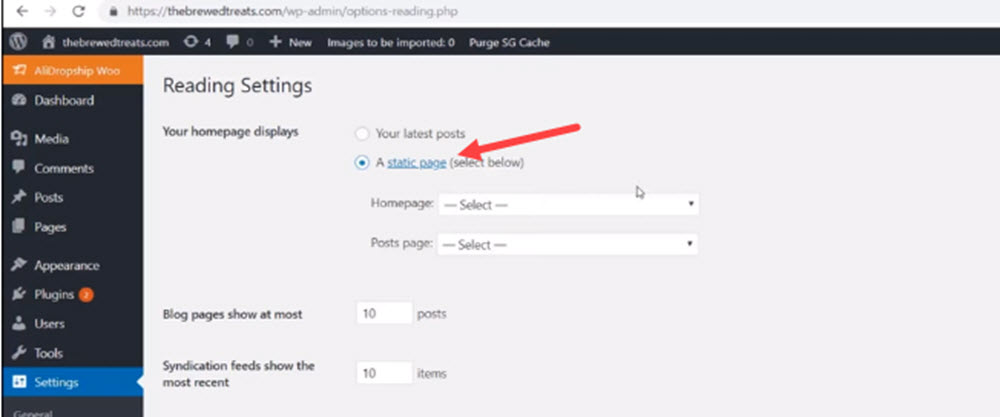
7. And then under Homepage, in the drop-down menu, select the Page Title you just created.
8. To preview your store's new look, click your store's name (at the top of the page), then click Visit Store.
9. Now switch back to your dashboard. Click Appearance, then Themes.
10. Find the Shopper Theme, and then click Customize.
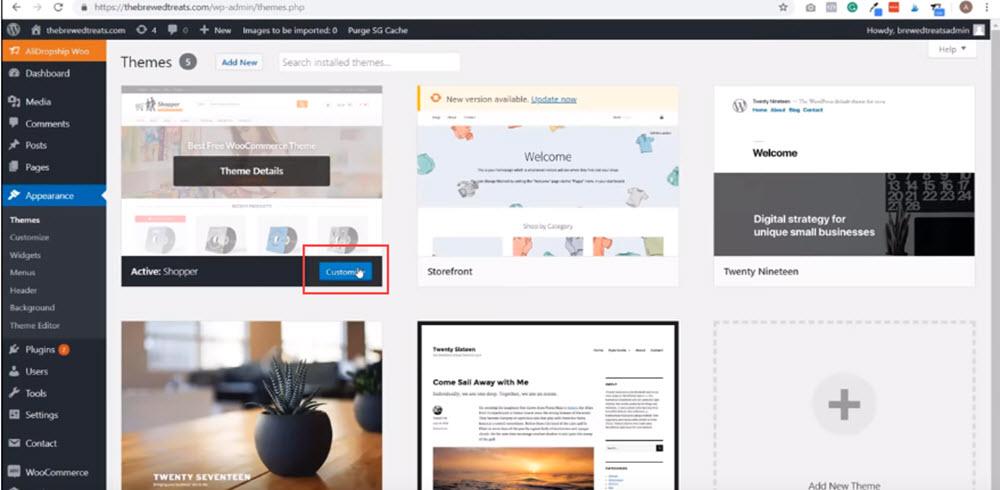
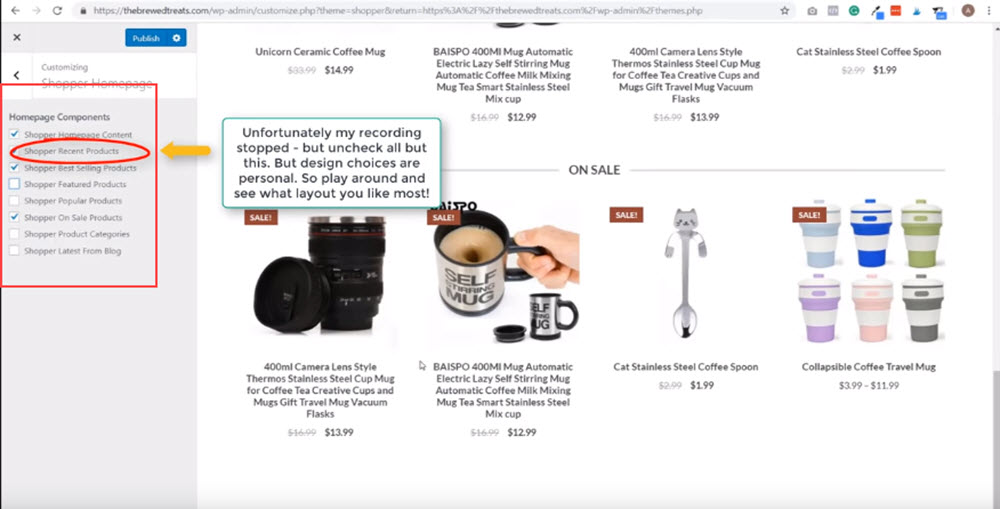
11. Click the Shopper Homepage, and then uncheck all of the boxes apart from the one circled below.
Step 16: Update the Product Pages
This step is going to show you how to create two types of product pages.
The first type is a single variation product. This product can only be bought as one variation, meaning it has no other colours or sizes.
The second type of product is one with variations. As well as its original black variation, you can also buy this in other colours like green, red, blue and yellow.
The method for updating both types of products are very different, which is why it's worth paying attention to this step, so you don't get mixed up.
Another thing worth mentioning is that this step will take a bit of time. You probably have more than two products you'll be adding to your store. And so creating individual pages for every product won't be a simple breeze.
But it's worth the hassle. Because once your store is up and running, and making sales, you'll realise how important this step is.
So stay positive and keep your eye on the finish line.
- On the dashboard, under Woocommerce, select Products.
2. Next, select the first product that you want to edit. Delete the title that's already in there, and replace it with your own.
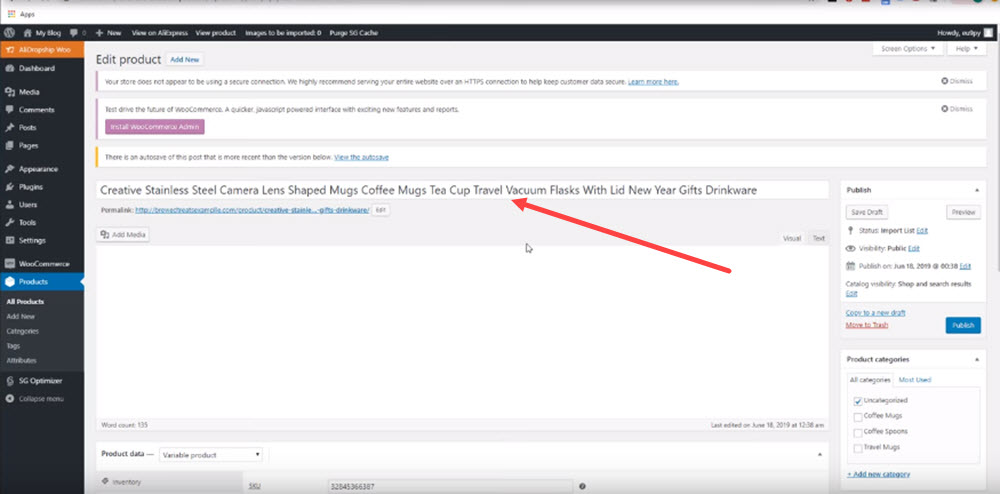
3. Underneath your title, you'll realise Alidropship has automatically copied the products description from Aliexpress. You'll want to also delete this then add your own description.
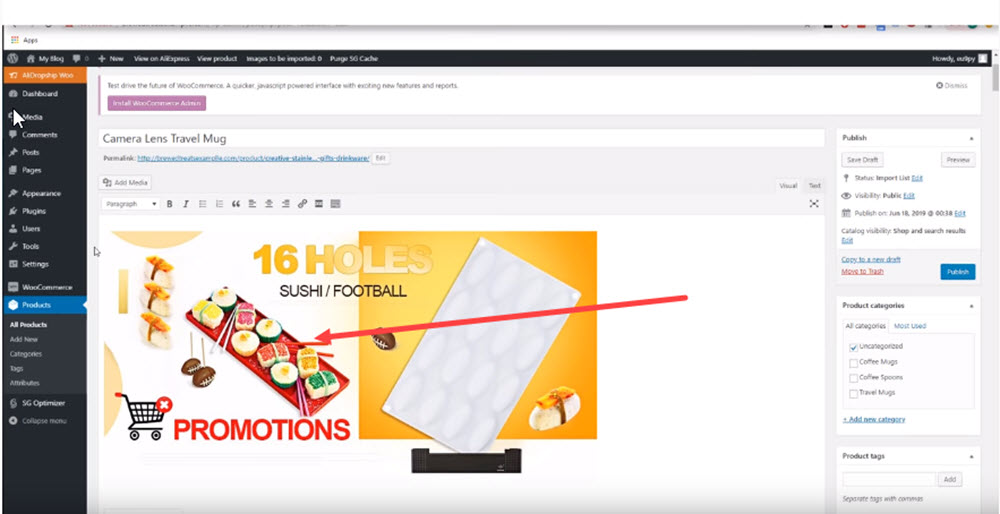
One thing we recommend our subscribers do is add a shipping disclaimer.
For example, "FREE SHIPPING! Note: Due to very high demand, please allow 2-4 weeks for your delivery." (Make sure you bold this too, so customers don't miss it)
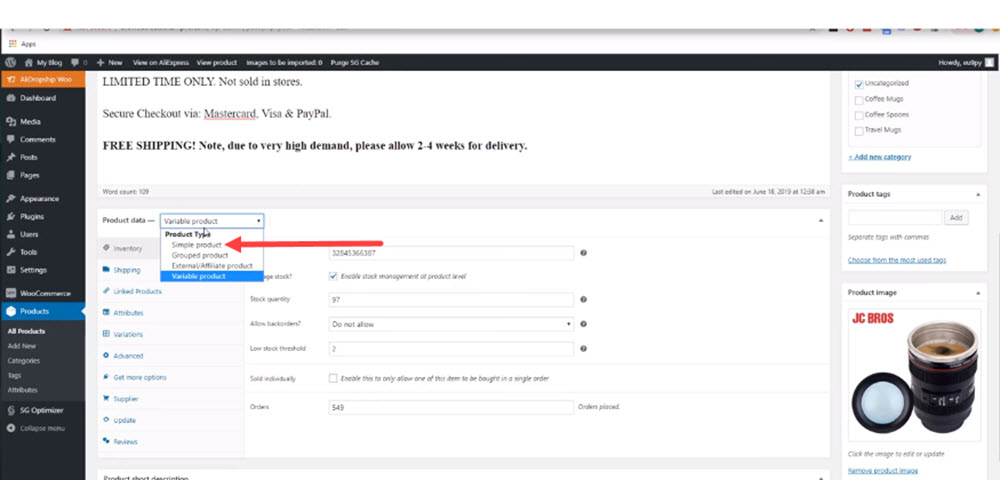
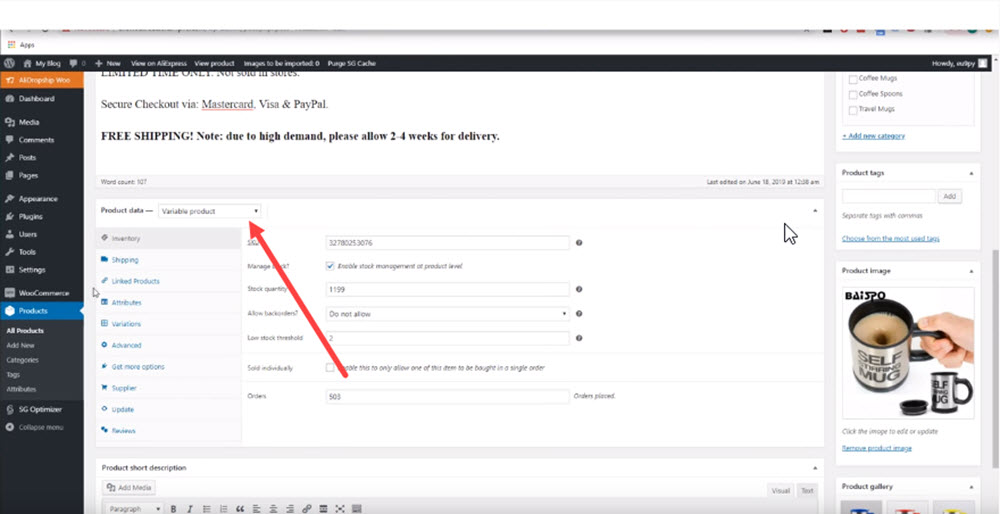
4. Scroll down to Product Data. And then in the drop-down menu, select Simple Product.
5. Next, add your regular price. (If your product is not on sale, don't add a sale price)
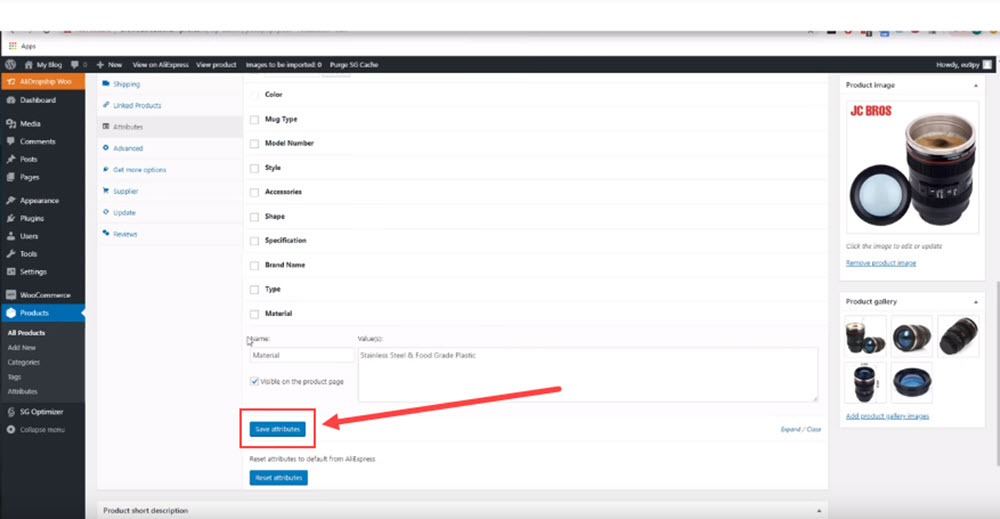
6. After that, you'll want to click Attributes on the left. Because these were written by Aliexpress suppliers by default, it's a good idea to have a look at each attribute to make any corrections, as well as grammar mistakes, since English isn't their first language.
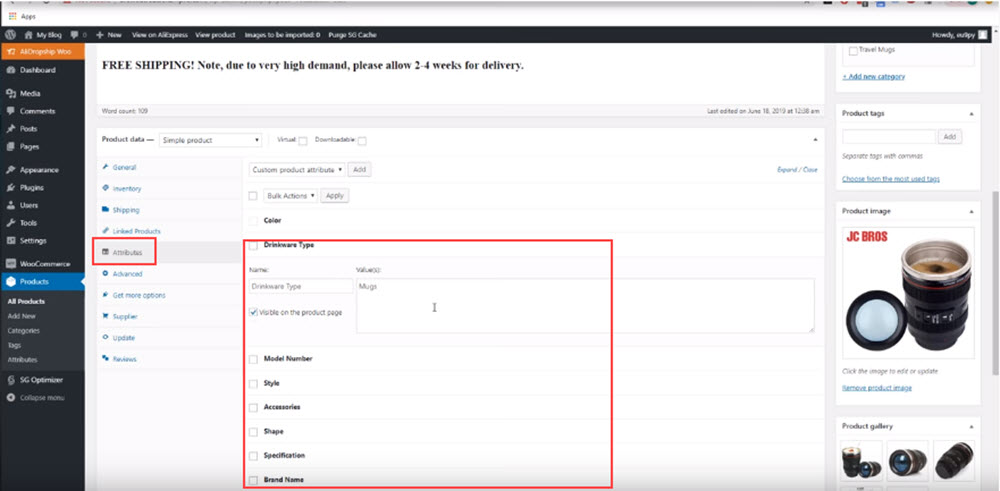
Likewise, if you don't want any of them visible, you can simply untick the checkbox. This will remove it from the page. Honestly, having all of them visible isn't necessary. But having none isn't very professional either. So two or three attributes are a good attribute to have.
6. When you're done, click Save Attributes.
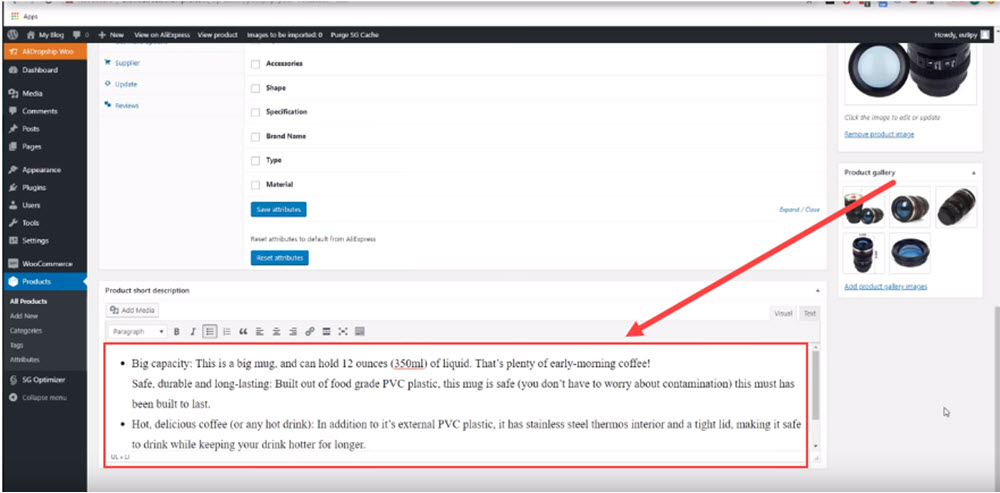
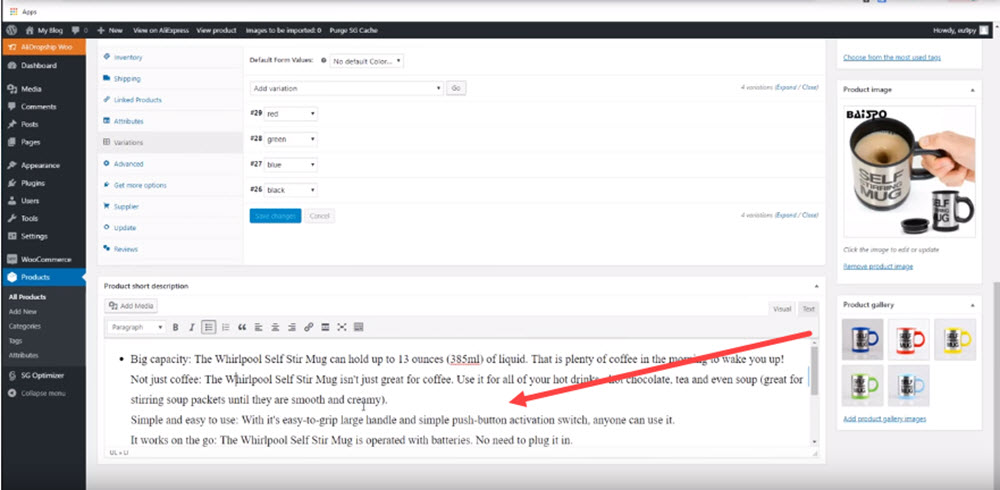
7. Scroll down, and in the Product Short Description box, paste in your description. We recommend that this should be 3-4 lines long.
8. Once you've finished adding in your bullet points, head over to the product gallery. Here is where you can either delete or rearrange any images you have.
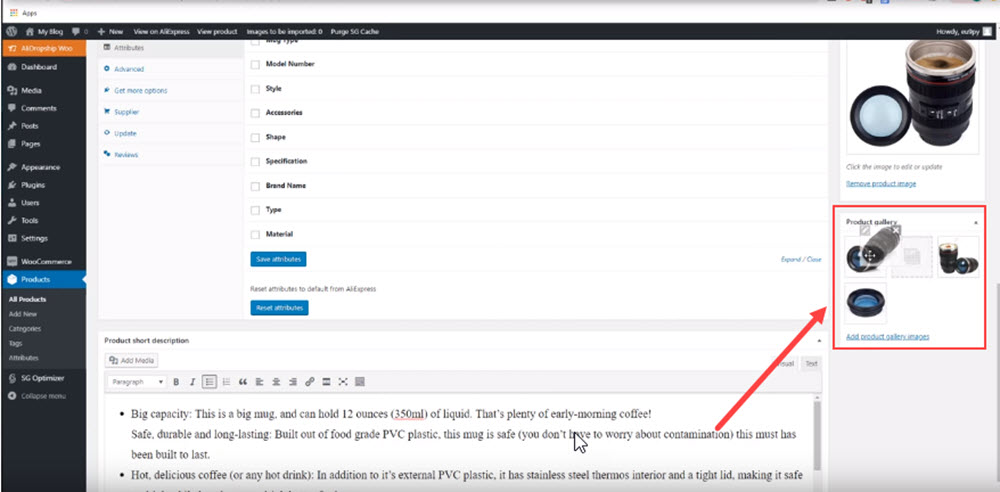
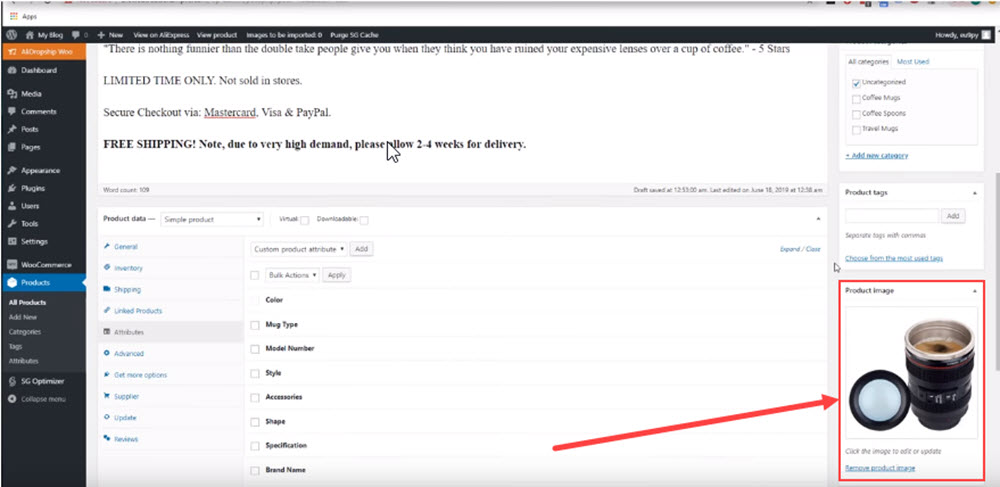
9. Above your product gallery is your main product photo. If you're happy with this image, leave it. If not, replace the current image with the one you want. You also have the option to edit the image too (for example, if there's any branded text).
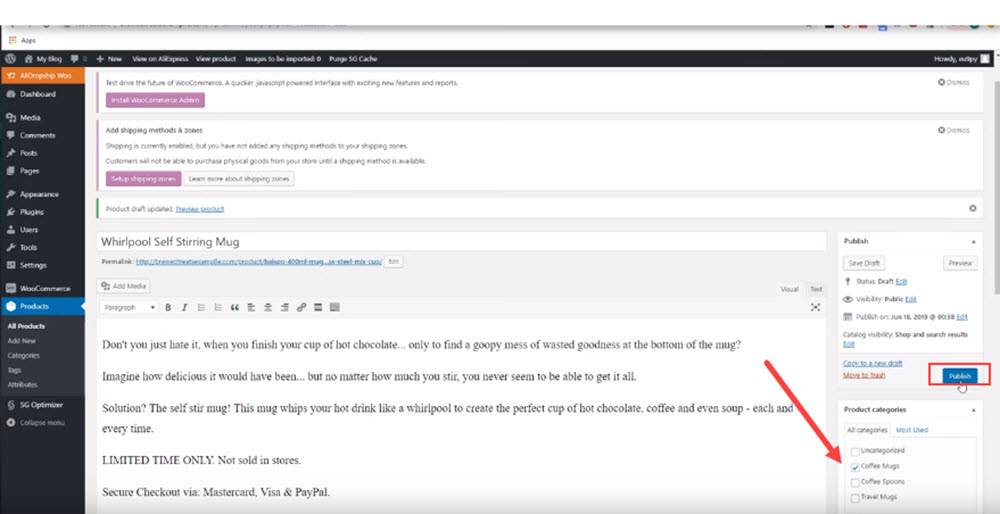
10. Now scroll up to categories and select the category you want this product to be in.
11. And then just click Publish.
Now you know how to edit a simple product with no variations, here's how you edit one with multiple variations.
- To begin, on your dashboard, click Products (under Woocommerce). Select a product in your store that has multiple variations.
2. Just like you did with your product with no variations, delete the title and description, and replace both with your own.
3. Scroll down to Product Data, but this time, select Variable product from the drop down menu.
4. Click Attributes. And like before, either keep, modify or hide any attributes.
5. Then when you're done, hit Save Attributes.
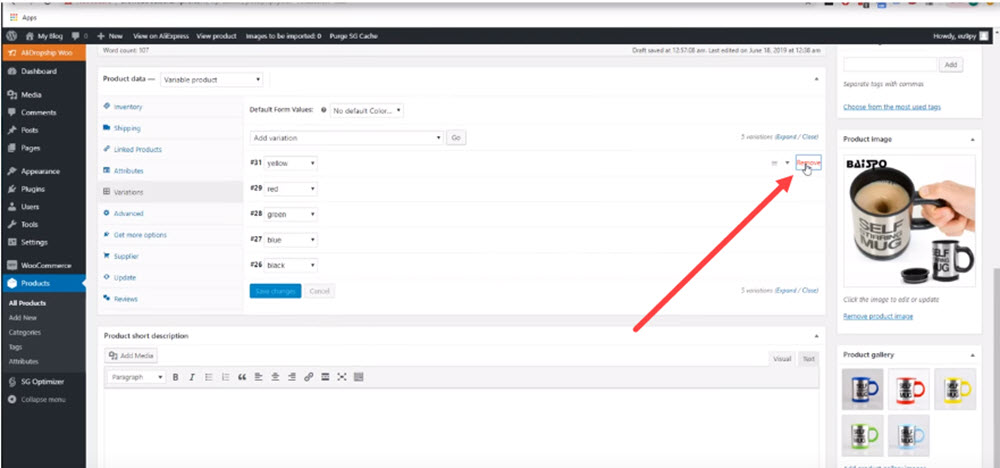
6. Now click Variations under the Product Data section.
7. Here, you can delete variations you don't want, by hovering over the variation and clicking Remove.
8. After removing unwanted variants, click on a variation and set its Regular price. (If it is on sale, set the Sale price too)

9. You'll need to update the price for every single variant you are selling. So go in and set the price for every variant, then click Save Changes.
10. Scroll down to Product short description. And then paste in your own description.
11. Next, head to product gallery, then delete or rearrange any images you have. (You might have to if you have removed any variants)
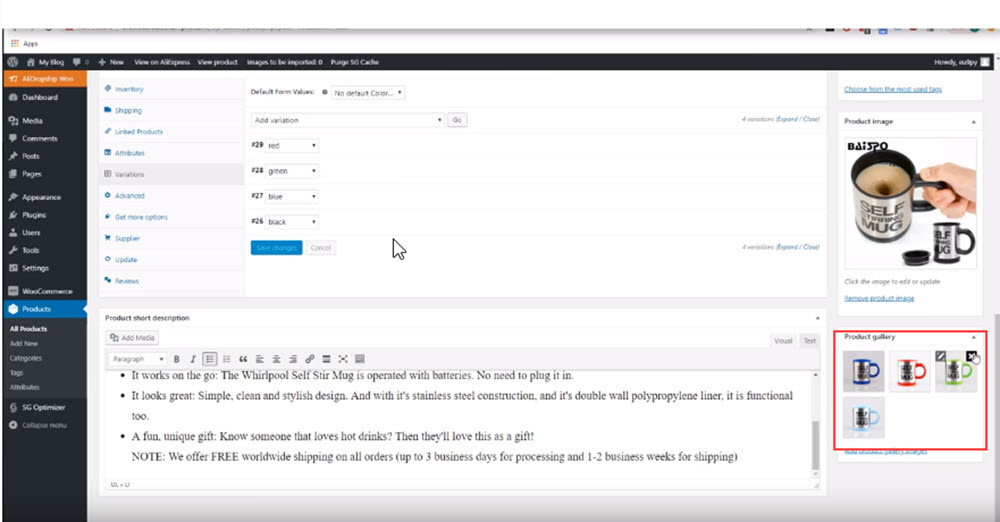
12. Then above your product gallery, you have the option to either keep, edit or replace your main product image.
13. Lastly, tick the category you want your product to be in. And then click Publish.
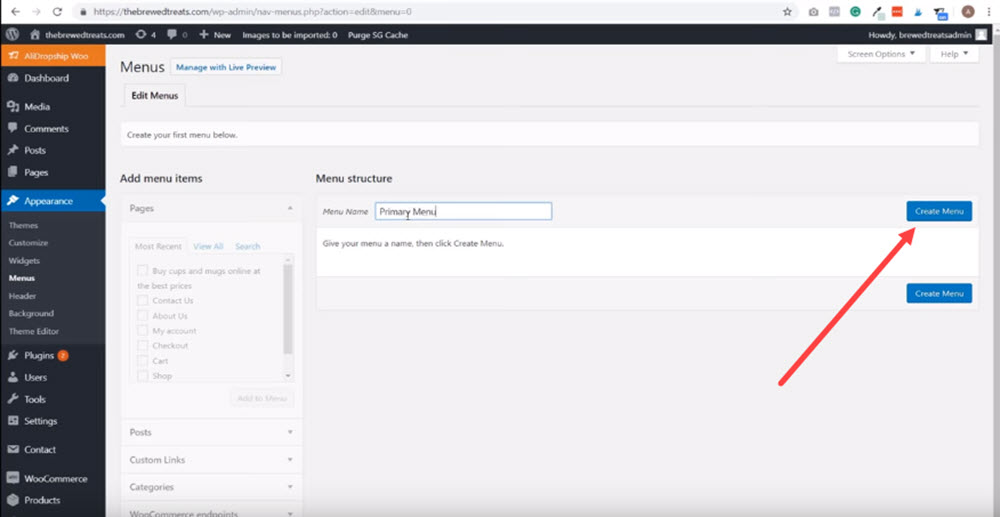
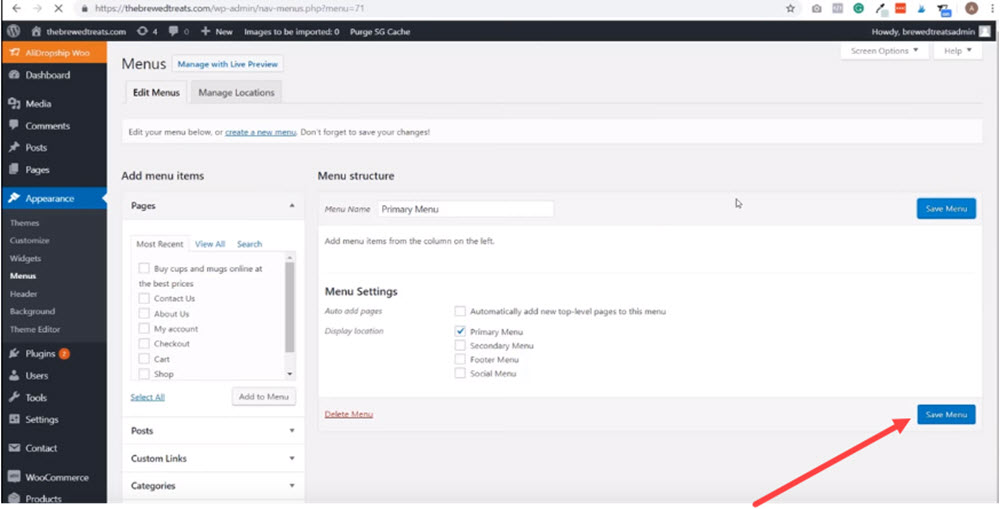
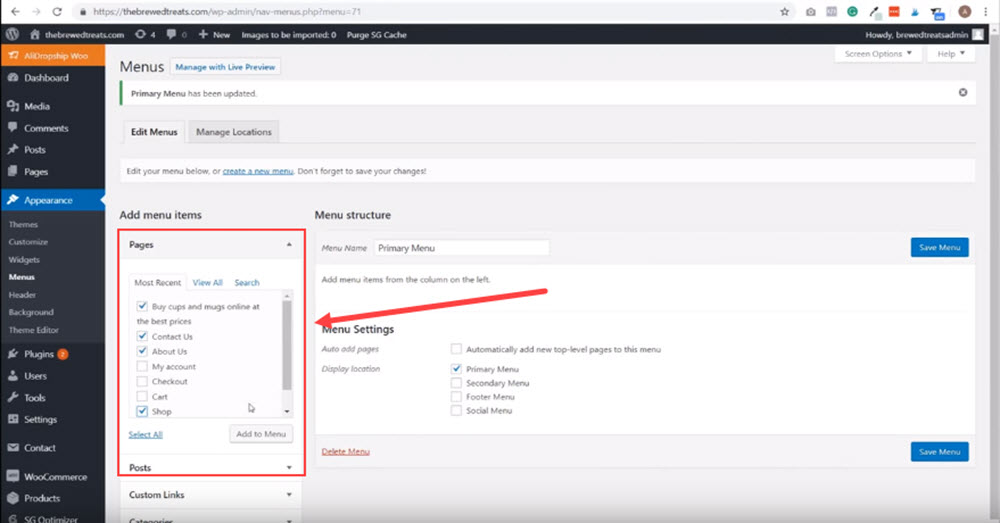
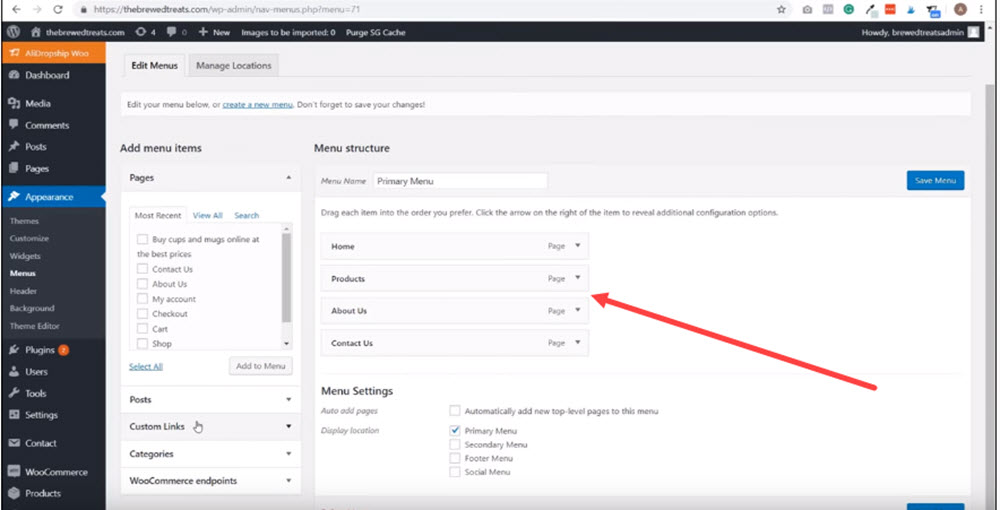
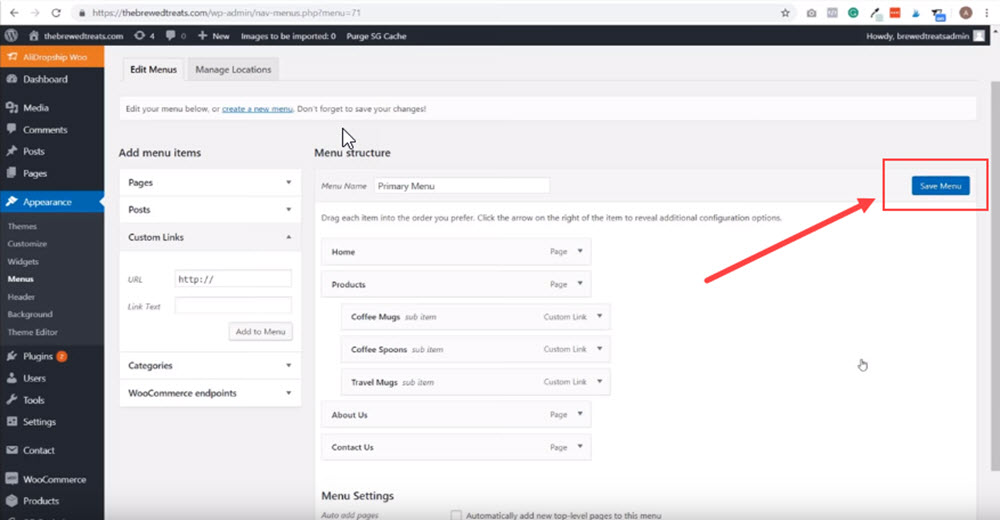
Step 17: Add a Store Menu
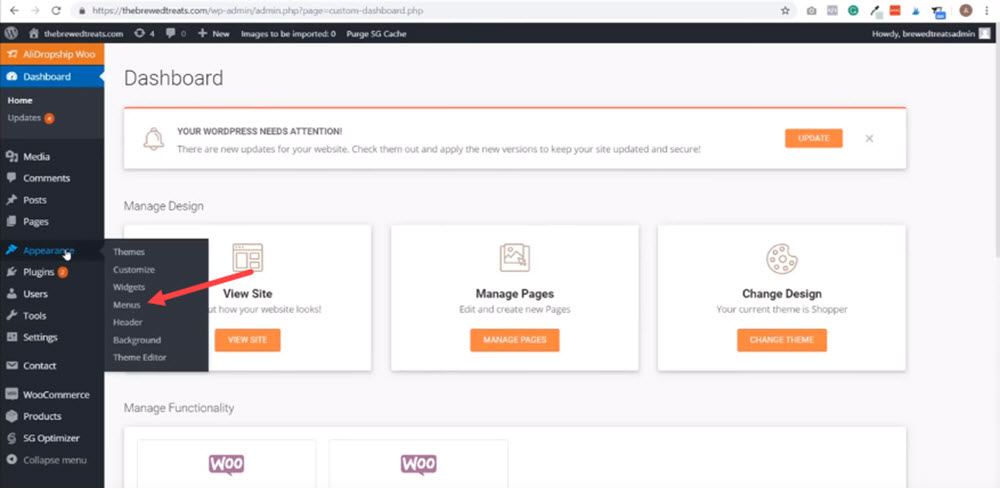
- On your dashboard, click Appearance then Menus.
2. Next, type in a menu name, then click Create Menu.
3. Tick the box next to Primary Menu, then click Save Menu.
4. Go to the Most Recent tab, and tick the box for Contact Us, About Us, Shop, and the title you created (in step 15). Then click Add to Menu.
5. Under Menu Structure, drag each tab, then rearrange to this order: Home, Products (Change the name Shop to Products), About Us, then Contact Us.
6. Now click Custom Links. Paste in the URL of your first product category.
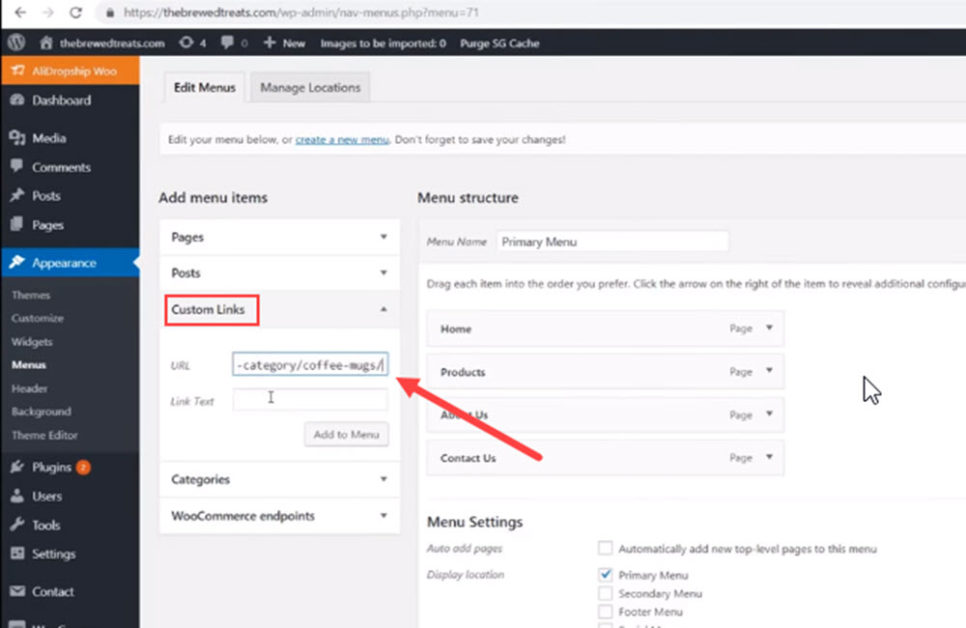
7. Then in the Link Text, type in the name of your first product category.
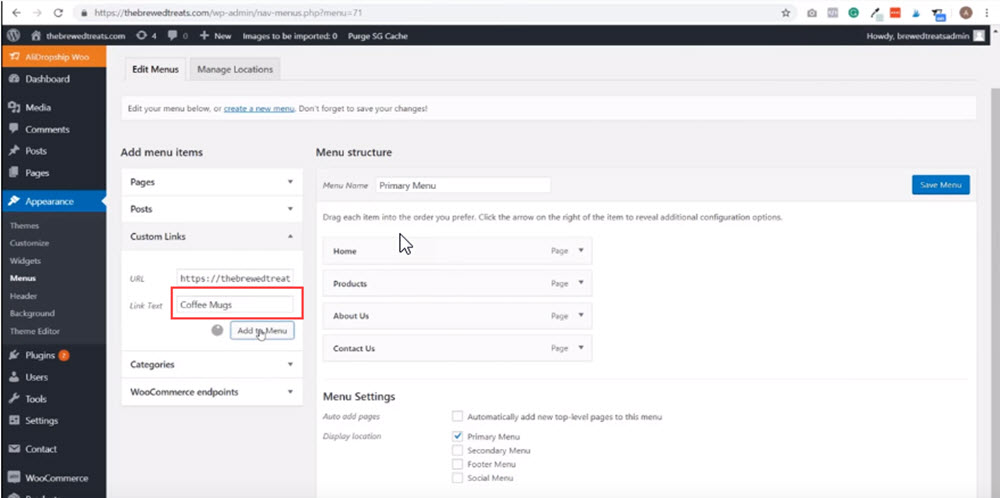
8. Now click Add to Menu. And drag your product category tab under Products.
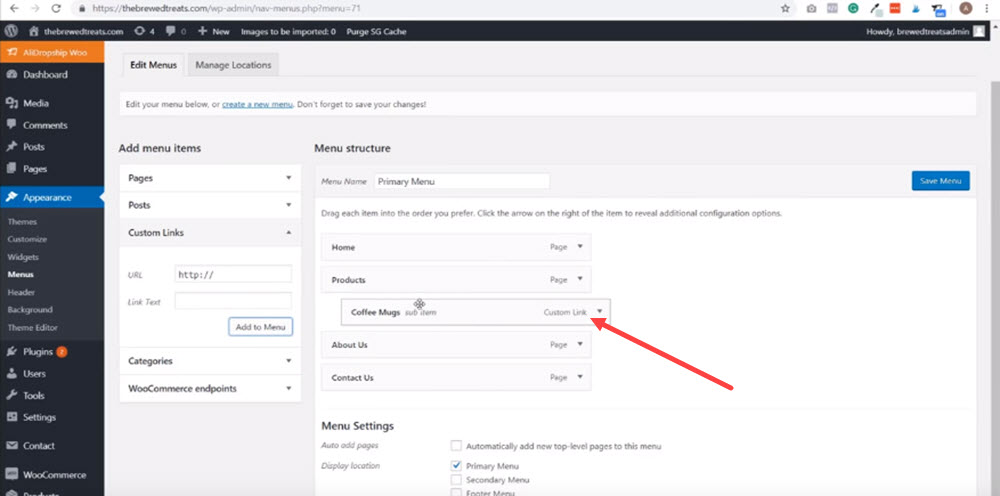
9. Next, paste in the URL of your second product category, then type in its name in the Link Text.
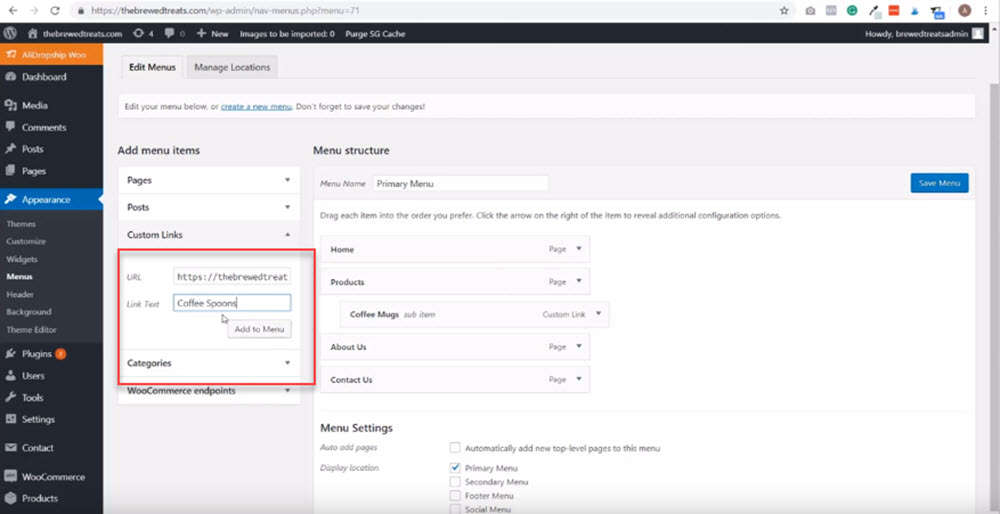
10. Then, like you did with your first product category, click add to menu, and drag it underneath the Products tab. Repeat this process for all the other categories you have.
11. Once done, click Save Menu.
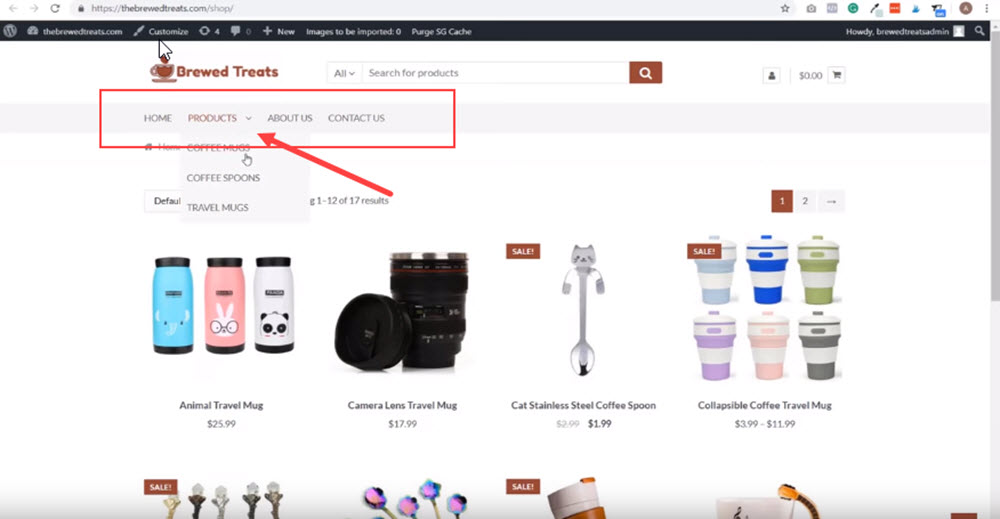
Under your store's URL, click Visit Store to see how your menu will appear on your site.
Great work! You've successfully built an Alidropship WooCommerce store from scratch. Now you can focus on driving traffic and making sales. Or even create another store, or add some finishing touches to your store.
And it doesn't matter if you've just read through this blog. Use this step-by-step tutorial for when you're ready to start. And come back to it if you're stuck, or need any help along the way.
How To Install Alidropship Woo Plugin
Source: https://www.wholesaleted.com/alidropship-woocommerce-dropshipping-store/
Posted by: alamedamancitagage.blogspot.com
0 Response to "How To Install Alidropship Woo Plugin"
Post a Comment