

How To Install Iptables On Ubuntu
Mar 17, 2022
Prithviraj Southward.
6min Read
Iptables Tutorial – Securing Ubuntu VPS with Linux Firewall
Download Complete Linux Cheat Canvass
Are you looking for a complete iptables tutorial? Stay put. In this article, we will show you lot how to install and use iptables on the Ubuntu organisation. Past learning about this Linux firewall tool, you tin secure your Linux VPS using the command-line interface.
What is Iptables, and How Does Information technology Work?
Simply put, iptables is a firewall program for Linux. It volition monitor traffic from and to your server using tables. These tables contain sets of rules, called chains, that volition filter incoming and outgoing data packets.
[optin-monster-shortcode id="fv4lqeko3gylvecpszws"]
When a packet matches a dominion, it is given a target, which tin be some other concatenation or one of these special values:
- ACCEPT – volition allow the packet to pass through.
- Drop – will not allow the packet pass through.
- RETURN – stops the packet from traversing through a chain and tell information technology to go back to the previous chain.
In this iptables tutorial, we are going to work with i of the default tables, called filter. It consists of three bondage:
- INPUT – controls incoming packets to the server.
- Forrard – filters incoming packets that will be forwarded somewhere else.
- OUTPUT – filter packets that are going out from your server.
Before nosotros brainstorm this guide, make sure you have SSH root or sudo access to your automobile that runs on Ubuntu xvi.04 or up. You can establish the connection through PuTTY (Windows) or final beat (Linux, macOS). If you lot ain Hostinger VPS, you can get the SSH login details on the Servers tab of hPanel.
iptables rules but utilize to ipv4. If yous desire to prepare a firewall for the ipv6 protocol, you will need to apply ip6tables instead.
How to Install and Use Iptables Linux Firewall
We volition split up this iptables tutorial into iii steps. First, you will acquire how to install the tool on Ubuntu. Secondly, nosotros are going to show you lot how to ascertain the rules. Lastly, nosotros will guide you to brand persistent changes in iptables.
Step 1 — Installing Iptables
Iptables comes pre-installed in most Linux distributions. However, if yous don't have it in Ubuntu/Debian system by default, follow the steps below:
- Connect to your server via SSH. If yous don't know, you can read our SSH tutorial.
- Execute the following command one by i:
sudo apt-get update sudo apt-get install iptables
- Check the status of your current iptables configuration by running:
sudo iptables -Fifty -v
Here, the -L option is used to list all the rules, and -v is for showing the info in a more detailed format. Below is the example output:
Chain INPUT (policy Accept 0 packets, 0 bytes) pkts bytes target prot opt in out source destination Concatenation Forrard (policy Take 0 packets, 0 bytes) pkts bytes target prot opt in out source destination Chain OUTPUT (policy Accept 0 packets, 0 bytes) pkts bytes target prot opt in out source destination
You volition now have the Linux firewall installed. At this point, you lot can find that all chains are ready to ACCEPT and accept no rules. This is not secure since any packet can come through without filtering.
Don't worry. We'll tell you how to define rules on the adjacent step of our iptables tutorial.
Step 2 – Defining Concatenation Rules
Defining a rule means appending information technology to the chain. To do this, yous need to insert the -A choice (Suspend) right later on the iptables control, like so:
sudo iptables -A
It will alert iptables that you are adding new rules to a chain. Then, you can combine the command with other options, such as:
- -i (interface) — the network interface whose traffic you desire to filter, such as eth0, lo, ppp0, etc.
- -p (protocol) — the network protocol where your filtering procedure takes place. It tin can be either tcp, udp, udplite, icmp, sctp, icmpv6, and then on. Alternatively, you can type all to choose every protocol.
- -s (source) — the address from which traffic comes from. You can add a hostname or IP address.
- –dport (destination port) — the destination port number of a protocol, such as 22 (SSH), 443 (https), etc.
- -j (target) — the target name (ACCEPT, Driblet, RETURN). You need to insert this every time you make a new dominion.
If you desire to utilise all of them, you must write the command in this order:
sudo iptables -A <chain> -i <interface> -p <protocol (tcp/udp) > -s <source> --dport <port no.> -j <target>
Once you sympathize the basic syntax, you tin start configuring the firewall to give more security to your server. For this iptables tutorial, nosotros are going to employ the INPUT chain as an case.
Enabling Traffic on Localhost
To allow traffic on localhost, type this command:
sudo iptables -A INPUT -i lo -j ACCEPT
For this iptables tutorial, we use lo or loopback interface. It is utilized for all communications on the localhost. The command in a higher place will make sure that the connections between a database and a web application on the same automobile are working properly.
Enabling Connections on HTTP, SSH, and SSL Port
Side by side, we desire http (port 80), https (port 443), and ssh (port 22) connections to work as usual. To do this, we demand to specify the protocol (-p) and the corresponding port (–dport). You can execute these commands one by one:
sudo iptables -A INPUT -p tcp --dport 22 -j Have sudo iptables -A INPUT -p tcp --dport 80 -j ACCEPT sudo iptables -A INPUT -p tcp --dport 443 -j Have
Information technology'due south time to bank check if the rules take been appended in iptables:
sudo iptables -50 -v
It should render with the results below which ways all TCP protocol connections from the specified ports will be accepted:
Filtering Packets Based on Source
Iptables allows you to filter packets based on an IP address or a range of IP addresses. You need to specify it after the -s option. For case, to accept packets from 192.168.1.three, the control would be:
sudo iptables -A INPUT -southward 192.168.1.3 -j ACCEPT
You can also decline packets from a specific IP accost past replacing the ACCEPT target with DROP.
sudo iptables -A INPUT -s 192.168.i.3 -j DROP
If you lot want to drop packets from a range of IP addresses, you have to utilise the -one thousand option and iprange module. And so, specify the IP address range with –src-range. Retrieve, a hyphen should dissever the range of ip addresses without space, like this:
sudo iptables -A INPUT -thousand iprange --src-range 192.168.1.100-192.168.1.200 -j DROP
Dropping all Other Traffic
It is crucial to use the DROP target for all other traffic after defining –dport rules. This will prevent an unauthorized connection from accessing the server via other open ports. To attain this, only blazon:
sudo iptables -A INPUT -j Driblet
At present, the connection outside the specified port volition be dropped.
Deleting Rules
If you want to remove all rules and get-go with a clean slate, you tin can use the -F option (flush):
sudo iptables -F
This command erases all current rules. However, to delete a specific rule, you must use the -D option. First, you need to see all the available rules by entering the following command:
sudo iptables -L --line-numbers
You will get a list of rules with numbers:
Chain INPUT (policy Accept) num target prot opt source destination i Have all -- 192.168.0.four anywhere 2 Have tcp -- anywhere anywhere tcp dpt:https three ACCEPT tcp -- anywhere anywhere tcp dpt:http 4 ACCEPT tcp -- anywhere anywhere tcp dpt:ssh
To delete a rule, insert the corresponding chain and the number from the listing. Permit's say for this iptables tutorial, nosotros want to get rid of rule number three of the INPUT concatenation. The control should be:
sudo iptables -D INPUT three
Step 3 – Persisting Changes
The iptables rules that we accept created are saved in memory. That means we have to redefine them on reboot. To make these changes persistent after restarting the server, you can use this command:
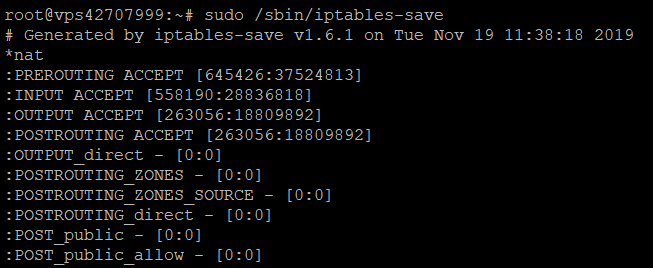
sudo /sbin/iptables-save
It will save the electric current rules on the system configuration file, which will be used to reconfigure the tables every time the server reboots.
Note that you should always run this command every fourth dimension y'all make changes to the rules. For example, if you want to disable iptables, yous need to execute these two lines:
sudo iptables -F sudo /sbin/iptables-salvage
Y'all volition see the following results:
Decision
Iptables is a powerful firewall program that you tin can apply to secure your Linux server or VPS. What'due south great is that you tin define diverse rules based on your preferences.
In this iptables tutorial, you have learned how to install and utilise the tool. Now, nosotros hope you can manage your sets of rules to filter incoming and outgoing packets.
It'due south time to test it yourself and good luck!

Prithviraj is a cybersecurity skilful that loves a challenge. When he'due south not managing servers and fixing security flaws, he writes about it on diverse blogs.

Source: https://www.hostinger.com/tutorials/iptables-tutorial
Posted by: alamedamancitagage.blogspot.com
0 Response to "How To Install Iptables On Ubuntu"
Post a Comment